Desserts
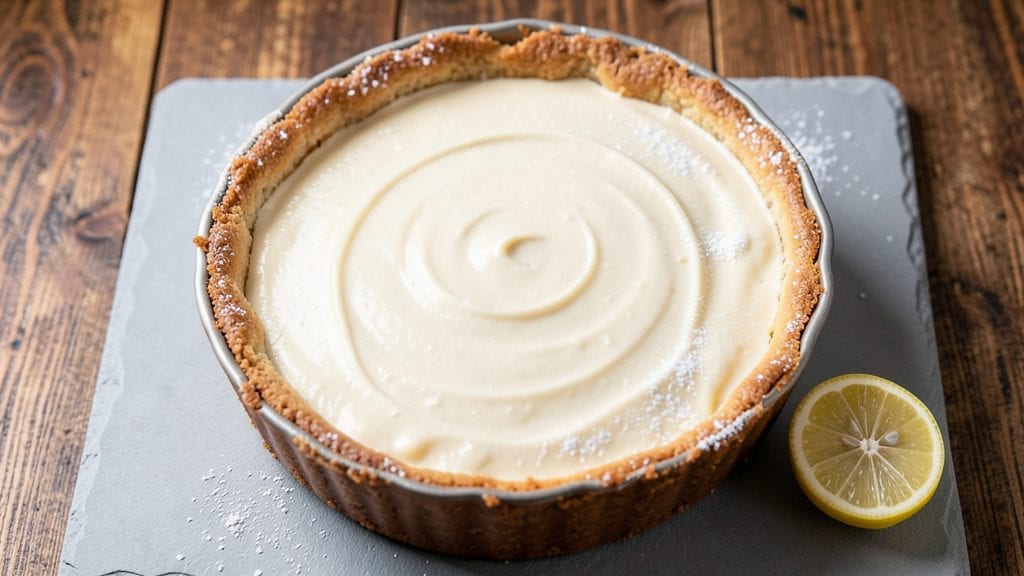
Betty Crocker’s baked cheesecake recipe delivers that perfect marriage of a crispy, buttery crust and a silky, jiggly filling—the kind that makes every slice worth the wait. I’ve recreated the classic method that’s been trusted for decades, ensuring a foolproof process that even beginners can master.
The key lies in a precise crust-to-filling ratio and a gentle baking technique that prevents cracks while locking in moisture.
What sets this recipe apart is the no-fail crust—a blend of graham crackers, melted butter, and a touch of sugar that bakes up golden and sturdy, ready to hold the weight of the filling.
The filling itself is a creamy mix of cream cheese, sugar, and eggs, baked just until set but still velvety. The secret? A water bath to keep the texture smooth and prevent sinking.
By the time it’s done, you’ll have a cheesecake with a perfectly crisp crust and a filling that’s rich yet light, with just a hint of tang. The aroma alone will have everyone gathering in the kitchen, and the first bite delivers that classic Betty Crocker comfort.
Serve it chilled with a dollop of whipped cream or fresh berries for an extra touch of elegance.
This recipe is designed for restaurant-quality results at home, with step-by-step instructions that guide you through every stage—from crust preparation to baking and cooling. Whether you’re baking for a special occasion or just craving a slice of nostalgia, this method ensures success every time.
Ingredients for betty crocker baked cheesecake
Classic crust and filling ingredients for that iconic Betty Crocker texture.
| Ingredient | Amount | Notes |
|---|---|---|
| Graham Cracker Crumbs 🍪 | 2 cups | Finely crushed, no large pieces |
| Unsalted Butter 🧈 | ¾ cup | Melted, full-fat preferred |
| Granulated Sugar 🍚 | ¼ cup | For crust sweetness balance |
| Large Eggs 🥚 | 2 whole | Room temperature for even baking |
| Cream Cheese (Full-Fat) 🧀 | 16 oz | Room temperature, no lumps |
| Granulated Sugar 🍚 | 1 cup | For filling sweetness |
| Sour Cream 🥛 | ½ cup | Full-fat for creaminess |
| Vanilla Extract 🌿 | 2 tsp | Pure, high-quality preferred |
| Large Eggs 🥚 | 3 whole | Room temperature for smooth filling |
| All-Purpose Flour 🌾 | ¼ cup | For filling stability |
| Lemon Juice 🍋 | 1 tbsp | Freshly squeezed, bright flavor |
| Salt 🧂 | ½ tsp | Fine sea salt preferred |
| Whipped Cream 🍦 | 1 cup | For serving, optional garnish |
| Fresh Berries 🍓 | 1 ½ cups | For topping, optional |
The graham cracker crumbs are the foundation here—Honey Maid or Keebler work best for that perfect crunch. Costco or bulk bins often have the best prices for large quantities. For the butter, Land O'Lakes or Plugrá are reliable choices, but any full-fat unsalted butter will do. The key is to crush the graham crackers finely—no large pieces, or your crust will be uneven. If you're short on time, store-bought crumbs work, but they lack that fresh-crushed texture. The sugar in the crust is minimal—just enough to balance the buttery richness without overpowering.
No graham crackers? Digestive biscuits or vanilla wafers make decent substitutes, but crush them extra fine. For the filling, Neufchatel cream cheese adds a lighter texture, but Philadelphia works perfectly fine. Short on sour cream? Greek yogurt at half the amount keeps the tang. The vanilla extract should be pure, not imitation—McCormick or Nielsen-Massey are solid brands. The lemon juice is non-negotiable for that classic tang; freshly squeezed is best, but bottled works in a pinch. If you're worried about cracking, adding the flour helps stabilize the filling without altering the texture too much.
This cheesecake keeps beautifully—chill for at least 4 hours before serving, but overnight is ideal. Store in an airtight container for up to 5 days in the fridge. For longer storage, wrap tightly in plastic and freeze for up to 3 months. Thaw overnight in the fridge before serving. The whipped cream should be added just before serving—it loses its fluffiness if whipped too early. Fresh berries add a pop of color and acidity, but they're optional. Warm the berries slightly if using frozen to release their juices for a prettier presentation.
Why You'll Love This Recipe
- I’ll be real: cream cheese and eggs can add up, but this recipe stretches further than you’d think. The graham crust uses pantry staples, and the sugar-butter mix cuts costs without sacrificing flavor. It’s the kind of dessert that tastes like you spent hours on it—even though you didn’t. My college budget (and my taste buds) still thank me for this one.
- No-Fuss Assembly: I swear by this recipe because it’s literally a 10-minute job before baking. Melt butter, mix crumbs, dump filling—no fancy piping or chilling tricks. That buttery graham crust stays crispy while the cream cheese center stays silky, and honestly? It’s the kind of dessert that makes me feel like a baking pro without the stress.
- Crust Edge Magic: Here’s what sold me—the contrast. That buttery graham crust isn’t just crunchy; it’s caramelized at the edges from the sugar and butter, while the center stays soft. The full-fat cream cheese? Rich but not heavy, and the eggs give it that perfect, jiggly set. It’s the kind of texture combo that makes me reach for seconds before the plate’s even empty.
- Party-Proof Dessert: Between us, this is my go-to for gatherings because it actually feeds a crowd. The 9x13 pan means no awkward single-serving slices—just big, shareable pieces. And here’s the kicker: it bakes in 30 minutes, so you’re not stuck in the kitchen while guests eat cake. Plus, the leftovers? Still just as good the next day (if they last that long).
Step-by-step instructions for Betty Crocker's baked cheesecake recipe
Here's the method that guarantees a golden crust and perfectly smooth filling every time.
Prepare the Crispy Crust Foundation
Preheat your oven to 325°F and grease a 9-inch springform pan thoroughly. In a medium bowl, combine the 2 cups graham cracker crumbs with the 0.75 cup melted unsalted butter and 0.25 cup granulated sugar. Mix until the crumbs are evenly moistened and the mixture holds together when pressed.
Press the mixture firmly and evenly into the bottom of the prepared pan, creating an even layer. Use a glass or measuring cup to compact it tightly—this ensures a sturdy base that won't crack during baking. Bake the crust for 10 minutes to set it while you prepare the filling. The crust should emerge golden and firm, ready to support the cheesecake filling without breaking.
Mix the Cheesecake Filling
While the crust bakes, reduce the oven temperature to 300°F. In a large mixing bowl, beat the 16 oz full-fat cream cheese until completely smooth—no lumps should remain. This step is crucial for achieving that signature silky texture. Gradually add the 1 cup granulated sugar while continuing to beat until fully combined.
Add the 0.5 cup sour cream, 2 tsp vanilla extract, 3 whole large eggs, 0.25 cup all-purpose flour, 1 tbsp lemon juice, and 0.5 tsp salt. Mix on medium speed until just combined—overmixing can incorporate too much air, which may cause cracks later. The batter should be thick but pourable, with a smooth, velvety consistency.
Assemble and Bake the Cheesecake
Pour the filling over the pre-baked crust, spreading it evenly to the edges. Tap the pan gently on the counter to remove any air bubbles that may have formed. Place the springform pan on a baking sheet lined with parchment paper—this prevents any potential cheesecake overflow from sticking.
Bake in the preheated 300°F oven for 50-55 minutes, until the edges are set and the center still appears slightly jiggly. The cheesecake should pull away cleanly from the sides of the pan when gently shaken. Avoid opening the oven door during baking—temperature fluctuations can cause cracks. The filling should be just set but still slightly underdone in the center.
Cool and Finish
Turn off the oven and prop the door open slightly to allow the cheesecake to cool gradually. This slow cooling process prevents sudden temperature changes that could cause cracking. Let the cheesecake cool completely in the oven for 1 hour, then transfer it to the refrigerator to chill for at least 4 hours or overnight.
Once fully chilled, run a thin knife around the edge of the springform pan to loosen the cheesecake. Remove the side of the pan and transfer the cheesecake to a serving plate. Top with 1 cup whipped cream and 1.5 cups fresh berries just before serving. The texture should be perfectly smooth with a crisp, golden crust that holds its shape without crumbling.
Pro Tips For Making Betty Crocker Baked Cheesecake
- Melt Butter Slowly: If you dump cold butter into the graham cracker crust mix, you’re fighting an uphill battle. Warm the butter in a microwave for 15 seconds first—just until it’s soft but not liquid—so it blends evenly into the crumbs. This keeps the crust from turning into a greasy mess when pressed into the pan.
- Room-Temp Cream Cheese: I learned this the hard way—lumpy cheesecake happens when cold cream cheese gets mixed with eggs. Take the blocks out of the fridge 24 hours ahead or sit them in warm water for 10 minutes. Smooth batter = no surprises when baking.
- Don’t Overmix Eggs: Once you add the eggs to the cream cheese mixture, mix just until combined—no need to beat it like a smoothie. Overmixing introduces too much air, which causes cracks. A few streaks of egg yolk? That’s fine. A frothy, fluffy batter? That’s trouble.
- Water Bath Mandatory: Skipping the water bath is how you end up with a dense, cracked cheesecake. Place your springform pan in a larger roasting pan, then fill the outer pan with hot water halfway up the sides. The steady heat keeps the center creamy, not rubbery. (Yes, even if the recipe says “optional.”)
Storing and reheating your betty crocker baked cheesecake
Refrigerator Storage
Once your cheesecake is fully chilled, store it in an airtight container or wrap it tightly with plastic wrap pressed directly against the surface. This prevents moisture loss and keeps the texture silky. Place it in the refrigerator for up to 5 days—the flavors actually deepen over time.
I like to slice it into individual portions for easy serving, but only if you're ready to eat it within 2-3 days to maintain the best texture. 🧊
Freezer Preservation
For longer storage, wrap the entire cheesecake tightly in plastic wrap, then place it in a freezer-safe bag or airtight container. Label with the date and freeze for up to 3 months. When ready to serve, thaw it overnight in the fridge.
If you prefer, you can also freeze individual slices—just wrap each one tightly in plastic wrap before placing them in a freezer bag. The texture remains creamy, though the crust may soften slightly upon thawing. ❄️
Reheating Slices
Cheesecake isn’t typically reheated, but if you want to warm a slice, place it on a microwave-safe plate and heat it on low power (30-40%) for 10-15 seconds. This just takes the chill off without making it rubbery.
For a gentler approach, warm it in the oven at 300°F for 5-7 minutes—this helps restore some of the crust’s crispness. Serve immediately with a dollop of whipped cream to revive its freshness. 🔥
Reviving Texture
If your cheesecake loses its moisture or the crust becomes soggy, don’t toss it! Place the entire pan in a 350°F oven for 10 minutes to crisp up the crust.
For the filling, add a thin layer of warm apricot jam or caramel sauce on top, then chill for 1 hour to absorb the moisture. This trick works wonders for restoring that classic creamy texture without altering the flavor. 💡
Serving After Storage
After refrigeration or freezing, let the cheesecake sit at room temperature for 15-20 minutes before serving. This allows the filling to soften slightly and the crust to firm up. Garnish with fresh berries or a drizzle of chocolate ganache to elevate its presentation.
If the whipped cream has lost its fluffiness, whip it fresh just before serving—it makes all the difference in that final touch of elegance. 🍓
Nutrition facts
Frequently asked questions
Why does my baked cheesecake crack?
Cracking happens when the cheesecake bakes too quickly or cools unevenly. To prevent this, reduce the oven temperature to 300°F after baking the crust, and avoid opening the oven door during baking. Also, let the cheesecake cool gradually by turning off the oven and leaving the door slightly open for 1 hour before refrigerating.
Can I make this recipe without a springform pan?
Yes, but you'll need to grease a regular 9-inch round pan very well and use parchment paper on the bottom. After baking, run a knife around the edges to loosen it before removing. For easier release, lightly grease the parchment paper too. The crust may not be as crisp, but the filling will still turn out creamy.
How do I fix a sunken cheesecake?
A sunken cheesecake usually means it was overbaked or the oven temperature was too high. If it happens, try this trick: Warm a 1/4 cup of apricot jam and spread it over the top, then chill for 1 hour. This adds moisture and helps restore the smooth texture. For future attempts, use a water bath (place the pan in a larger pan filled with hot water) to ensure even baking.
What’s the best way to serve this cheesecake?
This classic cheesecake pairs beautifully with fresh toppings like whipped cream, raspberries, or a drizzle of chocolate ganache. For a retro touch, try a sprinkle of crushed graham crackers or a dusting of powdered sugar. Serve chilled slices on a cake stand for an elegant presentation, or enjoy it straight from the pan for a casual vibe.
Can I substitute Neufchatel for regular cream cheese?
Neufchatel is lighter and milder, but Philadelphia full-fat cream cheese works perfectly fine. For an extra-rich texture, blend 8 oz cream cheese + 8 oz Neufchatel. Just make sure all dairy ingredients are at room temperature to avoid lumps in the filling. The flavor won’t change much, but the texture may be slightly smoother.