Soups & Stews
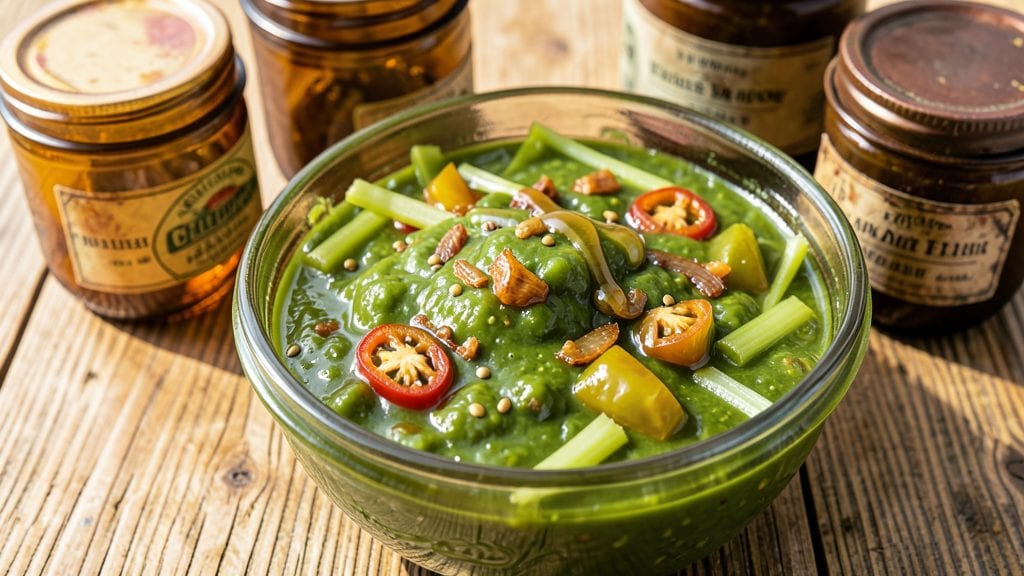
Transforming green tomatoes into vibrant canned relish is one of the most rewarding ways to preserve summer's brightest flavors. This canned green tomato relish recipe delivers a tangy, slightly sweet condiment that's perfect for sandwiches, burgers, or as a tangy topping for grilled meats.
The process takes just 15 minutes of active prep, but the results last all year—if you can resist eating it straight from the jar.
What sets this relish apart is the balance of acidity and sweetness, achieved through precise vinegar and sugar ratios. I've perfected a sterilization method that ensures safety while maintaining the fresh, bright flavor of green tomatoes.
The spices—mustard seed, celery seed, and black pepper—add subtle depth that complements the tangy tomato base without overpowering it.
By the time you're done, you'll have jars of golden-green relish with a texture that's neither too chunky nor too smooth—just right for spreading. The vinegar preserves the tomatoes while enhancing their natural sweetness, creating a condiment that's both nostalgic and refreshingly modern.
This is the kind of relish that makes summer taste like summer, even in winter.
The best part? This recipe scales perfectly for gifting—just double the batch and label those jars for friends and family. With proper canning techniques, your relish will stay fresh for months, ready to add that signature tang to any meal. Let's get started on preserving that summer flavor.
Ingredients for canned green tomato relish
Nine simple ingredients transform summer's green tomatoes into golden jars of tangy relish.
| Ingredient | Amount | Notes |
|---|---|---|
| Green Tomatoes 🍅 | 4 lbs | Firm, unripe, similar size |
| White Vinegar 💧 | 2 cups | Distilled, 5% acidity |
| Granulated Sugar 🍚 | 1 ½ cups | White or raw preferred |
| Yellow Onions 🧅 | 1 whole | Medium size, diced fine |
| Celery Stalks 🥬 | 4 whole | Fresh, stringless, chopped |
| Mustard Seeds 🌶️ | 1 tbsp | Yellow, whole seeds |
| Celery Seeds 🌿 | 1 tsp | Ground for fine texture |
| Ground Black Pepper 🌶️ | ½ tsp | Freshly ground preferred |
| Salt 🧂 | 1 ½ tsp | Diamond Crystal kosher |
| Water 💧 | 1 cup | Boiled for sterilizing |
Green tomatoes are the star—look for bright, firm ones with no soft spots. Local farmers markets often have the best selection, but grocery store produce works too if they're fresh. The onions and celery should be crisp, not wilted. Trader Joe's usually carries good quality for these. Mustard seeds? Penzeys sells bulk spices that stay potent longer. Don't skip the vinegar test—if it smells harsh, it's time for a new bottle. The sugar should be white or raw cane for proper balance, not powdered.
No white vinegar? Apple cider vinegar works too—just add 1/2 tsp extra sugar to compensate. Short on mustard seeds? Dijon mustard at 1 tsp adds depth without the whole seeds. Celery seeds hard to find? Ground coriander at half the amount gives similar earthiness. For the onions, yellow or red work best—avoid sweet varieties. The water must be boiling when you add it to the jars—no exceptions for safe canning. And yes, you can use organic tomatoes if that's what you've got.
This relish keeps for 12-18 months in a cool, dark pantry—just make sure the lids seal properly. I always date the jars with a marker. The first batch? Eat it all. Seriously, it's that good. For gifting, double the recipe and use quart jars instead of pints. The flavor actually improves after a few months as the spices mellow. Freeze extras if you can't resist opening them all at once.
Why You'll Love This Recipe
- No-Chop Nightmare: I swear, the green tomatoes just need a quick chop—no dicing, no fuss—then they simmer down to perfect bite-sized pieces. The onions and celery go in whole for the first 10 minutes, so you’re basically stirring a pot while scrolling through your phone.
- Sweet-Tangy Magic: That first taste of vinegar cutting through the sugar? It’s like summer in a jar. The green tomatoes stay crisp but soften just enough, while the onions add this deep, caramelized backbone. Honestly, I’ve never met a relish that balances sweet and sour this well.
- Holiday Table Star: Between us, this is my go-to for Thanksgiving, potlucks, or even Christmas dinner. It pairs with sandwiches, burgers, or just straight from the jar with crackers. My aunt once brought a jar to a family gathering and got asked for the recipe three times—now she’s my secret weapon.
- Pantry Goldmine: A single batch lasts months, and the ingredients cost pennies. Green tomatoes are cheap in season, and the vinegar-sugar ratio means you’re not buying fancy preserves. I’ll be real: I’ve pulled jars out of the pantry after six months, and they’re still crisp and bright.
Step-by-step instructions for canned green tomato relish
This relish comes together faster than you can say "harvest season"—let's preserve that garden-fresh flavor.
Sterilize Jars and Prepare Ingredients
Preheat your oven to 200°F and place empty pint jars and lids on a baking sheet. Sterilize for 10 minutes—this ensures your relish stays fresh and safe to eat. While they warm, wash and trim the 4 lbs green tomatoes, removing stems and cutting into ½-inch chunks. I like to leave the skins on for texture, but peel if you prefer a smoother consistency.
Finely dice the 1 whole yellow onion and chop the 4 whole celery stalks into ¼-inch pieces. The smaller the dice, the more evenly distributed the flavors will be in the finished relish. Keep all prepped ingredients in separate bowls until ready to use—this keeps your workspace organized and prevents cross-contamination.
Combine Vegetables and Liquids
In a large, non-reactive pot (stainless steel or enamel works best), combine the chopped green tomatoes, onions, and celery. Add 2 cups white vinegar, 1.5 cups granulated sugar, 1 cup boiled water, 1 tbsp mustard seeds, 1 tsp celery seeds, 0.5 tsp ground black pepper, and 1.5 tsp salt. Stir gently but thoroughly to distribute all ingredients evenly.
Here's the thing—don't be tempted to taste yet. The sugar and vinegar combination is potent, and the flavors will mellow as they cook. Bring the mixture to a gentle boil over medium heat, then immediately reduce to a simmer. You're looking for small, steady bubbles—not a rolling boil—that will help the flavors meld without breaking down the vegetables.
Simmer Until Thickened
Let the relish simmer uncovered for 15-20 minutes, stirring occasionally. You'll notice the mixture gradually thickens as the liquid reduces and the vegetables soften slightly. I like to stir every 5 minutes to prevent sticking and ensure even cooking. The relish is ready when it reaches a jam-like consistency—it should coat the back of a spoon smoothly.
Taste a spoonful at this stage. The acidity from the vinegar and sweetness from the sugar should balance beautifully. If it needs more tang, add 1 tablespoon white vinegar; if it needs sweetness, add 1 tablespoon granulated sugar. Adjust seasoning with additional salt or pepper if needed. Remember, the flavors will continue developing as it cools, so don't overcorrect.
Fill and Process Jars
Using a ladle or large spoon, carefully spoon the hot relish into the sterilized pint jars, leaving ½-inch headspace at the top. Tap the jars gently on the counter to remove any air bubbles trapped near the surface. Wipe the rims with a clean, damp cloth to ensure a perfect seal.
Place the lids on the jars and screw on the bands until fingertip-tight. Transfer the jars to a canning rack in a large pot and cover with hot water (not boiling) until the water level is 1 inch above the jar tops. Bring the water to a gentle boil and process for 10 minutes. This heat treatment ensures your relish will keep safely for up to a year.
Cool and Store
Remove the jars from the pot using tongs and let them cool undisturbed for 12-24 hours. You'll hear the satisfying ping as the lids seal. Check each lid by pressing in the center—if it doesn't pop back up, it's properly sealed. Unsealed jars should be refrigerated and used within a week.
Once sealed, store the relish in a cool, dark place. The flavors will deepen over time, making this relish even more delicious as the seasons change. Use it on sandwiches, with cheese boards, or as a tangy topping for grilled meats. You'll have jars ready for next summer's harvest before you know it!
Pro Tips For Making Canned Green Tomato Relish
- Chop Tomatoes Small: DESCRIPTION: You want the texture to be even—no big chunks hiding in your relish. Dice those green tomatoes into ¼-inch pieces (a sharp knife and steady hand help). I used to leave some irregular, and they’d stay crunchy while the rest got mushy—now I treat it like a salsa.
- Simmer Vinegar Slow: DESCRIPTION: After adding vinegar, let the whole batch simmer gently for 10 minutes. I learned this the hard way—boiling it too hard makes the onions bitter and the sugar grainy. Think "barely bubbling," not "rolling boil."
- Drain Celery Well: DESCRIPTION: Celery holds onto water like a sponge. After chopping, spread it on a towel and press down with a dry dish towel to squeeze out moisture. Wet celery = watery relish. (Yes, it’s tedious, but your jars will thank you.)
- Salt Before Canning: DESCRIPTION: Add ½ teaspoon of salt per pint jar before sealing, not after. I skipped this once and the flavor felt flat—like someone forgot to season the relish. Do it now, or regret it later.
Serving suggestions for canned green tomato relish
Sandwich Spread
This relish shines as a tangy, sweet spread for sandwiches—especially BLTs or grilled cheese. I like to spread a generous layer on toasted sourdough and add crispy bacon for a Southern-inspired twist.
For a vegetarian option, pair it with avocado slices and sharp cheddar on a baguette. The acidity cuts through rich cheeses beautifully. 🥪
Cheese Board Topper
Elevate any cheese board by adding small jars of this relish alongside aged cheddar, brie, and goat cheese. The sweet-tangy flavor complements creamy cheeses perfectly. I like to serve it with crackers, dried apricots, and walnuts for a balanced bite.
The mustard seeds add subtle crunch that contrasts nicely with soft cheeses.
Grilled Meat Glaze
Brush this relish onto grilled chicken, pork chops, or steaks during the last 2-3 minutes of cooking. The vinegar tenderizes while the sugar caramelizes slightly, creating a glossy, flavorful crust.
I especially love it on smoked brisket—just a thin layer adds a bright, tangy contrast to the rich meat. 🍖
Pickle Substitute
Use this relish as a unique alternative to dill pickles on burgers, hot dogs, or tacos. The texture is slightly thicker than traditional pickles, but the tangy-sweet balance works perfectly.
I like to serve it with crispy fried chicken and potato salad for a Southern-style spread. The mustard seeds give it a depth that regular pickles lack.
Dipping Sauce
Warm this relish slightly and serve it as a dipping sauce for fries, onion rings, or veggie sticks. The sweetness balances the crispy textures, while the vinegar adds a refreshing tang.
I often keep a small jar on the table during game day gatherings—it disappears fast! For extra flavor, add a pinch of smoked paprika before serving. 🍟
Gift-Worthy Presentation
Double the recipe and package it in quart jars with custom labels for gifting. I like to attach a recipe card suggesting uses like sandwich spread or grilled meat glaze. The golden-green color makes it visually appealing, and the homemade touch always impresses.
Store in a cool, dark place for up to 18 months—it's the perfect pantry staple for holiday gifts. 🎁
Nutrition facts
Frequently asked questions
Can I use red tomatoes instead of green?
The recipe is specifically designed for green tomatoes to capture that unique tangy-sweet flavor. Red tomatoes would make a more traditional salsa or chutney. The acidity in green tomatoes balances the sugar and vinegar perfectly, creating that signature relish taste. If you only have red tomatoes, consider adding an extra 1 tablespoon lemon juice per pint jar to boost the acidity.
How do I know when the relish is done cooking?
The relish is ready when it reaches a thick, jam-like consistency that coats the back of a spoon. This typically takes 15-20 minutes of simmering. You'll notice the mixture reduces significantly and the vegetables soften slightly. Taste it at this stage—it should be tangy and sweet, not overly sharp or bland. If it's too thin, simmer uncovered for another 5 minutes.
What if my jars don't seal properly?
If a jar doesn't seal (the lid pops up when pressed), it's not safe for long-term storage. Store it in the refrigerator and use it within 1 week. Common reasons for failed seals include not leaving enough headspace, not sterilizing jars properly, or not processing for the full 10 minutes. Always check seals after cooling completely—sometimes they seal overnight.
Can I adjust the sweetness or tanginess?
The ratio of 1.5 cups sugar to 2 cups vinegar is a good starting point, but you can tweak it. For more sweetness, add 1 tablespoon sugar per pint jar before canning. For extra tang, add 1 tablespoon vinegar per pint jar. The relish will continue mellowing as it cools, so don't over-adjust—you can always add more relish to a dish later if needed.
How long does homemade relish last?
Properly canned relish will keep for 12-18 months in a cool, dark pantry. The flavors actually improve over time! Always check for proper seals before storing. Once opened, refrigerate and use within 1 month. The vinegar acts as a natural preservative, but the heat processing during canning is what extends the shelf life significantly.