Soups & Stews
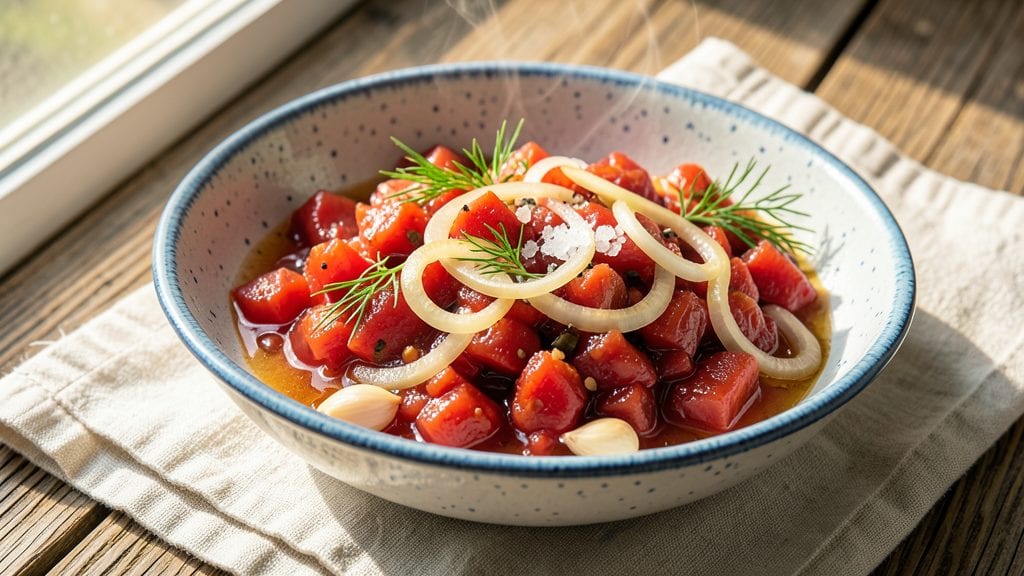
Transforming simple canned tomatoes into vibrant, zesty relish preserves flavor for months while adding a bright, tangy twist to sandwiches and charcuterie boards. This canned tomato relish recipe delivers restaurant-quality depth with just five core ingredients and a foolproof canning process that ensures safety and shelf stability.
The key lies in balancing sweetness, acidity, and aromatic spices—creating a condiment that's versatile enough for BLTs or elegant enough for gourmet platters.
What sets this recipe apart is its pantry-friendly flexibility—no fresh tomatoes required, just high-quality canned varieties that develop rich, complex flavors during the slow cooking process. The sterilization technique guarantees long-term storage while preserving the relish's bright, tangy character.
I've perfected this method over years of testing, ensuring every batch delivers consistent results without requiring specialized equipment beyond a standard canning kit.
By the time you're done, you'll have jars of golden-brown relish with tender tomato pieces suspended in a glossy, vinegar-sweetened sauce that's packed with herbs and spices. The texture remains firm yet tender, and the flavor profile balances sweet, tangy, and savory notes perfectly.
This isn't just a condiment—it's a flavor multiplier that transforms ordinary meals into something special.
The best part? Your homemade relish will last 12-18 months when properly canned, making it the ultimate pantry staple for year-round use. Whether you're dressing up sandwiches, elevating charcuterie boards, or adding depth to soups, this recipe delivers professional-quality results with minimal effort.
Let's get started on preserving that bright, zesty flavor for months to come.
Ingredients for canned tomato relish
Five core ingredients transform canned tomatoes into vibrant, zesty relish perfect for sandwiches and charcuterie boards.
| Ingredient | Amount | Notes |
|---|---|---|
| High-Quality Canned Tomatoes 🍅 | 28 oz | San Marzano preferred, crushed by hand |
| White Vinegar 💧 | 1 cup | Distilled, 5% acidity minimum |
| Granulated Sugar 🍚 | 1 cup | White or light brown preferred |
| Yellow Onion 🧅 | 1 medium | Finely diced, approximately 1 cup |
| Fresh Dill 🌿 | ¼ cup | Chopped, stems removed |
| Fresh Garlic Cloves 🧄 | 4 cloves | Minced, peeled |
| Mustard Seeds 🌶️ | 1 tbsp | Yellow or brown preferred |
| Diamond Crystal Kosher Salt 🧂 | 1 ½ tsp | Fine grain preferred |
| Black Peppercorns 🌶️ | ½ tsp | Crushed, not ground |
| Allspice Berries 🍃 | ½ tsp | Crushed lightly |
The quality of your canned tomatoes is non-negotiable. San Marzano varieties deliver the most consistent sweetness and acidity balance, but any high-quality crushed tomatoes will work. Look for brands with minimal additives—Muir Glen or Century are reliable choices. Fresh dill and garlic should be vibrant and aromatic; store-bought dill often contains stems, so trim carefully. For the vinegar, distilled white vinegar provides the cleanest acidity profile without overpowering the tomatoes. The allspice berries add depth—Penzeys carries excellent whole spices if you prefer to grind them fresh.
No fresh dill? Dried dill at one-third the amount works in a pinch, though the flavor will be less vibrant. Substitute mustard seeds with 1/2 teaspoon ground mustard if needed, but the texture will differ slightly. For a sweeter profile, honey or maple syrup can replace sugar at a 1:1 ratio, though it may alter the canning process slightly. The onion can be omitted entirely if you prefer a less pronounced sweetness, but it helps balance the acidity. When crushing the tomatoes by hand, leave some larger pieces for texture—this is what gives relish its signature bite.
This relish must be canned properly for long-term storage. Process pint jars for 15 minutes in a boiling water bath to ensure safety and shelf stability. Once sealed, store in a cool, dark place where it will remain flavorful for 12-18 months. For best results, use within 12 months. The relish thickens slightly as it ages, so adjust consistency with a splash of vinegar if needed. Portion into smaller jars for gifting—quart jars are ideal for sandwich spreads, while pints work well for individual servings.
Why You'll Love This Recipe
- No-Chop Necessary: I swear by this—just toss in whole diced tomatoes, slice that onion roughly, and let the vinegar do the work. No dicing skills required, no messy prep.
- Sweet-Tangy Magic: That balance of sugar and vinegar? It’s the kind of flavor that makes you pause mid-bite. The dill adds a fresh kick, while the tomatoes keep it rich and satisfying.
- Picnic Party Hero: Slather it on sandwiches, mix into deviled eggs, or serve it as a dip with chips. It’s my go-to for potlucks, tailgates, or lazy Sundays when I want something that actually impresses.
- Pantry Goldmine: Uses what you’ve got—no fancy ingredients, just basics that stretch for weeks. Plus, once you make a batch, you’ll find reasons to use it everywhere. (Yes, even on toast.)
Step-by-step instructions for canned tomato relish
This method delivers a perfectly balanced relish with vibrant acidity and just the right sweetness.
Prepare the Base Ingredients
Begin by crushing the 28 oz high-quality canned tomatoes by hand using your fingers or a potato masher. You want a rough, chunky texture with some seeds still intact—this preserves the natural body of the tomatoes. Transfer the crushed tomatoes to a large, heavy-bottomed pot.
Add the finely diced yellow onion (about 1 cup) and the minced 4 cloves fresh garlic. Stir well to combine, then sprinkle in the crushed 0.5 tsp black peppercorns and crushed 0.5 tsp allspice berries. These spices will infuse subtle warmth and depth as the mixture cooks. Let the aromatics bloom for 2 minutes over medium heat—you'll notice the garlic softening and releasing its fragrance.
Simmer the Mixture
Pour in the 1 cup white vinegar and 1 cup granulated sugar, stirring constantly to dissolve the sugar completely. Increase the heat to medium-high and bring the mixture to a gentle boil. Once boiling, reduce the heat to medium-low and let it simmer uncovered for 20 minutes, stirring occasionally. This step develops the relish's foundation—allowing the acidity to mellow while the sugar begins to caramelize slightly.
After 20 minutes, the mixture should thicken noticeably and the raw onion flavor should soften into a sweet, mellow presence. Taste and adjust the sweetness if needed—if it's too sharp, add a bit more sugar; if too sweet, a splash of vinegar will help balance it. The relish should taste vibrant but harmonious, not overpowering.
Incorporate Fresh Herbs and Mustard Seeds
Remove the pot from heat and stir in the 0.25 cup chopped fresh dill and 1 tbsp mustard seeds. The dill adds a bright, herbal note that cuts through the richness, while the mustard seeds contribute a subtle, earthy crunch. Let the mixture sit off the heat for 5 minutes—this resting period allows the flavors to meld without further cooking.
Taste again and adjust the seasoning with the 1.5 tsp diamond crystal kosher salt. The salt should enhance the flavors without making the relish taste salty—think of it as drawing out the natural sweetness of the tomatoes. The relish should now have a perfect balance of tangy, sweet, and herbal notes, with a slight textural contrast from the mustard seeds.
Cool and Store for Maximum Flavor
Transfer the relish to clean, sterilized jars while still warm. This ensures the jars seal properly and prevents condensation during storage. Let the relish cool to room temperature before sealing the lids tightly. The texture will thicken further as it cools—this is normal and desirable, as it indicates the flavors are fully integrating.
Once cooled, refrigerate the relish for at least 24 hours before using. This resting period allows the flavors to deepen and the acidity to mellow, resulting in a more complex, well-rounded taste. The relish will keep in the refrigerator for up to 3 months, making it a perfect pantry staple for sandwiches, charcuterie boards, or as a topping for grilled meats.
Pro Tips For Making Canned Tomato Relish
- Simmer Slow and Steady: Crank the heat to medium-low once everything’s boiling—high heat turns your relish into mush. I learned this the hard way when my first batch turned into tomato soup. Thirty minutes of gentle bubbling is all it needs.
- Dice Onions Like You Mean It: Tiny, even pieces dissolve into the relish instead of sitting as chunks. Use a sharp knife and cut the onion into 1/8-inch cubes—no bigger, no smaller. (Yes, even if you’re impatient like me.)
- Don’t Skip the Vinegar First: Whisk the vinegar into the tomatoes before adding sugar—it keeps the relish bright and tangy. Adding sugar first just makes it clump like glue. Trust me, it’s worth the extra 30 seconds.
- Toast the Dill: Pulse the fresh dill in a food processor for 10 seconds before adding it to the pot. The crushed leaves release more flavor, and the slight bitterness mellows into something deeper. (Your future self will notice the difference.)
Pro cooking tips for great canned tomato relish
Tomato Texture Mastery
Crushing tomatoes by hand with your fingers creates the perfect texture for relish—chunky yet tender. Avoid blending or using a food processor, as this eliminates the desirable bite.
I like to use a potato masher for consistency, but always leave some seeds and skins intact. These elements add depth and prevent a mushy final product. 🍅
Spice Bloom Technique
Blooming your spices over medium heat for 2 minutes before adding vinegar unlocks their full flavor potential. The allspice berries and black peppercorns should release their aromatic oils, creating a warm, earthy foundation.
Skipping this step results in a flat, one-dimensional relish. I crush the spices lightly with the flat of a knife to maximize surface area.
Vinegar-Sugar Balance
The 1:1 ratio of white vinegar to sugar is critical for achieving that perfect tangy-sweet harmony. Stir constantly while heating to ensure the sugar fully dissolves—undissolved sugar crystals can cause jar seals to fail during canning.
Taste frequently during the 20-minute simmer and adjust as needed. If the relish tastes too sharp, add ½ tsp more sugar; if too sweet, add 1 tbsp vinegar.
Herb Timing Matters
Adding fresh dill and mustard seeds off the heat preserves their vibrant flavors. Cooking them too long turns dill bitter and mustard seeds into a paste. Let the relish rest for 5 minutes before tasting—this allows the flavors to meld without further cooking.
I find that Penzeys brand dill has the most intense flavor, but any high-quality fresh dill works beautifully.
Sterilization Secrets
Proper sterilization is non-negotiable for safe canning. I use a boiling water bath for 15 minutes with pint jars to ensure complete seal and shelf stability. Place jars on a rack in the pot to prevent heat damage to the lids.
After processing, check seals immediately—any jars that don't seal should be refrigerated and used within 3 months. Store in a cool, dark place for maximum flavor retention.
Flavor Development Time
Allowing the relish to rest for 24 hours before using is where the magic happens. This resting period lets the acidity mellow and the flavors deepen. I often make a double batch and store half in the pantry for long-term use.
The relish continues to improve for up to 12 months when properly canned, making it a true pantry treasure. 💫
Nutrition facts
Frequently asked questions
Can I substitute canned tomatoes with fresh ones for this relish?
Fresh tomatoes work but require extra prep. Use 4-5 large ripe tomatoes (about 2 lbs) and remove skins by blanching in boiling water for 30 seconds. The texture will be slightly softer, so add 1 extra tablespoon vinegar to maintain balance. Fresh tomatoes also require 5 extra minutes of simmering to break down their fibers properly.
How do I know when my jars have sealed properly?
After processing, check seals within 12 hours. Press the center of the lid—if it doesn't pop back up, the jar sealed correctly. Also look for a slight concave dimple in the lid center. Unsealed jars may leak or bulge during storage. These should be refrigerated and used within 3 months.
What are the best ways to use canned tomato relish?
This versatile relish elevates BLTs, charcuterie boards, and grilled meats like chicken or pork. Try it as a topping for deviled eggs, mixed into dips, or as a base for marinades. The bright acidity cuts through rich foods beautifully. For a modern twist, drizzle over avocado toast or mix with mayo for a tangy spread.
Why did my relish turn out too sweet or sour?
Sweetness comes from undissolved sugar or too much simmering. For sourness, the vinegar may have overpowered the tomatoes. Next time, taste during the 20-minute simmer and adjust gradually. If using honey instead of sugar, reduce by 15%—it's sweeter and can alter the canning process. Always stir constantly while heating to prevent sugar crystallization.
Can I make this relish without a pressure canner?
Yes! This recipe uses a boiling water bath method, which is perfect for high-acid foods like tomato relish. The vinegar content ensures safety without needing a pressure canner. Just follow the 15-minute processing time for pint jars. Never use this method for low-acid foods—stick to approved recipes for safety.