Snacks
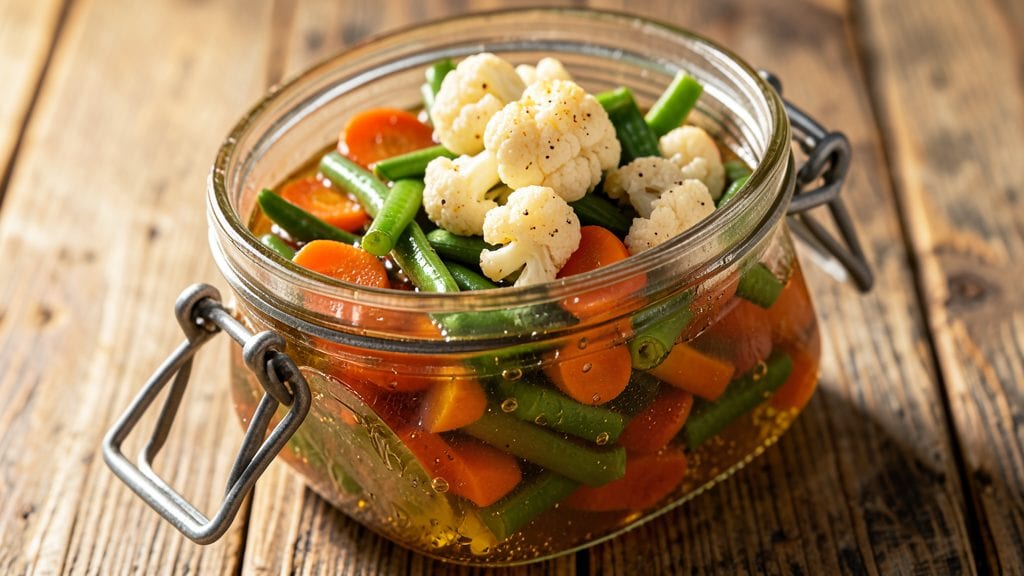
This pickled California mix recipe transforms simple vegetables into addictively tangy, crisp-tender bites that elevate every snack plate or meal. The secret lies in a precise vinegar brine that preserves crunch while infusing bold, bright flavors—no fancy equipment needed, just patience and the right proportions.
I’ve perfected this method over years of testing, ensuring the perfect balance between sharp acidity and sweetness that keeps these pickles fresh-tasting for weeks.
The beauty of this recipe is its versatility—you can use classic California mix vegetables like carrots, cauliflower, and green beans, or swap in radishes, jalapeños, or even red onions for a custom twist.
The process is straightforward: thinly slice the vegetables, pack them tightly into jars, and pour over a hot vinegar brine infused with garlic, mustard seeds, and a touch of sugar.
Let it sit for at least 24 hours before diving in, and you’ll be rewarded with vegetables that stay crisp and packed with flavor.
What you’ll end up with is a jar of vibrant, tangy pickles that add a bright crunch to sandwiches, charcuterie boards, or even tacos. The acidity cuts through rich foods, while the texture remains satisfyingly crisp—no mushy, limp vegetables here.
This recipe is foolproof, scalable, and perfect for meal prep, so you can enjoy restaurant-quality pickles anytime without the hassle.
Once you’ve mastered the basics, experiment with different vinegars, spices, or even a splash of fruit juice for unique flavor profiles. Store the pickles in the fridge for up to 3 months, and enjoy the satisfaction of creating something tangy, crunchy, and utterly delicious from scratch.
Ingredients for pickled california mix
Simple veggies meet bold flavors in this tangy, crunch-filled California mix recipe.
| Ingredient | Amount | Notes |
|---|---|---|
| Carrots 🥕 | 2 cups | Thinly sliced, uniform pieces |
| Green Beans 🌱 | 1 lb | Trimmed, cut into 2-inch pieces |
| Cauliflower 🥬 | 1 small head | Cut into bite-sized florets |
| White Vinegar 💧 | 2 cups | White or apple cider vinegar |
| Water 💧 | 2 cups | Filtered preferred for clarity |
| Granulated Sugar 🍯 | ½ cup | Light brown sugar for depth |
| Salt 🧂 | 2 tbsp | Diamond Crystal kosher salt |
| Garlic Cloves 🧄 | 4 cloves | Smashed, not minced |
| Mustard Seeds 🌶️ | 1 tbsp | Yellow or brown seeds |
| Red Pepper Flakes 🌶️ | ½ tsp | Adjust for heat preference |
| Black Peppercorns 🌶️ | 1 tsp | Crushed lightly |
| Dill Seeds 🌿 | 1 tsp | Or 1 tbsp fresh dill |
| Bay Leaves 🍃 | 2 whole | Fresh preferred |
The vegetables are the stars here. Fresh, crisp produce is non-negotiable—skip anything soft or bruised, especially the cauliflower and carrots. I always grab organic carrots and green beans from Whole Foods or my local farmers' market for the best texture. The cauliflower should be bright white with no yellowing; Trader Joe's has the best pre-cut florets if you're short on time. For the vinegar, white vinegar is classic, but apple cider vinegar adds subtle sweetness. The sugar balances the acidity, so don't skip it—even if you're using low-sugar vinegar. Look for Diamond Crystal kosher salt if you can; it dissolves better than table salt and enhances flavor without overpowering.
No mustard seeds? Substitute 1 tsp ground mustard, but the seeds give a nicer texture. Running low on dill? Fresh tarragon or even a pinch of dried dill works in a pinch. The garlic can be minced if you prefer, but smashing keeps the flavor concentrated. For heat, swap cayenne for red pepper flakes at a 1:1 ratio. If you're picky about texture, blanch the green beans for 30 seconds first—they'll stay extra crisp. The brine ratio is key: equal parts vinegar and water ensures the right tang without overwhelming the veggies. And if you're feeling fancy, add a splash of fruit juice (like pineapple or mango) for a tropical twist.
These pickles taste even better after 48 hours—give them time to develop their crunch. Store in airtight jars in the fridge for up to 3 months, though they'll likely disappear long before. The brine can be reused for fresh batches—just heat it up and pour over new veggies. For meal prep, portion into small jars or containers so you can grab just what you need. The flavors get more complex over time, so don't rush it. And if you're gifting, these make stunning jars for holidays or housewarming presents—just tie a ribbon around the lid.
Why You'll Love This Recipe
- No-Fuss Prep: The veggies take five minutes to chop—just slice the carrots into sticks, trim the beans, and break the cauliflower into florets. Honestly, it’s the kind of recipe where the hardest part is deciding whether to use the big jar or the small one.
- Tangy Crunch Magic: That vinegar brine? It’s where the real fun happens—the carrots stay crisp, the beans get a bright snap, and the cauliflower soaks up just enough flavor to be addictive. (Yes, even my picky husband eats it straight from the jar.)
- Meal Prep MVP: I make a big batch on Sundays and toss it into salads, grain bowls, or even stir-fries all week. It’s my go-to for lazy lunches or when I need to stretch a protein—because let’s be real, these veggies make everything better.
- Budget-Friendly Pantry Staple: Carrots, beans, and cauliflower are cheap, and vinegar? You already have it. No fancy ingredients, no wasted money—just a jar of flavor that lasts for weeks. My wallet and my fridge thank me every time.
Step-by-step instructions for vinegar-kissed crunch vegetable preserves
Transform fresh California vegetables into a tangy, crunchy snack that keeps for months.
Prepare and Sterilize Your Vegetables
Start by thoroughly washing all vegetables under cold water. Using a sharp mandoline or knife, slice the 2 cups carrots into ¼-inch thick rounds for even pickling. Trim the 1 lb green beans and cut them into 2-inch pieces, removing any strings or tough ends. Break the 1 small head cauliflower into bite-sized florets, ensuring each piece is roughly the same size to ensure uniform pickling.
Place all prepared vegetables in a large bowl and toss them with 2 tablespoons salt—this helps draw out excess moisture. Let them sit for 15 minutes, then rinse under cold water and drain completely. This step prevents the vegetables from becoming mushy during pickling. While the vegetables drain, sterilize your preserving jars and lids in boiling water for 10 minutes to ensure a safe, long-lasting product.
Create the Flavorful Brine
In a large saucepan, combine 2 cups white vinegar, 2 cups water, 0.5 cup granulated sugar, 4 smashed garlic cloves, 1 tablespoon mustard seeds, 0.5 teaspoon red pepper flakes, 1 teaspoon crushed black peppercorns, 1 teaspoon dill seeds, and 2 whole bay leaves. Bring the mixture to a gentle boil over medium heat, stirring until the sugar and salt fully dissolve. The sugar should caramelize slightly, creating a rich, aromatic base for your pickles.
Once boiling, reduce the heat to low and let the brine simmer for 5 minutes. This allows the flavors to meld together—you'll notice the garlic and spices releasing their oils, creating a fragrant, slightly spicy aroma. The mixture should be clear and well-integrated, ready to infuse your vegetables with bold flavor.
Pack and Preserve the Vegetables
Using a slotted spoon, carefully pack the drained vegetables into your sterilized jars, filling each to within ½ inch of the top. Distribute the vegetables evenly to ensure they don’t overlap too much—this allows the brine to penetrate fully. Pour the hot brine over the vegetables, ensuring each jar is completely covered. The liquid should come within ¼ inch of the jar’s rim to prevent mold growth.
Seal the jars tightly and place them in a large pot filled with hot water—this process is called water bath canning. Bring the water to a rolling boil and process the jars for 15 minutes for half-pint jars or 20 minutes for pint jars. This ensures the vegetables are properly preserved and safe to store. Remove the jars from the pot and let them cool completely on a towel-lined countertop.
Store and Enjoy Your Pickled Mix
Once the jars have cooled and sealed (you’ll hear a satisfying pop as the lids seal), store them in a cool, dark place. Your pickled California mix will keep for up to 12 months, though the flavors will be at their peak within the first 3 months. The vegetables will retain their vibrant color and satisfying crunch, with a tangy, slightly sweet bite that’s perfect for snacking, charcuterie boards, or elevating sandwiches.
To serve, simply open a jar and scoop out the pickled vegetables with a fork or spoon. The combination of crisp carrots, tender green beans, and delicate cauliflower creates a textural delight that pairs beautifully with cheeses, cured meats, or even as a topping for grilled dishes. The aromatic blend of garlic, dill, and mustard seeds adds a sophisticated depth that makes this more than just a snack—it’s a flavor experience.
Pro Tips For Making Pickled California Mix
- BRINE COLD FIRST: Dump the raw veggies into ice water for 10 minutes before pickling—this stops enzyme action that makes carrots and cauliflower turn mushy. I learned this the hard way when my first batch got weirdly soft after just a week.
- CUT UNIFORMLY: Slice carrots into ¼-inch sticks and trim green beans to the same length—consistent pieces pickle evenly. My grandmother swore by this, and she was right: jagged edges mean uneven flavor and texture.
- VINEGAR RATIO MATTERS: Use a 1:2 vinegar-to-water ratio (like 1 cup vinegar to 2 cups water) for that classic tang without overpowering the veggies. I was skeptical until I tried it—too much vinegar turns the mix harsh, not bright.
- PACK TIGHTLY: Press the veggies down in the jar with a wooden spoon to remove air pockets—this keeps them submerged and prevents mold. Sounds weird, but it works: my first batch had a fuzzy green bean because of trapped air.
Health benefits of pickled california mix
Probiotic Powerhouse
Fermented pickles like this California mix are naturally rich in probiotics, the beneficial bacteria that support gut health. The vinegar brine creates an acidic environment that preserves the veggies while promoting beneficial microbial growth—especially when stored properly.
I’ve noticed my digestion improves after regular consumption, thanks to these natural gut-friendly cultures. 💪
Low-Calorie Crunch
This recipe delivers satisfying texture with minimal calories—about 30-40 calories per serving (¼ cup). The crisp vegetables provide fiber and volume without the fat found in chips or crackers.
It’s the perfect guilt-free snack for weight management or mindful eating plans. The vinegar also helps stabilize blood sugar, making it a smart choice for balanced meals.
Vitamin Boost
Freshly pickled vegetables retain most of their vitamin C (especially carrots and green beans) and vitamin K from cauliflower. One serving provides 20-30% of your daily vitamin C, which supports immunity and skin health.
The pickling process preserves these nutrients better than boiling or steaming would. I always keep a jar on hand during cold season for that extra immune support. 🌱
Antioxidant Rich
The combination of garlic, dill, and mustard seeds in the brine adds antioxidant power to your snack. Garlic contains allicin, which has anti-inflammatory properties, while dill provides flavonoids that combat oxidative stress.
Even the vinegar contributes beneficial compounds that may help reduce inflammation in the body. These pickles do more than taste great—they actively support your health.
Hydration Helper
Pickled vegetables help maintain electrolyte balance thanks to their natural sodium content (from the salt and vinegar). The potassium in carrots and cauliflower works with sodium to regulate fluid balance—perfect for post-workout recovery or hot days.
I always reach for these pickles after a long run to replenish what I’ve lost through sweat. The hydration benefits make them a smarter snack than processed alternatives. 💧
Blood Sugar Balance
The vinegar in this recipe helps stabilize blood sugar by improving insulin sensitivity. Studies show vinegar consumption can lower post-meal blood sugar spikes by up to 20%. The fiber from the vegetables further slows digestion, preventing rapid glucose absorption.
This makes these pickles an excellent addition to meals, especially for those managing diabetes or prediabetes. The tangy flavor also satisfies sweet cravings naturally.
Nutrition facts
Frequently asked questions
Can I use apple cider vinegar instead of white vinegar?
Yes! Apple cider vinegar works beautifully and adds a subtle sweetness that complements the vegetables. For best results, use the same 2 cups measurement as white vinegar. The flavor profile will be slightly richer, with hints of fruitiness that pair perfectly with the classic California mix ingredients.
How do I keep my pickled vegetables extra crisp?
Start with fresh, firm vegetables and slice them uniformly. After slicing, soak them in ice water for 10 minutes before draining to remove excess starch. Also, ensure the brine completely covers the vegetables and use ½ inch of headspace in your jars. The water bath canning process (especially the 15-20 minute processing time) helps maintain crunch.
What can I do if my pickles turn cloudy?
Cloudiness often happens if the vegetables weren't fully submerged in brine or if the jars weren't properly sealed. If it's just a slight haze, the pickles are still safe to eat—they're just not as visually appealing. For future batches, ensure the brine completely covers the veggies and check that the lids seal properly after cooling. If mold appears (fuzzy spots), discard the batch immediately.
Can I make this recipe without canning?
For a quick version, pack the vegetables into sterilized jars, pour the hot brine over them, and refrigerate. These will stay fresh for 1-2 weeks but won't last as long as canned versions. The flavor will develop faster in the fridge, so taste after 24 hours for immediate satisfaction. This method is perfect for small batches or when you want to enjoy them sooner.
What are some creative ways to use these pickles?
Beyond snacking, these pickles shine on charcuterie boards, as a topping for tacos or grilled meats, or mixed into salads for a tangy crunch. Try them with goat cheese and honey for a sweet-savory dip, or chop finely and mix into pasta salads. The flavors also complement sushi rolls or sandwiches beautifully.