Side Dishes
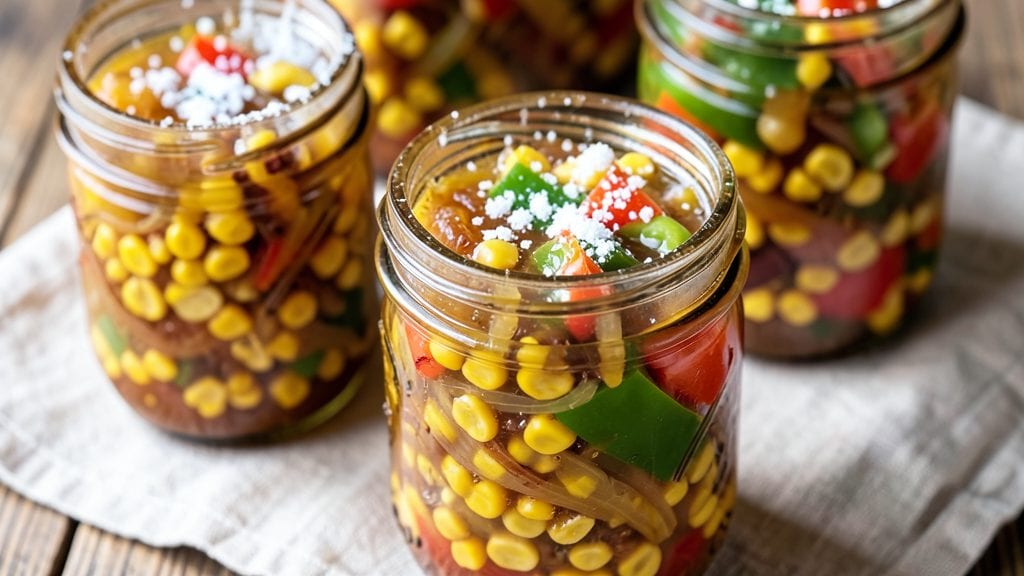
This sweet corn relish canning recipe transforms summer’s freshest ears into a vinegar-kissed condiment that preserves crisp texture and bright sweetness for months.
The key lies in balancing sugar, vinegar, and spices to create a relish that’s tangy, crunchy, and just sweet enough—perfect for sandwiches, burgers, or as a tangy side. I developed this method after years of canning failures, refining it to ensure proper sterilization and processing times for safe, long-lasting results.
The process begins with freshly cut corn kernels, which we’ll cook with onions, bell peppers, and a precise blend of sugar, vinegar, and spices. Sterilizing jars and lids is critical—this isn’t just about flavor, but food safety.
Once canned, the relish maintains its vibrant color and satisfying crunch, making it a pantry staple that rivals store-bought versions. Every batch delivers that perfect balance of sweetness and acidity that keeps people reaching for the jar.
What makes this recipe stand out is its versatility—use it as a sandwich spread, burger topping, or even a tangy side for grilled meats. The vinegar preserves the corn’s natural sweetness while adding a bright tang that cuts through rich flavors.
With proper canning techniques, your jars will stay fresh for up to a year, ready to bring summer’s taste to any meal. Let’s get started on preserving that garden-fresh flavor.
Fair warning: once you taste homemade, store-bought relish won’t compare. The secret is in the slow cooking and precise measurements—no shortcuts here. This isn’t just a recipe; it’s a way to extend summer’s harvest and impress anyone who takes a bite. Ready to can your own vinegar-kissed crunch?
Ingredients for sweet corn relish canning
Six cups of summer corn meet vinegar and sugar for relish that lasts months.
| Ingredient | Amount | Notes |
|---|---|---|
| Sweet Corn Kernels 🌽 | 6 cups | Freshly cut from 4-5 ears |
| Yellow Onion 🧅 | 1 whole | Medium size, finely chopped |
| Bell Pepper 🍅 | 1 whole | Green or red, finely chopped |
| White Vinegar 💧 | 2 cups | White or apple cider vinegar |
| White Sugar 🍚 | 1 ½ cups | Granulated preferred |
| Salt 🧂 | 1 ½ tsp | Kosher or sea salt |
| Mustard Seed 🌶️ | 1 tsp | Whole, lightly crushed |
| Black Peppercorns 🌶️ | ½ tsp | Crushed lightly |
| Canning Jars 🥫 | 6 pieces | Pint-size, sterilized |
| Lids and Rings 🔒 | 6 pieces | New lids for sealing |
The corn is the star—use freshly cut kernels from 4-5 ears for the best texture. Local farmers markets often have sweet corn at peak season, but grocery store ears work too (just pick the plumpest). For the vinegar, white or apple cider both work, but avoid flavored varieties—they can overpower the delicate sweetness. The sugar is crucial for balancing the acidity; granulated works best as it dissolves evenly. If you're canning a large batch, Costco or Sam's Club sell bulk vinegar and sugar at better prices. For the jars, Ball or Kerr brand are trusted for home canning—make sure they're new lids for proper sealing.
No fresh corn? Frozen corn works in a pinch—thaw and drain well first. Running short on vinegar? Lemon juice at half the amount gives a similar tang, though the flavor will differ slightly. Want extra crunch? Add ½ cup finely diced celery or jalapeño to the mix. The mustard seeds and peppercorns can be omitted if you prefer a smoother relish, but they add wonderful depth. For sterilizing jars, boiling water for 10 minutes is standard practice—never reuse lids from previous canning. If you're short on time, a dishwasher's sanitize cycle works too.
Once canned, this relish keeps for up to 12 months in a cool, dark pantry. The vinegar acts as a natural preservative, so no refrigeration is needed once sealed. For best results, store jars upright to prevent liquid loss. The relish will thicken slightly over time—just stir before using. If you're gifting jars, wrap with twine and add a handwritten label—it makes a fantastic homemade present. Leftovers after opening? They'll keep in the fridge for about 3 months, though they're rarely leftovers.
Why You'll Love This Recipe
- I’ll be real: canning used to stress me out. But this relish? Just toss in the corn, diced onion, and bell pepper, simmer until the vinegar sings, and pour it into jars. No fancy tools, no waiting hours—just 20 minutes of hands-off work.
- No-Fuss Preservation: I’ll be real: canning used to stress me out. But this relish? Just toss in the corn, diced onion, and bell pepper, simmer until the vinegar sings, and pour it into jars. No fancy tools, no waiting hours—just 20 minutes of hands-off work.
- Sweet-Tart Magic: That first bite of bright, crunchy corn kissed by vinegar and sugar? It’s the kind of flavor that makes you pause mid-bite. The onion adds a sharp little punch, while the bell pepper keeps it fresh—like summer in a jar, but better because it lasts.
- Picnic Pantry Hero: Honestly, this stuff belongs in everything. Slather it on sandwiches, mix it into deviled eggs, or just eat it straight with crackers. I keep a jar in my camping cooler—it’s the only thing that makes store-bought hot dogs tolerable.
Step-by-step instructions for sweet corn relish canning
Here's the precise method to create a tangy, crunchy corn relish that preserves beautifully.
Sterilize Jars and Prepare Ingredients
Begin by sterilizing all 6 pint-size canning jars, lids, and rings according to manufacturer instructions. I use the boiling water method—submerge jars and lids in a large pot of boiling water for 10 minutes, then keep them hot until ready for use. This prevents contamination and ensures proper sealing.
While the jars sterilize, chop the 1 whole yellow onion and 1 whole bell pepper into fine dice—about ¼-inch pieces. You'll want these evenly sized so they distribute throughout the relish. Cut the kernels from 4-5 ears of sweet corn, yielding exactly 6 cups of kernels. Remove any silk or tough cob pieces to keep the texture clean and consistent.
Cook the Relish Mixture
In a large, non-reactive pot, combine the 6 cups sweet corn kernels, chopped onion, and bell pepper. Add the 2 cups white vinegar, 1.5 cups white sugar, 1.5 teaspoons salt, 1 teaspoon lightly crushed mustard seed, and 0.5 teaspoon lightly crushed black peppercorns. Stir well to distribute all ingredients evenly.
Place the pot over medium-high heat and bring to a boil, stirring occasionally to prevent sticking. Once boiling, reduce heat to medium-low and let the mixture simmer for 15 minutes. You'll notice the vegetables soften slightly and the flavors begin to meld together. The relish should thicken just enough to coat the back of a spoon but still maintain a pleasant crunch.
Ladle into Sterilized Jars
Using a clean ladle, carefully spoon the hot relish mixture into the sterilized jars, leaving about ½-inch headspace at the top. Tap each jar gently on the counter to remove any air bubbles that may have formed. This step is crucial for proper sealing—air bubbles can cause jars to fail during processing.
Wipe the rims of the jars with a clean, damp cloth to ensure they're free of any relish residue. This prevents contamination and helps create an airtight seal. Place the lids on the jars and screw on the rings until they're fingertip-tight—just snug enough to hold the lids in place but not overly tight.
Process in a Water Bath
Prepare a water bath canner by filling it with enough water to cover the jars by at least 1 inch. Bring the water to a gentle boil over medium heat. Once boiling, carefully lower the jars into the canner using a jar lifter. The water should cover the jars completely—if not, add more boiling water as needed.
Process the jars for 45 minutes. You'll know they're properly processed when you hear the satisfying "ping" sound as the lids seal. After processing, remove the jars from the canner and let them cool undisturbed for 12 hours. This allows the lids to fully seal and the relish to set properly. Check each jar to ensure the lids have sealed—if any haven't, refrigerate and use those jars within a week.
Pro Tips For Making Sweet Corn Relish Canning
- Boil Corn Just 3 Minutes: I learned this the hard way—overcooking turns sweet corn mushy and sad. Three minutes in boiling water is enough to soften the kernels while keeping them bright and crisp. Drain immediately and shock in ice water to stop the cooking.
- Dice Onions Fine Before Cooking: Tiny onion pieces dissolve into the relish instead of sitting as chunks. Use a sharp knife and cut them into 1/8-inch pieces—small enough to disappear but big enough to add flavor without grit. (Yes, it takes a few extra minutes, but your jaw will thank you.)
- Skip the Crowded Jars: Packing corn relish too tightly leaves no room for liquid to circulate, and that’s how you end up with half-empty jars or under-processed batches. Fill jars loosely—about 1/2-inch headspace—and tap the counter to settle the mix. Leave room for the vinegar to do its job.
- Use Hot Vinegar: Cold vinegar makes the relish taste flat and watery. Heat it to 180°F (just below boiling) before mixing with the other ingredients—it cuts through the sweetness better and ensures even distribution. (Pro move: Warm the sugar in the same pot first to dissolve it faster.)
Pro cooking tips for this dish
Vinegar Ratio Precision
The vinegar-to-sugar ratio is the secret to balancing sweetness and tang. I use 2 cups white vinegar to 1.5 cups sugar for every 6 cups corn—this creates that signature vinegar-kissed crunch without overpowering the sweetness.
If you prefer a sharper tang, increase vinegar by ¼ cup; for milder flavor, reduce by ¼ cup. Always measure vinegar with a liquid measuring cup to avoid spills—vinegar is acidic and can damage countertops. 💧
Headspace Control
Leave exactly ½-inch headspace when filling jars—this prevents overflow during processing. I use a clean chopstick to tap jars gently after filling, dislodging any trapped air bubbles. Too little headspace risks seal failure; too much creates weak seals.
For extra insurance, run a damp paper towel around jar rims before sealing to remove residue that could interfere with the vacuum. 🥫
Processing Time Mastery
Process pint jars for 45 minutes in a boiling water bath—this is non-negotiable for safe preservation. I set a timer and monitor the water level, adding boiling water as needed to maintain coverage.
The ping when lids seal signals success, but always check seals after 12 hours. If any jars don't seal, refrigerate and use within 1 week—never risk spoilage. 🔥
Spice Infusion Tricks
Crush mustard seeds and peppercorns lightly with a rolling pin—this releases oils for deeper flavor without bitterness. For extra warmth, add ½ tsp ground ginger or ¼ tsp cayenne.
I avoid pre-ground spices since they lose potency quickly. If you love texture, add ¼ cup diced celery or jalapeño during cooking. ✨
Equipment Must-Haves
Invest in a Ball Mason jar lifter ($8) for safe handling and a canning rack ($15) to keep jars off hot canner bottoms. My Presto 23-quart water bath canner ($40) handles 7 pint jars at once—essential for large batches.
For beginners, Ball Blue Book Guide ($10) is a canning bible with troubleshooting tips. Never skip sterilization—this is where most failures begin. 💡
Flavor Testing Tip
Taste the relish before canning—this ensures perfect balance. Adjust sweetness or tang as needed, then proceed with canning. I keep a small bowl of the mixture aside to reference later.
After opening a jar, the flavor should be bright, crunchy, and just sweet enough—if it tastes flat, the vinegar ratio was off. 🌟
Nutrition facts
Frequently asked questions
Can I use frozen corn instead of fresh for this relish?
Yes, but thaw and drain the corn thoroughly first to avoid excess moisture in your jars. Frozen corn works best when you're short on fresh ears, though it may lose some of its natural sweetness. For every 1 cup of frozen corn, use 1 extra teaspoon of sugar to compensate.
Why did my relish turn cloudy after canning?
Cloudiness usually means the jars weren't properly sealed or sterilized. Double-check your processing time (45 minutes) and ensure all jars had the correct ½-inch headspace. If lids didn't seal, refrigerate and use within 1 week. For future batches, boil lids for 5 minutes before canning.
How long does homemade sweet corn relish last?
Properly canned relish keeps for up to 12 months in a cool, dark pantry. Once opened, store in the fridge and use within 3 months for best quality. The vinegar preserves the sweetness, but refrigeration extends shelf life after opening.
Can I adjust the sweetness level in this recipe?
For a sweeter relish, increase sugar by ¼ cup increments. For less sweetness, reduce by ¼ cup but don't go below 1 cup—the sugar helps preserve the texture. Taste before canning to ensure balance.
What's the best way to store unopened jars?
Keep jars upright in a cool, dark pantry away from heat sources. Store them with the lids facing outward so you can easily check seals. If you're gifting jars, wrap them in twine and add labels—they make fantastic homemade presents!