Appetizers
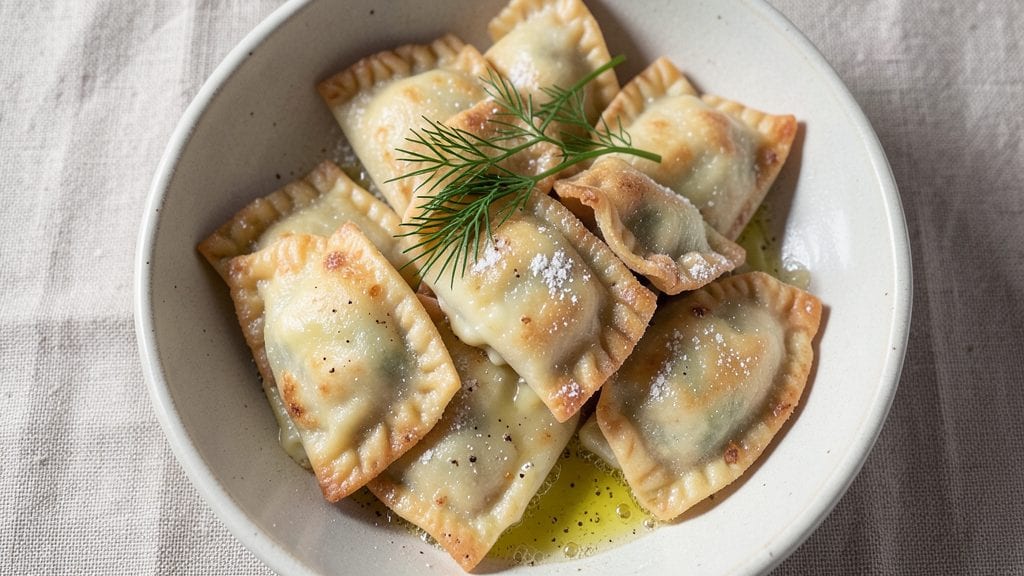
This cheese pierogi recipe delivers the perfect balance of golden, crispy exteriors and pillowy soft centers—just like Grandma used to make. The secret lies in a few precise techniques: using cold butter in the dough for flakiness, keeping the filling simple but flavorful, and boiling them just until they float.
I've been perfecting this recipe for years, and it never fails to impress.
What makes these pierogi truly special is their versatility—serve them pan-fried with sour cream and caramelized onions for a classic experience, or try them baked with a crispy breadcrumb topping for a modern twist.
The dough requires just five ingredients and comes together in under 30 minutes, while the filling takes less than 10 minutes to prepare.
By the time you're done, you'll have a plate of dumplings that are tender yet sturdy enough to hold their shape, with a golden crust that's irresistibly crispy.
The contrast between the warm, buttery dumplings and cool toppings creates a meal that's both comforting and satisfying—ideal for family dinners or special occasions.
Whether you're making them for a holiday gathering or a cozy weeknight dinner, this recipe delivers restaurant-quality results with a homemade touch. Let's get started on creating these golden dumplings with perfectly soft centers.
Ingredients for cheese pierogi
Five dough ingredients plus three filling staples—simple but precise for perfect pierogi.
| Ingredient | Amount | Notes |
|---|---|---|
| All-Purpose Flour 🌾 | 3 cups | Sifted for smooth dough |
| Cold Unsalted Butter 🧈 | ½ cup | Cubed, cut into dough |
| Large Eggs 🥚 | 1 whole | Room temperature preferred |
| Granulated Sugar 🍚 | 1 tbsp | For dough sweetness |
| Salt 🧂 | ½ tsp | Fine sea salt preferred |
| Shredded Farmer's Cheese 🧀 | 1 ½ cups | Or dry cottage cheese |
| Sour Cream 🥛 | ¼ cup | Full-fat for richness |
| Fresh Chives 🌿 | 2 tbsp | Finely chopped, optional |
| Salted Butter 🧈 | 2 tbsp | For frying, unsalted if preferred |
| All-Purpose Flour 🌾 | ½ cup | For pan-frying coating |
| Sour Cream 🥛 | ½ cup | For serving, full-fat |
| Caramelized Onions 🧅 | ½ cup | Optional topping |
| Fresh Dill 🌿 | 1 tbsp | Chopped, optional garnish |
The flour matters here—King Arthur or Gold Medal brands work best for that tender yet sturdy dough. Cold butter is non-negotiable; it creates those signature flaky layers. If you can't find farmer's cheese, dry cottage cheese works well—just drain it first to remove excess moisture. Chives add freshness, but skip them if you prefer a classic taste. For the filling, full-fat sour cream ensures richness, while the salted butter for frying adds that golden crust. I always grab unsalted butter for the dough to control the saltiness myself.
No farmer's cheese? Ricotta or dry cottage cheese are solid swaps—just add a pinch more salt to taste. Short on chives? Fresh parsley works in a pinch, though it has a slightly different flavor. For the caramelized onions, store-bought works fine if you're short on time, but homemade takes just 20 minutes in a pan with a splash of balsamic vinegar. The dough should be cool when shaping—wrap it in plastic and chill for 30 minutes if it's too sticky. This prevents filling from leaking during boiling.
Pierogi dough keeps for 3 days in the fridge, wrapped tightly in plastic. The filling can be prepped ahead and stored separately for 2 days. For longer storage, freeze shaped pierogi on a tray before bagging—they'll keep for up to 3 months. Thaw in the fridge overnight before cooking. Leftover sour cream topping? Store it with a splash of lemon juice to prevent curdling—it keeps for 5 days in the fridge.
Why You'll Love This Recipe
- No-Knead Magic: I swear by this dough—just flour, butter, and a splash of cold water. No standing at the counter for hours, no tough kneading. The butter melts into flaky layers while you fold, and the egg just ties it all together like a dream.
- Sweet-Savory Balance: That pinch of sugar in the dough? It’s not just for show—it rounds out the sharpness of the farmer’s cheese filling, giving each bite this cozy, almost buttery contrast. Honestly, it’s the little details like this that make it feel like a hug in food form.
- Freezer-Friendly Forever: Make a batch on Sunday, freeze them raw, and pull them out whenever you’re craving them. Boil, pan-fry, or bake—no waste, no stress. My kids’ school lunches have never been this popular (or this easy to pack).
- Budget Booster: Four ingredients, zero specialty items, and enough leftovers to feed the neighborhood. The butter might seem indulgent, but a little goes a long way, and the rest? Pure pantry staples. This is comfort food that won’t break the bank.
Step-by-step instructions for cheese pierogi
Master the art of pierogi with this foolproof method for pillowy dough and rich, creamy fillings.
Prepare the Dough with Cold Butter
In a large mixing bowl, combine the 3 cups all-purpose flour and 0.5 teaspoon salt. Make a well in the center and add the 0.5 cup cold unsalted butter cut into small cubes. Use your fingers or a pastry cutter to work the butter into the flour until it resembles coarse crumbs with pea-sized butter pieces remaining.
Add the 1 whole large egg and 1 tablespoon granulated sugar, then mix gently with a wooden spoon or your hands until the dough begins to come together. Avoid overmixing—just combine until the dough forms a shaggy mass. If it feels too dry, add 1-2 teaspoons of ice water to help bind it.
Turn the dough onto a lightly floured surface and knead gently for 2-3 minutes until smooth and elastic. Wrap tightly in plastic wrap and refrigerate for at least 30 minutes (or up to 24 hours). Chilling relaxes the gluten for easier rolling and prevents shrinking during cooking.
Make the Cheese Filling
In a medium bowl, combine the 1.5 cups shredded farmer's cheese, 0.25 cup sour cream, and 2 tablespoons finely chopped fresh chives. Mix gently with a fork or rubber spatula until just combined—overmixing will make the filling too dense. The mixture should be smooth but still hold its shape when scooped.
Taste and adjust seasoning if needed, though the farmer's cheese should already be salty. If using 0.5 cup caramelized onions as an optional topping, set them aside for later. For extra flavor, you can also fold in 1 tablespoon chopped fresh dill at this stage.
Roll and Cut the Dough
Preheat your oven to 375°F for baking pierogi later if desired. On a lightly floured surface, roll the chilled dough to 1/8-inch thickness using a rolling pin. If the dough sticks, dust with more flour but don't overdo it—too much flour makes the dough tough.
Use a 3-inch round cutter (or a glass) to cut circles from the rolled dough. Place 1 tablespoon of cheese filling in the center of each circle. Fold the dough over the filling, pressing the edges firmly with your fingers or a fork to seal completely. No air bubbles should remain inside.
Place the sealed pierogi on a floured baking sheet and cover with a damp towel to prevent drying. If not cooking immediately, refrigerate for up to 4 hours or freeze for later use.
Cook the Pierogi to Golden Perfection
Bring a large pot of water to a rolling boil. Add the pierogi in batches (don't overcrowd) and cook for 2-3 minutes until they float to the surface. This indicates they're fully cooked inside. Use a slotted spoon to transfer them to a paper towel-lined plate.
For pan-frying, heat 2 tablespoons salted butter in a large skillet over medium heat. Add the cooked pierogi in a single layer and cook for 2-3 minutes per side until golden brown and crispy. The butter will bubble and sizzle—this creates that signature crispy exterior.
Serve immediately with 0.5 cup sour cream for dipping, and garnish with extra chives or dill if desired. For a complete meal, top with the reserved caramelized onions and additional butter if you love extra richness.
Pro Tips For Making Cheese Pierogi
- CHILL THE DOUGH: After mixing, wrap the dough in plastic and refrigerate for at least 30 minutes—yes, even if you’re eager to start. I learned this the hard way when my first batch of pierogi dough stuck together like glue, no matter how much flour I dusted. Cold dough handles better and seals tighter when you shape them.
- CUT BUTTER SMALL: Pulse the cold unsalted butter in a food processor until it’s pea-sized—not flaky, not melted, just tiny cubes. This ensures even distribution in the dough, so every bite has that rich, buttery flavor without making the pierogi greasy. (And skip the microwave—it’s a shortcut that ruins texture.)
- DON’T OVERWORK THE DOUGH: Mix the dough just until it comes together—about 30 seconds after the flour disappears. Overmixing develops gluten, and your pierogi will turn out tough instead of tender. If the dough feels sticky, add a tablespoon of flour at a time, but don’t go overboard.
- BOIL IN BATCHES: Drop pierogi into a pot of rolling boil, not simmering water—this keeps them from sticking and ensures they cook evenly. Use a slotted spoon to transfer them to a plate, then return them to the pot for a final 30 seconds. Crowding the pot lowers the temp, and soggy pierogi are a crime.
Best sauces and condiments for this dish
Classic Sour Cream Sauce
The most traditional topping for cheese pierogi is a simple sour cream sauce—just ½ cup full-fat sour cream thinned with 1 tablespoon warm water or milk. Season with ¼ teaspoon salt and a pinch of black pepper.
This creamy, tangy sauce balances the richness of the pierogi perfectly. For extra flavor, stir in 1 teaspoon fresh lemon juice or 1 tablespoon chopped fresh dill just before serving. 🥛
Caramelized Onion Topping
Slow-cooked caramelized onions add a sweet, jammy depth that pairs beautifully with cheese pierogi. Cook 1 large yellow onion (thinly sliced) in 2 tablespoons butter over low heat for 30-40 minutes, stirring occasionally, until deep golden brown.
Add 1 tablespoon balsamic vinegar in the last 5 minutes for extra richness. Spoon over pan-fried pierogi for a restaurant-worthy finish. 🧅
Garlic Butter Sauce
For a bold, aromatic twist, melt 2 tablespoons butter in a small saucepan over low heat. Add 2 minced garlic cloves and cook for 1-2 minutes until fragrant (don’t let it brown). Remove from heat and stir in 2 tablespoons sour cream and 1 teaspoon chopped parsley.
Drizzle over pierogi or use as a dipping sauce. This sauce elevates the dish with a savory, garlicky kick. 🧄
Spicy Sour Cream Dip
If you love heat, mix ½ cup sour cream with 1 teaspoon hot sauce (like Frank's RedHot) and ½ teaspoon smoked paprika. For extra creaminess, add 1 tablespoon Greek yogurt.
This dip adds a tangy, spicy contrast that cuts through the richness of the pierogi. Serve on the side for dipping or drizzle over the top. 🌶️
Brown Butter & Herb Garnish
For a gourmet touch, brown 2 tablespoons butter in a skillet over medium heat until nutty and golden (about 3-4 minutes). Remove from heat and stir in 1 teaspoon chopped fresh chives and ½ teaspoon chopped fresh dill.
Drizzle over pan-fried pierogi just before serving. The nutty, buttery flavor adds a sophisticated finish. 🌿
Sweet & Tangy Fruit Compote
Balance the savory pierogi with a sweet-tart compote. Simmer ½ cup mixed berries (like raspberries or strawberries) with 1 tablespoon honey and 1 teaspoon lemon juice over low heat for 5-7 minutes until thickened.
Spoon over pierogi for a refreshing, fruity contrast. This works especially well with a white wine or sparkling water pairing. 🍓
Nutrition facts
Frequently asked questions about cheese dumplings
Can I make pierogi dough ahead of time?
The dough keeps beautifully for 3 days in the fridge, wrapped tightly in plastic. For longer storage, divide it into portions and freeze for up to 3 months. Thaw overnight in the refrigerator before rolling. Chilling the dough also prevents shrinking during cooking, so it's worth the extra time!
Why do my pierogi turn out dense instead of pillowy?
Overworking the dough or using warm butter creates dense dumplings. Always use cold butter and knead gently for just 2-3 minutes. Also ensure your filling isn't too wet—excess moisture makes the centers soggy. The secret is a 1/8-inch thick dough and proper sealing with no air bubbles.
What's the best way to freeze cooked pierogi?
Freeze them uncooked first: shape the pierogi, place on a floured tray, and freeze solid (about 1 hour). Then transfer to a freezer bag. Cook from frozen by boiling for 4-5 minutes (they'll float when done) and pan-fry as usual. The texture stays perfect when frozen this way!
Can I bake pierogi instead of frying?
Boil the pierogi as usual, then brush with melted butter and sprinkle with 1/2 cup breadcrumbs. Bake at 375°F for 15-20 minutes until golden. For extra crispiness, broil for 2-3 minutes at the end. This method uses less oil but still delivers great flavor.
What's the difference between farmer's cheese and ricotta?
Farmer's cheese is firmer and saltier, giving pierogi a sturdy texture. Ricotta is milder and creamier, requiring 1/2 teaspoon extra salt to match the flavor. For a hybrid, mix 1 cup farmer's cheese with 1/2 cup ricotta—you'll get the best of both worlds!