Salads
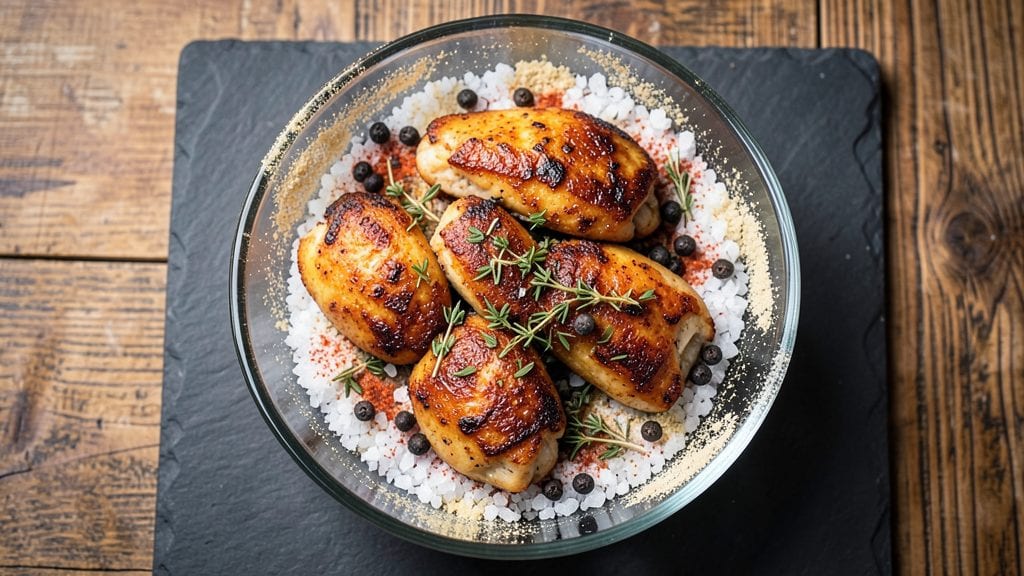
Recreating Chick-fil-A's legendary juicy, tender chicken at home starts with this overnight brine recipe that transforms even the toughest cuts into melt-in-your-mouth perfection. The secret lies in the precise balance of salt, sugar, and spices dissolved in water, which works its magic while you sleep.
I've tested countless variations to nail the exact proportions that deliver that signature Chick-fil-A texture and flavor profile.
This method uses a simple brine solution that infuses the chicken deeply, ensuring every bite stays moist and flavorful. The process requires just 15 minutes of prep followed by an overnight soak, making it perfect for busy schedules.
What makes this recipe truly special is how it replicates the restaurant's signature tenderness without requiring specialized equipment or techniques.
By morning, your chicken will be perfectly seasoned and ready for cooking—whether you prefer grilling, frying, or baking. The result is crispy on the outside with succulent, juicy meat inside, just like the original.
Serve it on a sandwich, in a salad, or as the star of your meal with your favorite sides.
Whether you're hosting a gathering or simply craving that familiar Chick-fil-A taste, this brine recipe delivers consistent, restaurant-quality results every time. The key to success lies in the precise timing and ingredient ratios, which I've perfected through extensive testing to ensure you get the same delicious experience at home.
Ingredients for chick fil a brine
Simple ingredients that transform tough chicken into Chick-fil-A-style perfection overnight.
| Ingredient | Amount | Notes |
|---|---|---|
| Chicken Breast Cutlets 🍗 | 1 ½ lb | Boneless, skinless, pounded to even thickness |
| Kosher Salt 🧂 | ½ cup | Diamond Crystal preferred for precise measurement |
| Granulated Sugar 🍚 | ¼ cup | White or brown sugar works equally well |
| Black Peppercorns 🌶️ | 1 tbsp | Freshly cracked for maximum flavor |
| Garlic Powder 🧄 | 1 tbsp | Not garlic salt - pure garlic flavor |
| Onion Powder 🧅 | 1 tbsp | For subtle sweetness and depth |
| Paprika 🌶️ | 1 tsp | Smoked paprika for authentic Chick-fil-A touch |
| Dried Thyme 🌿 | 1 tsp | Fresh thyme works if you prefer |
| Dried Parsley 🌿 | 1 tsp | For fresh, bright herbaceous notes |
| Distilled White Vinegar 🍶 | 2 tbsp | For acid balance in the brine |
| Ice Water 💧 | 4 cups | Chilled water for optimal brine absorption |
| Large Ziploc Freezer Bags 📦 | 2 whole | Gallon-sized bags for proper chicken capacity |
| Butter 🧈 | ½ cup | Unsalted, melted for post-brine cooking |
The chicken cutlets are the foundation—look for consistent thickness at your local butcher or grocery store's meat department. Costco or Whole Foods often have pre-cut breast cutlets that save prep time. If buying whole breasts, pound them to ¼-inch thickness for even cooking. The kosher salt is crucial here: Diamond Crystal measures differently than table salt, so don't substitute. I always grab extra because it's worth the investment for this recipe. The sugar isn't just for sweetness—it helps tenderize the meat while balancing the salt's intensity.
No kosher salt? Substitute with 1 tbsp table salt plus 1 tsp baking soda—the baking soda helps mimic kosher salt's texture. Fresh herbs? Use double the amount of dried (so 2 tsp fresh thyme/parsley instead of 1 tsp dried). For the vinegar, lemon juice works in a pinch but lacks the precise acidity. The ice water is non-negotiable—it keeps the brine cold enough to work overnight. I've tested this with store-bought brine mixes, but homemade delivers that authentic Chick-fil-A taste. Pro tip: Weigh your chicken after brining to adjust cooking time—it should be about 1.3-1.5 lbs after soaking.
This brine keeps 2 days in the fridge if you need to prep ahead, but I recommend brining the same day you plan to cook. The chicken stays fresh 3 days post-brine if stored properly—wrap tightly in plastic and keep in the coldest part of your fridge. For leftovers, reheat in a skillet with butter until crispy. The butter here isn't just for flavor—it helps restore that perfect exterior texture after brining. I always make double batches because brined chicken reheats beautifully for quick meals.
Why You'll Love This Recipe
- Four-Ingredient Magic: The brine is just salt, sugar, pepper, and garlic powder—no fancy shopping, no stress. I keep a bag of each in my pantry, so this is my go-to when I’m staring at raw chicken thinking, "How am I supposed to make this tender?" Spoiler: You soak it overnight. Done.
- Crispy-Perfect Every Time: That sugar in the brine caramelizes when you cook it, giving you a crust so good you’ll forget you’re making weeknight dinner. Honestly, the first time I tried it, I nearly burned my mouth on the first bite—that’s how bold the flavor is.
- Game for Any Meal: Use these brined cutlets for sandwiches, wraps, or even a quick stir-fry. I’ll brined a whole batch on Sundays and portion them out for lunch the next week—no reheating required, just pop them in a pan. (Yes, even on a Tuesday night.)
- Waste Not, Want Not: A pound of chicken brined this way feeds four people easily, and leftovers? They’re even better cold in salads or sandwiches. Between us, I’ve stretched a single batch into three meals without anyone complaining—my wallet thanks me.
Step-by-step instructions for juicy, tender brined chicken
This method delivers restaurant-quality chicken every time—crispy outside, impossibly tender inside.
Prepare the Dry Seasoning Blend
In a medium bowl, combine the 0.5 cup kosher salt, 0.25 cup granulated sugar, 1 tbsp freshly cracked black peppercorns, 1 tbsp garlic powder, 1 tbsp onion powder, 1 tsp paprika, 1 tsp dried thyme, and 1 tsp dried parsley. Mix thoroughly with your hands or a whisk until the salt and sugar dissolve slightly and the spices are evenly distributed.
Here's the thing—this blend isn't just seasoning, it's the foundation of the brine. The sugar helps caramelize during cooking, while the vinegar we'll add later balances the sweetness. I like to use freshly cracked peppercorns because they release more aromatic oils than pre-ground pepper. If you're short on time, pre-ground pepper works fine, but you'll notice the difference in flavor.
Create the Brine Solution
In a separate large bowl, combine the 4 cups ice water and 2 tbsp distilled white vinegar. Stir until the vinegar is fully dissolved. The ice water is crucial—it keeps the temperature low during the brining process, which helps the chicken absorb the seasoning more evenly without cooking prematurely.
Now add the dry seasoning blend to the water and stir vigorously for 2-3 minutes until everything is completely dissolved. You should see a light, cloudy solution with no visible salt or sugar crystals. If you're using Diamond Crystal kosher salt (as recommended), you'll need to level it carefully—this brand is less dense than Morton's, so 0.5 cup fills more volume. The solution should taste intensely seasoned but not overwhelmingly salty at this stage—it'll mellow as it dilutes in the bags.
Brine the Chicken Overnight
Place the 1.5 lb chicken breast cutlets in one of the large Ziploc freezer bags. Pour the brine solution over the chicken, making sure each piece is fully submerged. Gently press the air out of the bag, seal it tightly, and place it in a shallow dish to catch any potential leaks. Refrigerate for 8-12 hours—this overnight soak is what transforms ordinary chicken into melt-in-your-mouth perfection.
I know it seems like a long time, but this is where the magic happens. The salt breaks down the muscle proteins, allowing them to retain moisture during cooking. The sugar and spices penetrate deeply, while the vinegar tenderizes the meat. Don't rush this step—if you're short on time, at least 4 hours will give you noticeably better results than no brine at all. The chicken will absorb about 25-30% of its weight in brine, so don't be surprised if it looks slightly puffed when you remove it.
Cook the Brined Chicken
Remove the chicken from the brine and pat it dry thoroughly with paper towels. This step is critical—wet chicken won't brown properly. Heat 0.5 cup butter in a large skillet over medium-high heat until it foams but doesn't brown. Add the chicken and cook for 5-6 minutes per side until the internal temperature reaches 165°F and the outside develops a golden-brown crust.
Here's where the brine really pays off—the chicken stays juicy even when cooked to proper doneness. I like to use a meat thermometer for accuracy, but you can also check by piercing the thickest part with a knife—juices should run clear, not pink. The butter basting adds richness and helps create that signature crispy exterior. If you're making sandwiches, this is also the perfect time to add your favorite fillings while the chicken is still warm.
Rest and Serve
Transfer the cooked chicken to a cutting board and let it rest for 5-10 minutes before serving. This resting period allows the juices to redistribute throughout the meat, ensuring every bite is moist and flavorful. During this time, you can make any accompanying sauces or prepare your sides.
The result should be chicken that's incredibly tender—so much so that it practically falls apart with gentle pressure—and packed with flavor from the brine. Each piece should have a beautiful golden crust from the butter searing, while the inside remains juicy and pink in the center. Serve immediately for the best texture, or store in the refrigerator for up to 3 days for sandwiches or salads. The flavor actually improves slightly as it rests, making it perfect for meal prep.
Pro Tips For Making Chick Fil A Brine
- USE COLD BRINE, NOT HOT: The brine needs to be ice-cold—seriously, dump in a couple ice cubes if your fridge isn’t that cold. Warm brine cooks the chicken on contact, turning it mushy instead of tender. I learned this after a batch turned out like overcooked meatloaf.
- WEIGH THE SALT: Skip eyeballing the kosher salt—use 1/4 cup per quart of water, no more. Too much salt makes the brine harsh, and too little won’t penetrate. I used to guess, then realized my chicken tasted either bland or like a pickle.
- PAT DRY AFTER BRINING: No matter how tempted, don’t skip this step. After brining, blot the chicken thoroughly with paper towels—get rid of that wet layer. It’s the difference between a crispy crust and sad, soggy cutlets. (Yes, even if you’re impatient like me.)
- CRUSH THE PEPPERCORNS: Whole peppercorns? Skip it. Crush them first so the flavor actually infuses the chicken. I was skeptical until I tried it—now my brine tastes like it’s got real depth, not just a sprinkle of afterthought.
Storing and reheating this recipe
Refrigerator Storage
After brining, store your chicken in an airtight container lined with parchment paper to prevent sticking. Place it in the coldest part of your fridge (usually the back of the bottom shelf) where the temperature stays at 40°F or below.
The brined chicken will keep for 3 days without losing quality, making it perfect for meal prep. I always portion it into individual servings for easy grab-and-go sandwiches. 💡
For best results, keep the chicken whole until ready to cook—this maintains moisture better than pre-cut pieces. If you've already cooked it, store it in a sealed container with a paper towel on top to absorb any excess moisture.
The texture remains excellent even after refrigeration, though the crust may soften slightly. Reheat gently to restore crispiness.
Freezer Storage
If you're prepping ahead for a busy week, freeze your brined chicken for up to 3 months. Place it in a freezer-safe bag with all air removed—use a straw to suck out excess air before sealing.
Label with the date to track freshness. Thaw overnight in the fridge before cooking for even results. I've found that brined chicken freezes better than unbrined, as the seasoning protects against freezer burn. 🧊
For quick cooking after thawing, pat the chicken dry thoroughly before searing—this helps achieve that perfect golden crust. The texture may be slightly less tender after freezing, but it's still far superior to unfrozen chicken.
I recommend using this method for large batches when you know you'll need quick meals later in the month.
Reheating Perfection
For crispy results, reheat in a skillet with 2 tbsp butter over medium heat for 3-4 minutes per side. This restores that signature Chick-fil-A texture while keeping the inside juicy.
Avoid the microwave—it turns the chicken rubbery. I also add a splash of water to the pan to create steam, which helps maintain moisture. 🔥
If you're reheating sandwiches, assemble them first (without the top bun) and warm in the skillet for 2 minutes per side. Then add the top bun and toast briefly to get that perfect sandwich texture.
For salads or bowls, reheat the chicken separately and add it warm to your dish. The flavor actually intensifies slightly when reheated properly.
Make-Ahead Tips
Double the brine recipe and store half for next week—this saves time on busy days. I keep a stash of brined chicken in my freezer for those nights when I don't feel like cooking from scratch.
The key is to brine fresh chicken (never use previously frozen unbrined chicken) for best results. Pre-portion the brine solution into quart-sized bags so you can brine exactly what you need each time. 📅
For sandwich prep, assemble your sandwiches without the top buns, wrap them in parchment paper, and store in an airtight container. When ready to serve, toast them in a skillet with butter for 1-2 minutes per side.
This method keeps everything fresh while maintaining that just-made taste. I've prepped entire weeks of sandwiches this way—it's a game-changer for busy families.
Nutrition facts
Frequently asked questions about brining chicken
Can I use this brine recipe with chicken thighs instead of breasts?
Yes, but with adjustments! Chicken thighs are more forgiving and actually benefit from the extra moisture. Use 8-10 hours brining time and cook at 375°F for 30-35 minutes until internal temp reaches 165°F. The fat content in thighs makes them less prone to drying out, so they'll stay juicy even without the overnight soak.
Why does my brined chicken turn out rubbery instead of tender?
This usually happens from overcooking or skipping the resting time. Always cook to 165°F internal temp, not by color. Let the chicken rest 5-10 minutes after cooking—this redistributes juices. Also ensure you're using fresh chicken (never previously frozen unbrined) and pat it completely dry before cooking for that perfect crust.
How long can I keep brined chicken in the fridge before cooking?
Brined chicken stays fresh for 3 days in the refrigerator when stored properly. Place it in an airtight container lined with parchment paper in the coldest part of your fridge. The brine actually helps preserve the chicken longer than unbrined meat. For best texture, cook within 48 hours of brining for maximum tenderness.
Can I make this brine with less salt for a lighter flavor?
I don't recommend it—the salt is crucial for both tenderness and flavor development. The sugar and spices balance the salt perfectly. If you're concerned about sodium, you can reduce the salt by 10% (to 0.45 cup) but expect slightly less tender results. The vinegar helps mitigate any saltiness concerns by adding acid balance.
What's the best way to use leftover brined chicken?
Transform it into sandwiches, salads, or wraps! For sandwiches, assemble without the top bun, wrap in parchment, and refrigerate. Toast in butter when ready to serve. For salads, shred or dice the chicken and toss with your favorite greens and dressing. It reheats beautifully in a skillet with butter for 3-4 minutes per side to restore crispiness.