Soups & Stews
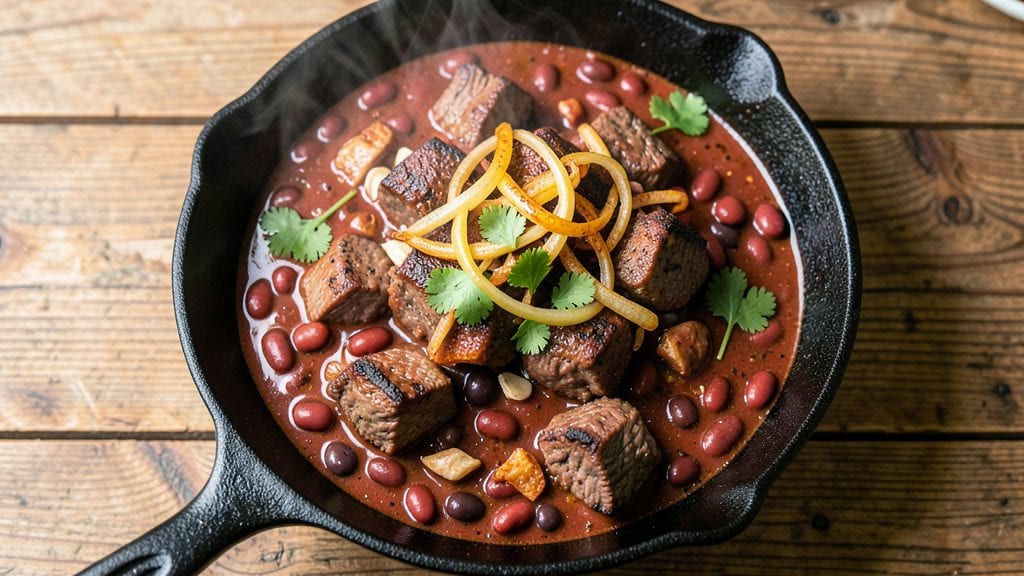
This Grandma's chili recipe is the kind of hearty, smoky dish that transforms any kitchen into a warm gathering spot. The secret lies in slow-cooked beef and beans simmered with aromatic spices until every bite delivers deep, comforting flavors.
I first made this version during a family potluck when my grandma couldn't attend, and it became an instant crowd-pleaser—requested by everyone who tasted it.
What makes this chili special is its balance of rich meat, tender beans, and perfectly spiced broth that develops complex flavors over time. The browning step creates that essential smoky depth, while the long simmer ensures the meat becomes fork-tender.
It's the kind of recipe that tastes even better the next day, making it ideal for meal prep or feeding a crowd during cold weather.
By the end, you'll have a pot of chili with layers of smoky, savory goodness that's perfect for serving with cornbread or crusty rolls. The aroma alone will have everyone gathering around the table, and the first spoonful delivers that nostalgic comfort food experience.
This is chili that brings people together—just like grandma always intended.
Whether you're making it for a family dinner or a holiday gathering, this recipe delivers restaurant-quality results with minimal effort. The beauty lies in its adaptability—use ground beef, stew meat, or even chicken, and adjust the spices to suit your family's preferences. Let's get cooking!
Ingredients for grandma's chili
Sixteen ingredients. One unforgettable pot of chili that brings everyone to the table.
| Ingredient | Amount | Notes |
|---|---|---|
| Chuck Roast Beef 🥩 | 2 ½ lb | Cut into 1-inch cubes, boneless |
| Yellow Onions 🧅 | 2 whole | Medium size, diced small |
| Garlic Cloves 🧄 | 6 cloves | Minced, fresh preferred |
| Kidney Beans 🌱 | 2 cans | 15 oz each, drained and rinsed |
| Black Beans 🌱 | 1 can | 15 oz, drained and rinsed |
| Tomato Paste 🍅 | ½ cup | Smooth, not chunky |
| Beef Broth 💧 | 3 cups | Low-sodium preferred |
| Red Wine 🍷 | ½ cup | Dry, like Cabernet |
| Chili Powder 🌶️ | 2 tbsp | Medium heat preferred |
| Ground Cumin 🌿 | 1 tbsp | Toasted for depth |
| Dried Oregano 🍃 | 1 tsp | Mexican preferred |
| Salt 🧂 | 1 ½ tsp | Adjust to taste |
| Black Pepper 🌶️ | ½ tsp | Freshly ground |
| Bay Leaves 🌿 | 2 whole | Remove before serving |
| Olive Oil 🫒 | 1 tbsp | For browning meat |
The beef is the heart of this chili, so chuck roast is your best bet—it stays tender and full of flavor. I grab mine from Costco when I'm making a big batch, but the regular supermarket chuck works too. Look for good marbling—the more fat, the more flavor. If you're using pre-cubed beef, skip the chopping step. The beans? Canned is fine—just drain and rinse them well. For the tomato paste, Trader Joe's has the best squeeze tubes—no mess, and it keeps forever. The onions and garlic are simple but essential—don't skip the browning step, that's where the smoky flavor starts.
No red wine? Extra beef broth with a splash of balsamic vinegar works in a pinch. The spices can be adjusted—if you like it hotter, add cayenne, milder? Skip the chili powder and use more cumin. Fresh oregano is ideal, but dried works at half the amount. For the beans, pinto beans can swap in for kidney beans if that's what you've got. The broth matters—low-sodium so you can control the salt. If you're using instant broth, dissolve it fully before adding to the pot. And trust me on the bay leaves—they add depth but disappear completely, so don't worry about removing them early.
This chili tastes even better the next day—honestly, that's when it shines. Keeps for 5 days in the fridge, freezes for 3 months. I always make a double batch because it disappears fast. Portion it into containers so you've got lunches sorted for the week. The aroma alone will have your whole house smelling like a family gathering. And if someone asks for leftovers? They're getting the good stuff—just reheat with a splash of water or broth.
Why You'll Love This Recipe
- One-Pot Magic: I swear by this recipe—just dump everything in one pot, let it simmer, and walk away. The chuck roast practically melts into tender chunks while the onions caramelize right in the pot, no extra pans needed.
- Deep, Rich Layers: That slow-cooked beef with the garlic and beans? It’s like a hug in a bowl. The onions get sweet and jammy, the beans soak up all the meaty flavor, and the spices—oh, the spices—build into something seriously addictive.
- Leftovers That Shine: Between us, this chili only gets better the next day. The flavors meld even more overnight, and it’s perfect for lunches or freezing. I’ve reheated portions for weeks without a single complaint.
- Budget-Friendly Feast: A whole roast and two cans of beans stretch across multiple meals, and it’s way cheaper than takeout. Plus, the chili’s hearty enough to fill up a crowd without breaking the bank—ideal for game days or family dinners.
Step-by-step instructions for grandma's chili recipe
Here's how to make this hearty chili that's been a pot luck favorite for generations.
Brown the Chuck Roast Beef
Heat a large Dutch oven over medium-high heat and add the 1 tablespoon olive oil. Once the oil shimmers, add the 2.5 lb chuck roast beef cut into 1-inch cubes, working in batches if needed. Don't overcrowd the pan—this ensures the meat browns properly instead of steaming.
Cook the beef for 8-10 minutes, stirring occasionally, until it develops a deep golden-brown crust. This step is crucial—it builds rich, meaty flavor that infuses the entire chili. Once browned, transfer the beef to a plate and set aside temporarily.
Sauté the Aromatics
In the same Dutch oven, add the 2 whole yellow onions diced small and cook for 5 minutes until they begin to soften and turn translucent. Add the 6 cloves garlic cloves that have been minced, and cook for another 30 seconds until fragrant.
I like to press the garlic into the onions as they cook—this helps release their flavors more thoroughly. If the onions start to stick, add a splash of beef broth to deglaze the pan. The goal is to create a flavorful base for the chili, so don't rush this step.
Build the Chili Base
Stir in the 2 tablespoons chili powder, 1 tablespoon ground cumin, 1 teaspoon dried oregano, 1.5 teaspoons salt, and 0.5 teaspoon black pepper. Let the spices toast in the pan for 30 seconds until you can smell their warm, earthy aromas.
Add the 0.5 cup tomato paste and stir vigorously to combine with the spices. Pour in the 0.5 cup red wine and scrape up any browned bits from the bottom of the pan—this is where all the flavor hides. Let the mixture simmer for 2 minutes until the wine reduces slightly and the tomato paste darkens.
Combine and Simmer
Return the browned beef to the Dutch oven. Add the 2 cans kidney beans, 1 can black beans, 3 cups beef broth, and 2 whole bay leaves. Stir everything together until well combined. Bring the mixture to a gentle boil, then reduce the heat to low.
Cover the Dutch oven and let the chili simmer for 2 hours, stirring occasionally. This slow cooking time allows all the flavors to meld together beautifully. If the chili gets too thick, add a splash more beef broth to keep it moist. The beans should be tender, and the beef should be fork-tender with no resistance.
Finish and Serve
Remove the 2 whole bay leaves before serving. Taste the chili and adjust the seasoning if needed—you might want to add a pinch more salt or a sprinkle of chili powder to suit your taste. Let the chili rest for 10 minutes off the heat before serving.
This chili tastes even better the next day as the flavors continue to develop. Serve it with crusty bread or cornbread to soak up all that delicious, smoky bean and meat goodness. The perfect pot luck dish that brings everyone to the table!
Pro Tips For Making Grandma'S Chili
- SEAR THE CHUCK ROAST: High heat. Seriously, crank it up until the beef browns deeply—those crusty bits dissolve into the chili and add richness. I used to rush this, and the chili always tasted flat. Now I take the extra 5 minutes, even if I’m impatient like you.
- SOAK BEANS OVERNIGHT: Skip the canned beans—soak kidney and black beans in water for at least 8 hours (or overnight). They’ll break down smoother and avoid that weird gummy texture. My grandmother swore by this, and she was right: the flavor’s deeper when you start fresh.
- LOW AND SLOW IS NON-NEGOTIABLE: After browning the meat, drop the heat to a simmer and let it cook uncovered for 2+ hours. Too much boiling turns the chili mushy and watery. I learned this the hard way—my first batch was a sad, thin soup.
- TOAST THE BEANS: Dry the drained beans in a skillet over medium heat for 2-3 minutes before adding them to the chili. The slight char adds nutty depth. Sounds weird, but it works—your chili will taste like it’s been simmering all day, not just an hour.
Troubleshooting this recipe
Meat Too Tough?
If your chuck roast ends up chewy rather than tender, you likely didn’t simmer it long enough. I’ve found that chuck roast needs at least 2 hours at a gentle boil to break down properly.
For extra tenderness, add 1 cup beef broth after the initial 2 hours and simmer another 30 minutes. The key is patience—don’t rush the cooking process. 💡
Chili Too Thin?
A watery chili usually means too much liquid was added. If this happens, remove the lid and simmer uncovered for 10-15 minutes to reduce the broth. For a thicker texture right away, mash ½ of the beans with a fork before adding them to the pot.
This releases starch that thickens the chili naturally. 🥄
Spices Too Mild?
If your chili lacks heat or depth, the spices likely weren’t toasted enough. Next time, let the chili powder and cumin bloom in the pan for 1 full minute before adding tomato paste.
For extra kick, stir in ½ teaspoon cayenne pepper or a pinch of smoked paprika during the last 30 minutes of cooking. 🌶️
Onions Too Raw?
If your onions taste raw or harsh, they weren’t cooked long enough. Always cook diced onions for at least 5-7 minutes until fully translucent. For deeper flavor, caramelize them first by cooking without stirring for 10 minutes until golden brown.
This step transforms their taste from sharp to sweet and mellow. 🧅
Broth Too Salty?
If your chili tastes overly salty, it’s likely from the broth or canned beans. Use low-sodium beef broth and rinse canned beans thoroughly before adding. To fix oversalted chili, stir in ½ cup unsalted tomato sauce or 1 cup extra beans to dilute the saltiness.
Avoid adding water—it thins the chili and makes it taste watered down. ⚖️
Beef Not Browned?
Pale beef means it didn’t develop a flavorful crust. Brown meat in batches over medium-high heat for 8-10 minutes, stirring only once or twice. If your pan is too crowded, the meat will steam instead of sear.
For best results, use a 12-inch cast iron skillet—it retains heat better than nonstick pans. 🥩
Nutrition facts
Frequently asked questions
Can I make this chili in a slow cooker?
Brown the beef first in a skillet, then transfer everything to your slow cooker. Cook on low for 6-7 hours or high for 3-4 hours. The slow cooker method actually enhances the tenderness of the beef and deepens the flavors. Just skip the final 10-minute rest since it won't be as thick.
What's the best way to store leftovers?
Let the chili cool completely, then store in an airtight container in the fridge for up to 5 days. For freezing, portion into individual servings and freeze for 3 months. Thaw overnight in the fridge—never microwave directly from frozen. The flavors actually improve after refrigeration!
Can I substitute chicken or turkey for the beef?
Yes, but use dark meat chicken thighs or ground turkey (93% lean or less). Brown the meat thoroughly first, as poultry cooks faster than beef. You may need to reduce simmering time to 1.5 hours to prevent drying out. The texture will be slightly different but still delicious.
How can I make this vegetarian?
Swap the beef for 1.5 cups lentils (cooked) or 2 cans extra beans. Add 1 tablespoon soy sauce or 1 teaspoon liquid smoke for depth. Use vegetable broth instead of beef broth. The chili will be heartier but still packed with flavor!
Why does my chili taste better the next day?
This happens because the flavors have time to meld together fully. The acids in the tomato paste and wine break down the meat fibers further, while the spices continue to bloom. The chili also thickens slightly as it cools, concentrating the flavors. Always make extra—it's the best part!