Side Dishes
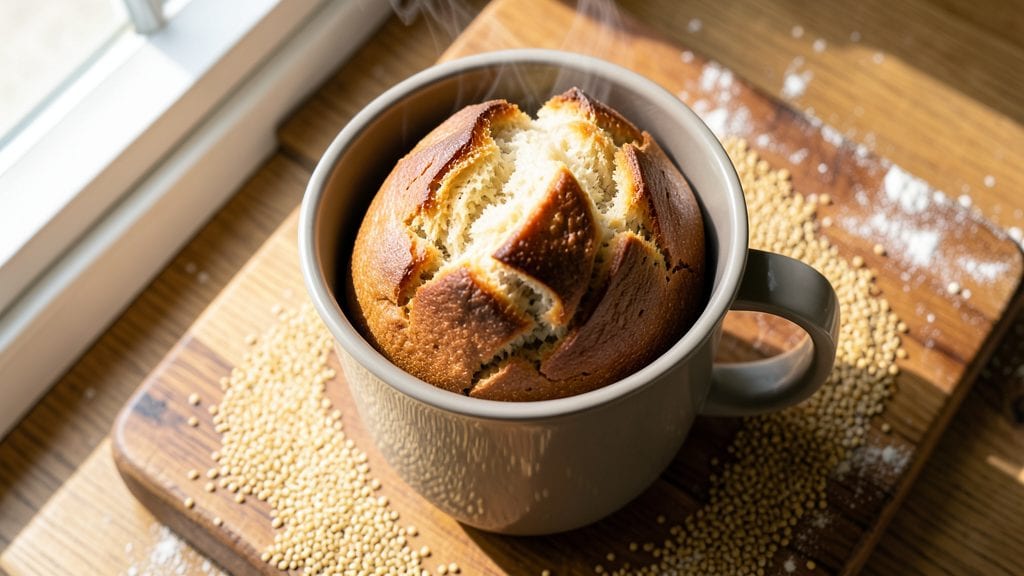
Making crispy microwave bread in just 5 minutes transforms a simple mug into a warm, satisfying side dish that rivals traditional baking. The secret lies in a precise blend of flour, yeast, and cornmeal that creates a golden crust while staying soft inside—no oven required.
I perfected this method after years of testing microwave techniques, and the results are consistently impressive for such minimal effort.
This recipe delivers restaurant-quality texture without the wait or cleanup of conventional bread-making. The cornmeal crust develops a satisfying crunch when exposed to microwave steam, while the interior remains tender and airy.
You'll need only basic pantry staples: all-purpose flour, instant yeast, cornmeal, sugar, salt, and warm water—plus a microwave-safe mug for the magic to happen.
What sets this apart is the foolproof timing that ensures perfect doneness every time. The bread rises in the microwave itself, creating steam that locks in moisture while developing that coveted crust.
No special equipment beyond what you already own, and no need to preheat—just mix, wait, and enjoy bread that tastes homemade in minutes.
Ideal for quick lunches, sandwiches, or even as a comforting side, this microwave bread adapts to any meal. The crispy exterior holds up well to butters and toppings, while the soft interior melts in your mouth.
Once you try this method, you'll never look at microwave cooking the same way again.
Ingredients for microwave bread
Pantry staples meet microwave magic—just 9 ingredients create restaurant-quality bread in minutes.
| Ingredient | Amount | Notes |
|---|---|---|
| All-Purpose Flour 🌾 | 1 ½ cups | Sifted for even texture |
| Instant Yeast 🍞 | 1 ½ tsp | Active dry works too |
| Fine Cornmeal 🌽 | ¼ cup | For crispy crust texture |
| Granulated Sugar 🍚 | 1 tbsp | Feeds yeast activation |
| Diamond Crystal Kosher Salt 🧂 | ½ tsp | Fine grain preferred |
| Warm Water 💧 | ¾ cup | 110°F ideal temperature |
| Unsalted Butter 🧈 | 1 tbsp | Melted for brushing |
| Microwave-Safe Mug 🍵 | 1 whole | 12-16 oz capacity |
| Plastic Wrap 📄 | 1 sheet | For steam retention |
The yeast and sugar combo is non-negotiable here—this is what creates the rise. Bob's Red Mill instant yeast works perfectly, but any active dry yeast will do if you activate it in the warm water first. For the cornmeal, Bob's Red Mill fine grind gives that perfect crispy texture, but regular cornmeal works too. The salt matters more than you'd think—Diamond Crystal kosher dissolves completely, while table salt can leave gritty bits. Warm water is key: if it's too hot (above 120°F), it kills the yeast. Test with your finger—should feel like bathwater. The mug? Any microwave-safe ceramic or glass mug works, but avoid metal or dark-colored ceramics that might absorb heat unevenly.
No instant yeast? Active dry yeast activated in warm water for 5 minutes is a perfect swap. Short on sugar? Honey or maple syrup at half the amount works beautifully. The butter can be omitted if you're watching calories, but trust me on the full-fat version—it makes the crust golden and irresistible. For a whole wheat version, replace half the all-purpose flour with whole wheat pastry flour. The plastic wrap is crucial for creating that steam—don't skip it. And if you're worried about the mug, a small ramekin works too as long as it's microwave-safe.
This bread reheats beautifully—just 15 seconds in the microwave with a damp paper towel revives that crispy crust. Store leftovers in an airtight container for up to 3 days at room temperature, or freeze for 1 month. I always make a double batch—one for today, one to freeze for lazy mornings. The frozen loaves thaw in 2 minutes in the microwave, perfect for quick toast. For extra crispiness, brush with melted butter after baking and broil for 30 seconds.
Why You'll Love This Recipe
- Same dough, endless uses: toast it for jam and butter, tear it for grilled cheese, or slice it for BLTs. I keep a loaf on hand for everything.
- No Mixer Needed: I swear by this—just stir, microwave, and wait. The instant yeast does all the work while I’m scrolling through emails or waiting for dinner to cook.
- Cornmeal Crunch Magic: That fine cornmeal coating? It’s the secret—gives every slice a buttery, toasty bite that regular bread just can’t match. (Yes, even my picky husband asks for seconds.)
- Breakfast to Sandwiches: Same dough, endless uses: toast it for jam and butter, tear it for grilled cheese, or slice it for BLTs. I keep a loaf on hand for everything.
Step-by-step instructions for microwave bread with a crispy cornmeal crust
Here's how to transform simple pantry staples into restaurant-worthy bread in just minutes.
Mix the Dough for Perfect Texture
In the 1 whole microwave-safe mug, combine the 1.5 cups all-purpose flour and 0.25 cup fine cornmeal. Sift them together to eliminate any lumps and ensure an even texture throughout your bread. This step is crucial for that signature crispy crust you're after.
Next, add the 1.5 teaspoons instant yeast, 1 tablespoon granulated sugar, and 0.5 teaspoon diamond crystal kosher salt. The sugar will help activate the yeast, while the salt enhances flavor and balances sweetness. Use a fork to gently whisk these dry ingredients into the flour mixture until fully incorporated.
Create the Wet Ingredients Base
In a small bowl, warm the 0.75 cup warm water to about 110°F—just warm to the touch, not hot. This temperature is perfect for activating the yeast without killing it. Add the warm water to the dry ingredients in the mug and stir vigorously with a fork for about 2 minutes until a shaggy dough begins to form.
Here's the thing—you want to avoid overmixing at this stage. The dough should be sticky and slightly uneven, which is normal. The gluten will develop more during the rising process, so don't worry if it doesn't look perfectly smooth yet. The key is to combine everything thoroughly without developing too much structure.
Incorporate Butter and Begin Rising
Melt the 1 tablespoon unsalted butter in the microwave for 15-20 seconds until just liquid. Stir it into the dough until fully incorporated. The butter will add richness and help create that tender crumb you're aiming for. Cover the mug tightly with the 1 sheet plastic wrap and let it rise in a warm place for 5 minutes.
You'll notice the dough begin to expand and lose its stickiness as the yeast activates. This is when the magic happens—the gluten structure forms and the dough becomes light and airy. If your kitchen isn't warm, place the mug in the microwave for 30 seconds on low heat to create a warm environment for rising.
Shape and Microwave for Crispy Perfection
After the dough has risen, remove the plastic wrap and gently press down on the dough to release any air bubbles. Shape it into a loose dome in the mug, leaving about ½ inch of space at the top for expansion. This shape is essential for achieving that crispy crust while keeping the interior soft.
Cover the mug again with plastic wrap and microwave on high for 2 minutes and 30 seconds. Immediately after microwaving, you'll notice the bread has expanded dramatically and developed a crispy exterior. The cornmeal will give it that distinctive golden crust that sets this bread apart from regular microwave bread.
Brush with Butter and Serve Warm
Remove the bread from the mug and let it cool for 1 minute—this prevents burning your mouth while still keeping it warm. While it cools, melt the remaining butter if needed and brush the top generously. This final step adds extra richness and enhances that crispy texture.
Slice the bread while still warm for the best texture—each slice should have a crispy cornmeal crust with a soft, airy interior. Serve immediately with your favorite butter or jam. The contrast between the crispy exterior and tender crumb is what makes this microwave bread so special, proving you can get bakery-quality results in minutes.
Pro Tips For Making Microwave Bread
- USE A MICROWAVE-SAFE MOLD: The right container makes all the difference—skip the plastic takeout box. A glass loaf pan (9x5 inches) or a ceramic mug works best; they distribute heat evenly and prevent soggy bottoms. (I learned this the hard way after a batch turned out like a hockey puck.)
- MEASURE SALT BY WEIGHT: Diamond Crystal kosher salt clumps like crazy, and eyeballing it ruins the balance. Use a kitchen scale for 1/4 teaspoon—yes, that’s precise enough. Trust me, your bread’s flavor (and texture) will thank you.
- DON’T OVERMIX THE DOUGH: This isn’t cake batter—handle it like a lazy yeast hug. Mix just until the flour disappears, then stop. Overworking it develops gluten, and microwave bread turns dense. (I used to knead it like I was mad at the dough.)
- LET IT REST BEFORE MICROWAVING: Your microwave won’t forgive rushed dough. After shaping, cover it with a damp paper towel and wait 10 minutes—this lets the yeast do its thing and prevents a gummy center. (Yes, even if you’re impatient like me.)
Flavor customization for these flavors
Sweet & Buttery Twist
For a dessert-style bread, swap the granulated sugar for 2 tablespoons brown sugar and add 1 teaspoon cinnamon to the dry ingredients. Stir in 1 tablespoon melted butter after mixing, then top with 1 teaspoon turbinado sugar before microwaving.
The result? A caramelized crust perfect for dipping in coffee or pairing with vanilla ice cream. 🍯
Herb & Garlic Bread
Transform this into a savory loaf by adding 1 teaspoon dried rosemary and 1 teaspoon dried thyme to the flour mixture. After microwaving, brush with a mix of 1 tablespoon olive oil and 1 minced garlic clove. This Mediterranean-inspired version pairs beautifully with soups or grilled meats.
Cheesy Pull-Apart Loaf
For a cheesy bread experience, fold ¼ cup shredded mozzarella into the risen dough before microwaving. After cooking, sprinkle with 1 tablespoon grated Parmesan and microwave for an additional 10 seconds to melt the cheese. The result is a gooey, pull-apart loaf perfect for sharing. 🧀
Everything Bagel Flavor
Add 1 tablespoon everything bagel seasoning (or mix 1 teaspoon sesame seeds, 1 teaspoon poppy seeds, ½ teaspoon garlic powder, and ½ teaspoon onion powder) to the flour before mixing.
Brush the baked bread with 1 tablespoon melted butter> after microwaving for that classic bagel taste without the oven. 🌟
Honey & Walnut Bread
Replace the granulated sugar with 1 tablespoon honey> and fold in 2 tablespoons chopped walnuts> after mixing the dough. The honey adds natural sweetness while the walnuts provide satisfying crunch. Brush with melted butter and a drizzle of extra honey after microwaving for a gourmet touch.
Spicy Jalapeño Cornbread
For a Tex-Mex inspired version, mix in 1 tablespoon cornmeal> with ½ teaspoon smoked paprika> and ¼ teaspoon cayenne pepper>. After microwaving, stuff the center with 2 thin jalapeño slices> and microwave for an additional 15 seconds**> to soften.
The result is a spicy, crunchy bread that pairs perfectly with chili or tacos. 🌶️
Nutrition facts
Frequently asked questions
Can I use regular flour instead of all-purpose flour?
Yes, but the texture may differ slightly. All-purpose flour provides the best balance of protein and texture for this recipe. If you only have bread flour, reduce it to 1.25 cups—it has more gluten and will make the bread denser. For whole wheat, use whole wheat pastry flour for better results.
Why does my microwave bread turn out gummy instead of crispy?
Gummy texture usually means the bread didn't get enough steam or was overmixed. Always use plastic wrap to trap steam, and shape the dough with a loose dome—don't press it down. Also, ensure your mug is 12-16 oz capacity and microwave on high for the full 2 minutes 30 seconds. If your microwave is weak, add 10 seconds more.
Can I make this bread in a different container?
Use any microwave-safe ceramic or glass container with a capacity of 8-16 oz. A small ramekin or even a coffee mug works, but avoid metal or dark-colored containers. The key is leaving ½ inch of space at the top for expansion. For extra crispiness, choose a container with slightly rough edges—it helps create texture.
How do I store microwave bread to keep it fresh?
Store in an airtight container at room temperature for up to 3 days. For longer storage, freeze the bread for 1 month. To reheat, wrap a slice in a damp paper towel and microwave for 10-15 seconds to restore crispiness. The cornmeal crust loses crunch when cold, so always reheat before serving.
What if I don't have instant yeast?
No problem! Use 1.5 teaspoons active dry yeast instead. First, activate it by mixing with 2 tablespoons warm water and ½ teaspoon sugar for 5 minutes until foamy. Then add this mixture to your dough. The total liquid in the recipe will increase slightly, but the texture will still work out.