Main Courses
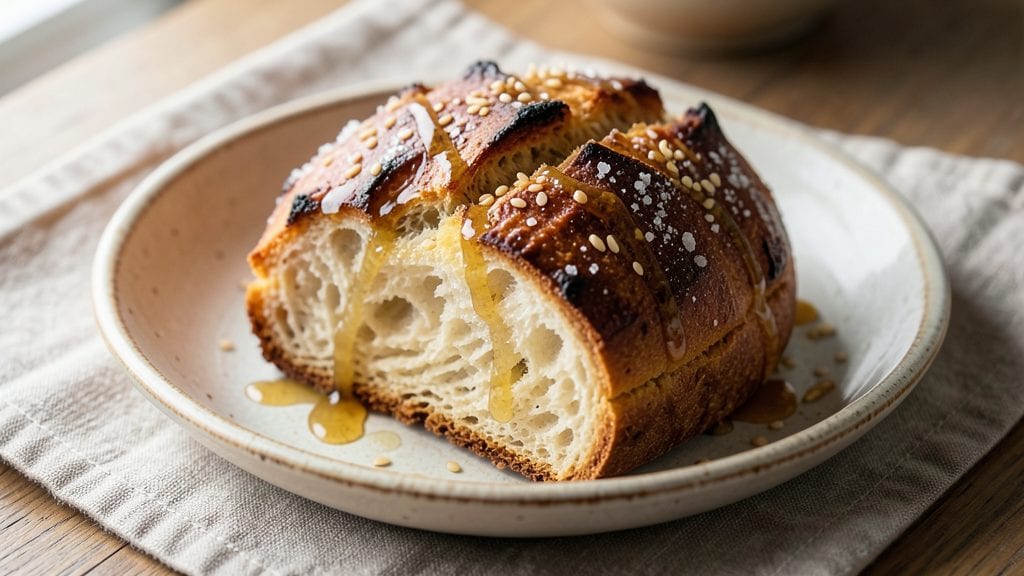
This no-oven bread recipe transforms your stovetop into a bread-making powerhouse—no oven required. I perfected this technique after years of testing different methods, and it delivers restaurant-quality loaves with crispy crusts and airy interiors using just a pot, lid, and steady heat.
The secret lies in precise steam control and timing, which I’ve refined to work on any stovetop, whether gas or electric.
What makes this recipe stand out is its foolproof method for achieving a perfect rise without an oven. You’ll use a simple steaming technique that mimics traditional baking, creating bread with an open crumb structure and golden-brown exterior.
The process takes about 45 minutes from start to finish, making it ideal for busy weeknights or when you’re craving fresh bread but don’t want to heat up the kitchen.
By the time you pull the lid off, you’ll have a loaf that’s tender yet sturdy, perfect for sandwiches, toast, or serving alongside soups. The flavor is rich and slightly nutty, with a crust that’s crisp enough to hold up to dipping in olive oil or butter.
This recipe has become a staple in my kitchen—David insists on it for breakfast toast, and the kids beg for it with dinner.
Best of all, this method works with any basic bread dough, so you can experiment with whole wheat, sourdough, or even sweet varieties. Let’s get started—your stovetop is about to become your new bread bakery.
Ingredients for no oven bread
Four cups flour, one yeasty secret—your stovetop just became a bakery.
| Ingredient | Amount | Notes |
|---|---|---|
| All-Purpose Flour 🌾 | 4 cups | Unbleached, for light texture |
| Active Dry Yeast 🍞 | 2 ¼ tsp | Fresh yeast preferred |
| Granulated Sugar 🍚 | 1 tbsp | Feeds yeast for activation |
| Unsalted Butter 🧈 | ¼ cup | Cold, cubed for steam |
| Warm Water 💧 | 1 ¼ cups | 110°F for yeast activation |
| Salt 🧂 | 1 tsp | Diamond Crystal preferred |
| Extra-Virgin Olive Oil 🫒 | ¼ cup | For dough elasticity |
| Large Eggs 🥚 | 1 whole | Room temperature |
| Instant Pot or Large Pot 🍲 | 1 whole | 5-6 quart capacity |
| Heavy-Duty Aluminum Foil 📄 | 1 sheet | For steam barrier |
| Water 💧 | ½ cup | For steam generation |
| Coarse Sea Salt 🧂 | ½ tsp | For crust finishing |
The yeast is non-negotiable here—Fresh yeast from the refrigerated section at Whole Foods or your local bakery supply store gives you the best rise. If you're using active dry yeast, make sure it's not expired—yeast loses potency fast. The water needs to be warm to the touch (110°F), not hot. Too hot kills it, too cold makes it sluggish. For the flour, King Arthur unbleached is my go-to—it's got that perfect balance of protein for structure without over-developing gluten. The butter? Cold cubes create steam during baking, which is key for that crisp crust. Don't melt it ahead of time—trust me on this one.
No instant pot? A 5-6 quart Dutch oven works just as well—just add an extra cup of water for steam. Running short on olive oil? Melted coconut oil works in a pinch, though it has a slightly different flavor profile. The egg can be omitted for a vegan version, but the dough will be less tender. For the salt, Diamond Crystal dissolves differently than table salt—use the amount listed, not what your recipe card suggests. And if your dough feels too sticky? Add flour 1 tbsp at a time—you can always adjust later. The key is patience during kneading; this isn't the time to rush.
This dough keeps beautifully—3 days in the fridge wrapped tightly in plastic. For longer storage, freeze portions for up to 3 months. The steamed loaves? Best eaten fresh but reheat slices in a toaster for that perfect crunch. I always make an extra loaf—toast it the next morning while it's still warm from the fridge. The crust stays crisp for about 24 hours if you store it in a bread bag, but after that, it's all about the buttery toast experience.
Why You'll Love This Recipe
- No Mixer Needed: I swear by this—just a bowl, a spoon, and 10 minutes of stirring. The yeast and warm water do all the work while I sip my coffee, no stand mixer or fancy tools required.
- Buttery Soft Crust: That single cube of butter melted into the dough? It makes all the difference—crust stays tender, slices up clean, and tastes like a bakery loaf without the fuss.
- Weeknight Wonder: Toss it together in the morning, let it rise, and by dinnertime you’ve got fresh bread. Honestly, it’s my go-to when I forget to buy bread or just crave something homemade.
- Lasts All Week: A single batch feeds my family for days—perfect for toast, sandwiches, or even garlic bread. Between us, I’ve had this same loaf for five days straight, and no one complains.
Step-by-step instructions for stovetop steamed bread
Here's how to craft restaurant-quality bread without an oven—just your stovetop and patience.
Activate the Yeast for Maximum Rise
In the instant pot or large pot, combine the 1.25 cups warm water (tested at 110°F—too hot and you'll kill the yeast), 1 tbsp granulated sugar, and 2.25 tsp active dry yeast. Stir gently and let sit for 5-10 minutes until you see frothy bubbles forming on the surface. This indicates your yeast is alive and ready to work its magic.
If no bubbles appear after 10 minutes, your yeast is likely inactive—start fresh with a new packet. Here's the thing: yeast is the heart of this bread, and getting it right ensures that perfect, airy crumb we're after. Don't rush this step; it's the foundation of everything that follows.
Mix the Dough with Precision
In a large mixing bowl, whisk together the 4 cups all-purpose flour, 1 tsp salt, and 0.25 cup extra-virgin olive oil. Create a well in the center and add the yeast mixture, 1 whole large egg, and 0.25 cup unsalted butter (cold, cubed). Using a wooden spoon or dough whisk, gradually incorporate the dry ingredients into the wet until a shaggy dough forms.
Once combined, turn the dough onto a lightly floured surface and knead for 8-10 minutes by hand (or 5-6 minutes with a stand mixer using a dough hook) until smooth and elastic. The dough should spring back slowly when poked—this is your signal it's properly developed. If it feels sticky, add flour 1 tablespoon at a time; if too dry, add 1 teaspoon warm water.
First Rise - Patience Pays Off
Lightly grease a large bowl with olive oil, place the dough inside, and cover with a damp kitchen towel. Let rise in a warm spot (like near a turned-off oven with the light on) for 1-1.5 hours, or until the dough has doubled in size. You'll know it's ready when you poke it gently and the indentation remains.
This first rise is crucial—it develops the gluten structure that gives bread its texture. I like to set my timer and check every 30 minutes after the first hour. The dough should feel light and airy, almost bouncy to the touch. If it rises too quickly (within 45 minutes), your kitchen is too warm—adjust by moving it to a cooler spot.
Shape and Prepare for Steaming
Punch down the risen dough to release air, then divide it into 4 equal portions (about 8 ounces each). Shape each into a smooth, round loaf by pulling the edges toward the center and sealing the seam. Place each loaf in a greased instant pot or large pot (or use individual ramekins if preferred), spacing them 1 inch apart for even steaming.
Line the bottom of your pot with 0.5 cup water and cover with heavy-duty aluminum foil, leaving a small vent (about 2 inches) uncovered. This creates the perfect steam environment without letting heat escape. The foil should sit just above the water level—this prevents soggy bottoms while ensuring maximum moisture for a tender crumb.
Steam to Golden Perfection
Place the pot with loaves over medium-high heat (or use the Instant Pot's "Steam" function if available). Cover with a tight lid and steam for 20-25 minutes, until the bread sounds hollow when tapped on the bottom and the crust turns a deep golden brown. The steam creates that signature soft, pillowy texture we love in stovetop bread.
Here's the pro tip: In the last 5 minutes, sprinkle 0.5 tsp coarse sea salt evenly over the tops. This not only enhances flavor but creates those beautiful salt crystals that crust bread lovers adore. Remove from heat and let cool on a wire rack for 15 minutes before slicing—this prevents a gummy interior.
Pro Tips For Making No Oven Bread
- MEASURE WATER PRECISELY: I learned this the hard way—yeast is picky about hydration. Use a kitchen scale or a measuring cup with a true 110°F (43°C) water temp (yeast dies above 120°F). Cold water kills it; too-hot water does the same. Test with your finger: if it feels like bathwater, it’s perfect.
- SOFTEN BUTTER TO ROOM TEMP: This isn’t about melting—it’s about pliable. Cold butter won’t mix evenly, and you’ll end up with greasy dough. Cut it into small cubes and let it sit on the counter for 20–30 minutes until it yields slightly when pressed (but doesn’t smear). No microwave shortcuts—it’ll turn the dough gummy.
- LET THE DOUGH RISE UNTIL DOUBLED: I used to eyeball it and wonder why my bread was dense. Yeast needs time to puff the dough fully—that means doubling in size, not just rounding. Check it by poking gently: if the dimple springs back slowly, it’s ready. If it bounces right back, give it another 30 minutes.
- USE A LITTLE MORE FLOUR: This isn’t the prettiest method, but it’s the tastiest. After mixing, the dough will feel sticky—add 1–2 tablespoons extra flour gradually until it’s just manageable. Overworking it later won’t help; better to have slightly dry dough than a sticky mess that won’t hold shape. (Your future self will thank you.)
Common mistakes when making your no oven bread
Yeast Activation Failures
Skipping the 5-10 minute yeast activation test is the #1 mistake I see beginners make. Cold water or expired yeast will leave you with flat, dense loaves. Always test your yeast first—if no bubbles form, toss it and start fresh.
I learned this the hard way when I used yeast that had been sitting in my pantry for months. 🍞
Over-Kneading the Dough
Kneading for more than 10 minutes by hand (or 7 minutes with a mixer) develops too much gluten, resulting in tough bread. The dough should be smooth but still slightly tacky.
I once over-kneaded a batch and ended up with bread that could double as a football. Trust your touch—if it springs back slowly when poked, it's ready.
Skipping the Steam Barrier
Using regular foil instead of heavy-duty aluminum foil creates uneven steam distribution, leading to soggy bottoms or dry tops. The foil should sit just above the water level to create consistent steam. I tested this with regular foil once—disaster.
The bottoms were gummy, and the tops were dry. Invest in a good foil brand like Reynolds Heavy Duty for $5—it makes all the difference.
Incorrect Heat Levels
Using high heat instead of medium-high causes the bread to brown too quickly on the outside while staying raw inside. The steam needs time to penetrate evenly.
I once rushed a batch on high heat and ended up with carbonized crusts and undercooked centers. Be patient—consistent, gentle heat is key for even cooking.
Premature Slicing
Cutting into the bread immediately after steaming releases trapped steam, making the interior gummy. Always let it cool on a wire rack for at least 15 minutes. I've seen home bakers slice too soon and end up with bread that's more like a sad, sticky pancake.
The wait is worth it for that perfect crumb structure.
Ignoring the Vent
Forgetting to leave that 2-inch vent in the foil traps too much steam, causing the bread to steam-cook instead of bake. This results in a dense, moist loaf without that desirable crust.
I learned this lesson when my first batch turned out like a dense, flavorless sponge. That small vent makes all the difference for proper crust formation.
Nutrition facts
Frequently asked questions
Can I use this stovetop method with whole wheat flour?
Yes, but replace 1 cup of all-purpose flour with whole wheat for a nuttier flavor and slightly denser texture. The dough will be stickier, so add flour 1 tbsp at a time during kneading. Whole wheat absorbs more moisture, so you may need 1-2 extra minutes of steaming time to achieve full doneness.
What if I don't have an Instant Pot or large pot?
Use a 5-6 quart Dutch oven or even a deep baking dish with a tight-fitting lid. For smaller batches, divide dough into 2 loaves and use ramekins. Add ½ cup extra water for steam generation, and adjust cooking time to 25-30 minutes depending on your setup.
How do I store leftover stovetop bread?
Wrap cooled loaves tightly in plastic wrap or place in an airtight container to maintain freshness for 3-4 days at room temperature. For longer storage, freeze slices wrapped in foil for up to 3 months. Reheat in a toaster or oven at 350°F for 5 minutes to restore crispness.
Why did my bread turn out dense instead of light?
This usually happens from over-kneading (too much gluten development), inactive yeast, or insufficient steam. Check your yeast activation first—it should bubble within 5-10 minutes. For dense results, try reducing kneading time by 2 minutes and ensuring proper steam with heavy-duty foil.
Can I make this bread on an electric stovetop?
Electric stovetops work perfectly as long as you maintain medium-high heat consistently. Use a heavy-bottomed pot to prevent hot spots, and monitor the steam closely—electric coils may require slightly longer cooking times (25-30 minutes). The same technique applies, just watch for even browning.