
Breakfast & Brunch
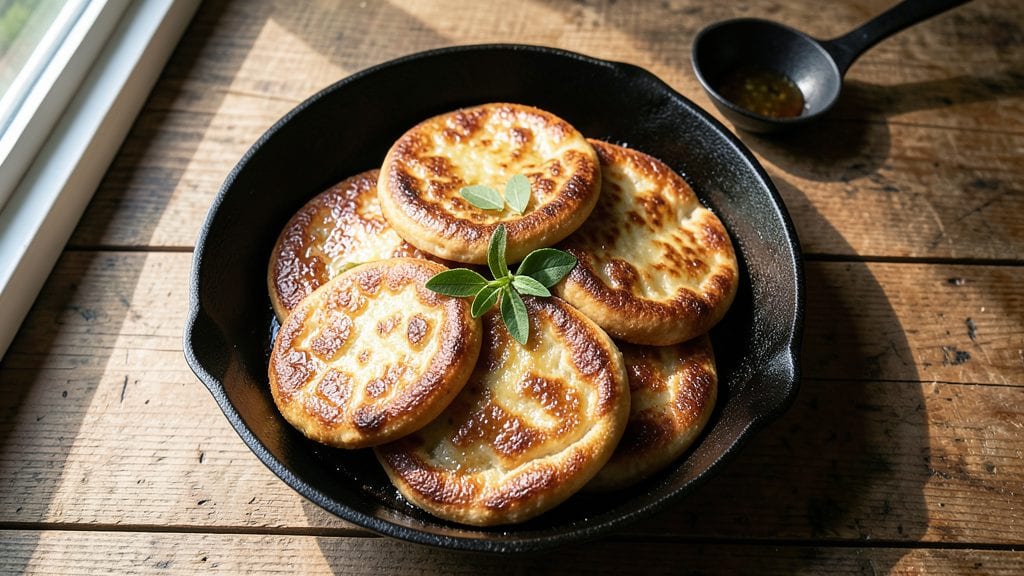
This Arizona fry bread recipe brings the rich traditions of Native American cuisine to your kitchen with its signature crispy texture and golden-brown edges. The combination of flour, lard, and baking powder creates a dough that transforms into a delicate, flaky delight when fried to perfection.
I first discovered this recipe during a visit to the Navajo Nation, where it's served as both a traditional food and a modern comfort dish.
The key to achieving that ideal crispy exterior and tender interior lies in the frying technique—using enough lard to create steam while cooking, then reducing the heat slightly to finish. This method ensures every bite delivers that satisfying crunch without compromising the soft center.
The dough itself is simple, requiring just five basic ingredients, making it accessible for home cooks of all skill levels.
Once fried, these golden rounds become a canvas for sweet or savory toppings—think honey drizzled over powdered sugar, jam swirled into warm dough, or even a sprinkle of cinnamon for extra warmth.
The versatility of fry bread makes it perfect for breakfast, dessert, or even a hearty snack when paired with refried beans or honey butter.
What makes this recipe special is its cultural significance, serving as both a staple food and a symbol of resilience and tradition.
Whether you're recreating a family recipe or exploring Native American cuisine for the first time, this fry bread delivers restaurant-quality results with a touch of history in every bite.
Ingredients for arizona fry bread
Five simple ingredients transform into golden fry bread with crispy edges and tender centers.
| Ingredient | Amount | Notes |
|---|---|---|
| All-Purpose Flour 🌾 | 2 cups | Sifted for light texture |
| Lard 🧈 | ½ cup | Leaf or leaf lard preferred |
| Baking Powder 🍞 | 1 tbsp | Aluminum-free for best rise |
| Salt 🧂 | ½ tsp | Fine sea salt preferred |
| Water 💧 | ¾ cup | Room temperature |
| Vegetable Oil 🫒 | 3 cups | For frying, high smoke point |
| Powdered Sugar 🍚 | ¼ cup | For serving, optional |
| Honey 🍯 | ¼ cup | Wildflower preferred |
| Cinnamon 🌿 | ½ tsp | Ground, optional topping |
The lard is non-negotiable here—it's what creates that signature steam during frying for that perfect crispy texture. Leaf lard from Whole Foods or specialty butchers is ideal, but regular lard works fine in a pinch. Sift the flour and baking powder together to avoid lumps, and make sure your baking powder is fresh (test it by mixing with water—it should bubble). The salt enhances flavor without overpowering, so use fine sea salt for even distribution. Room-temperature water helps the dough come together smoothly without overmixing.
No lard? Shortening or butter can substitute, though the texture will differ slightly—shortening gets closest. Running out of baking powder? Baking soda plus cream of tartar at half the amount works, but the flavor won't be identical. For the toppings, Trader Joe's powdered sugar is my go-to—it's finer and sweeter than store brands. Honey adds depth, but maple syrup works beautifully too. If you're serving this traditionally, consider adding a sprinkle of cinnamon-sugar mix for that classic Navajo touch—just don't skip the honey drizzle, it's essential.
This dough keeps covered in the fridge for 2 days, though it's best used fresh for optimal texture. For frying, maintain the oil at 350°F—too hot and it burns, too cool and it soaks up grease. Fry in batches to avoid overcrowding, and keep the fried bread warm in a 200°F oven while you finish the batch. Leftover fry bread reheats best in a skillet over medium heat for about 30 seconds per side—it's even better the second time around.
Why You'll Love This Recipe
- Five-Ingredient Magic: I swear by this list—flour, lard, baking powder, salt, and water. That’s it. No fancy substitutions, no hunting for obscure spices. The dough comes together faster than you can say "deep fryer," and honestly? It’s the kind of recipe that makes me feel like a baking genius when I’m really just mixing and frying.
- Crispy-Creamy Obsession: The secret’s in the lard—it gives that unmatched golden crust while keeping the inside pillowy soft. First bite? That’s the moment I realize I’ve made enough for seconds. (Yes, even on a Tuesday night.) The baking powder does all the work while you’re busy doing whatever else life throws at you.
- Breakfast to Dessert: Same dough, endless possibilities. Serve it plain for breakfast with honey or jam, or pile it high with scrambled eggs and bacon. Need a quick dinner? Stuff it with beans, cheese, and salsa—suddenly, you’ve got a crowd-pleasing meal. My kids beg for it at 7 a.m. and again at 7 p.m.
- Budget-Friendly Staple: A single batch costs pennies and stretches for days. Freeze the extras—no fancy packaging, just a bag in the freezer—and reheat in seconds. I’ll be real: this is my go-to when grocery money’s tight, but somehow, it still feels like a treat. The best kind of practical recipe, if you ask me.
Step-by-step instructions for Arizona fry bread
Here's how to achieve that perfect golden-brown, crispy exterior with a tender interior every time.
Mix the Dough for Light, Airy Texture
In a large mixing bowl, combine the 2 cups all-purpose flour, 1 tablespoon baking powder, and ½ teaspoon salt. Sift the dry ingredients together to eliminate any lumps and create a fine, aerated base for your fry bread.
Next, cut the ½ cup lard into small pieces and rub it between your fingers to soften it slightly. Add the lard to the dry ingredients and use a pastry cutter or your fingers to work it into the flour until the mixture resembles coarse crumbs with pea-sized lard pieces remaining. This creates pockets that will create steam during frying, ensuring a light interior.
Make a well in the center and gradually add the ¾ cup room-temperature water. Mix gently with a wooden spoon or your hands until the dough just comes together—it should be slightly sticky but not wet. Avoid overmixing to prevent tough bread. The dough should hold together when pressed but still feel soft and pliable.
Shape the Dough into Classic Fry Bread
Turn the dough out onto a lightly floured surface and knead it gently just 2-3 times to form a smooth ball. Divide the dough into 4 equal portions (about 4 ounces each) and roll each portion into a ball.
Flatten each ball into a ½-inch thick circle using your hands or a rolling pin. The edges should be slightly thicker than the center—this creates that signature puffed, irregular shape when fried. Keep the remaining dough covered with a damp towel while you shape the others to prevent drying.
Here's the key: don't press too hard when flattening. You want gentle pressure that creates surface tension—this helps the bread puff dramatically when it hits the hot oil. The dough should spring back slightly when you press your finger into it.
Fry to Golden-Brown Perfection
Heat 3 cups vegetable oil in a large skillet over medium-high heat until it reaches 350°F. Use a deep-fry thermometer to monitor the temperature—this is critical for even cooking without burning. The oil should shimmer gently but not smoke excessively.
Carefully place one dough circle into the hot oil. The bread will immediately begin to puff and rise. Fry for 1 minute 30 seconds per side, turning carefully with a slotted spatula, until the bread reaches a deep golden brown color. You'll see the edges become crispy while the center remains soft and pillowy.
Remove the fried bread to a paper towel-lined plate to drain excess oil. Repeat with the remaining dough circles, maintaining the 350°F oil temperature between batches. If the oil temperature drops below 340°F, let it recover before adding more bread—this prevents soggy centers.
Serve Warm with Classic Toppings
Serve the fry bread immediately while still hot and crispy. For an authentic Arizona experience, brush the warm bread with a mixture of ¼ cup honey and ¼ cup powdered sugar while still hot. The heat will melt the honey slightly, creating a sticky glaze that caramelizes beautifully.
Sprinkle with ½ teaspoon ground cinnamon and serve with additional honey for dipping. The contrast of crispy exterior with soft interior and sweet glaze makes this a perfect balance of textures. For extra richness, add a dollop of whipped cream or a scoop of vanilla ice cream.
This fry bread should be served immediately—it loses its crispness as it cools. The exterior should be able to hold its shape when stacked, while the interior remains tender enough to pull apart with your fingers. Each bite should deliver that satisfying crunch followed by a warm, fluffy finish.
Pro Tips For Making Arizona Fry Bread
- Use Cold Lard: I learned this the hard way—warm or melted lard makes the dough greasy and hard to handle. Keep it chilled until you mix it in, then cut it into small cubes so it melts just enough to coat the flour without turning the dough into a sticky mess.
- Mix Just Until Combined: Overworking the dough kills the baking powder and makes the bread dense. Stir the wet ingredients into the dry until barely combined—lumps are fine. The moment you see a shaggy dough form, stop.
- Fry in Small Batches: Crowding the pan drops the oil temperature and steams the bread instead of frying it. Work in batches of 2-3 pieces, and resist the urge to flip too soon—wait until the edges are golden and the underside releases easily.
- Salt the Oil: A pinch of salt in the hot lard (about ¼ teaspoon per batch) crisps the bread faster and keeps it from turning soggy. It’s a tiny detail, but it makes a real difference in texture—trust me, I’ve tried both ways.
Troubleshooting this recipe
Dough Too Sticky
If your dough feels too sticky to handle, you've likely added too much water. The ideal consistency should be soft but not wet—it should gather into a ball when pressed. To fix this, add 1-2 tablespoons more flour at a time until the dough becomes more manageable.
I've found that using King Arthur all-purpose flour absorbs slightly more moisture than other brands, so adjust accordingly. If the dough cracks when shaping, it needs a little more water—just 1 teaspoon at a time. 💫
Oil Temperature Issues
Fry bread requires precise oil temperature—too hot and it burns, too cool and it soaks up grease. If your bread comes out greasy, your oil is too cool (340°F or lower). Let the oil recover to 350°F before adding more dough.
For accurate readings, I recommend the Thermoworks Thermapen—it's worth the investment. If the oil smokes excessively, it's too hot; reduce heat slightly and let it stabilize. Never exceed 375°F or you'll burn the exterior before the interior cooks.
Uneven Puffing
For that dramatic puff, your dough needs proper surface tension. If your bread puffs unevenly or collapses, you may have overworked the dough or pressed too hard when flattening. Shape each piece gently—just enough to create a ½-inch thick circle with slightly thicker edges.
Cover the dough with a damp towel while shaping to prevent drying, which can also cause uneven puffing. The key is patience: let the bread rise naturally in the hot oil without forcing it.
Soggy Centers
Soggy fry bread usually means undercooked centers or oil that's too cool. Maintain oil at 350°F and fry for the full 1 minute 30 seconds per side. If your bread feels undercooked, increase frying time by 15 seconds per side until the interior reaches 190°F (use an instant-read thermometer).
Another common cause is overcrowding the pan—fry in batches to maintain proper oil temperature. I keep my fried bread warm in a 200°F oven while finishing the batch to prevent cooling too quickly.
Dough Not Rising
If your fry bread stays flat instead of puffing, your baking powder may be old or expired. Test freshness by mixing 1 teaspoon baking powder with 3 tablespoons hot water—it should bubble vigorously.
Replace if it doesn't. Also check that your lard is properly incorporated—it should create pea-sized pockets in the dough. For extra lift, I sometimes add ½ teaspoon apple cider vinegar to the water, which reacts with the baking powder for enhanced rise.
Avoid using baking soda alone—it creates a metallic taste.
Burning Exteriors
Burnt edges happen when oil is too hot or bread sits too long in the pan. Maintain oil at 350°F and fry only until golden brown—about 1 minute 30 seconds per side. Remove bread immediately when edges crisp, even if the center seems underdone.
If your pan is too small, the bread can't circulate properly, leading to uneven cooking. For best results, use a 12-inch cast iron skillet—it distributes heat evenly and maintains temperature better than nonstick pans. 🔥
Nutrition facts
Frequently asked questions
Why does traditional Arizona fry bread use lard instead of butter or oil?
The lard creates steam during frying, giving that signature crispy exterior while keeping the interior tender. It also adds a rich, authentic flavor that butter or vegetable oil can't replicate. For a lighter option, try shortening—it works almost as well while being slightly healthier.
Can I make this recipe without a deep-fry thermometer?
Yes! Test the oil by dropping a small piece of dough in—if it sizzles and turns golden in 1 minute 30 seconds, it's ready. The oil should shimmer but not smoke excessively. For best results, maintain 350°F by adjusting heat between batches. A 12-inch cast iron skillet helps maintain consistent temperature.
What are some savory toppings besides sweet ones?
Try refried beans with melted cheese, scrambled eggs with salsa, or even pulled pork for a hearty breakfast. For a Navajo-inspired twist, sprinkle with powdered sugar and cinnamon first, then add a dollop of whipped cream. The crispy edges pair perfectly with savory fillings!
How do I store leftover fry bread?
Keep it in an airtight container at room temperature for 2 days or freeze for up to 3 months. Reheat in a skillet over medium heat for 30 seconds per side—it reheats beautifully! For extra crispiness, toast in the oven at 375°F for 5 minutes.
Is this recipe gluten-free?
No, this traditional recipe uses all-purpose flour. For a gluten-free version, substitute with a 1:1 gluten-free flour blend (like Bob's Red Mill) and add ½ teaspoon xanthan gum. Expect slightly denser texture—gluten-free dough doesn't puff as dramatically.