
Snacks
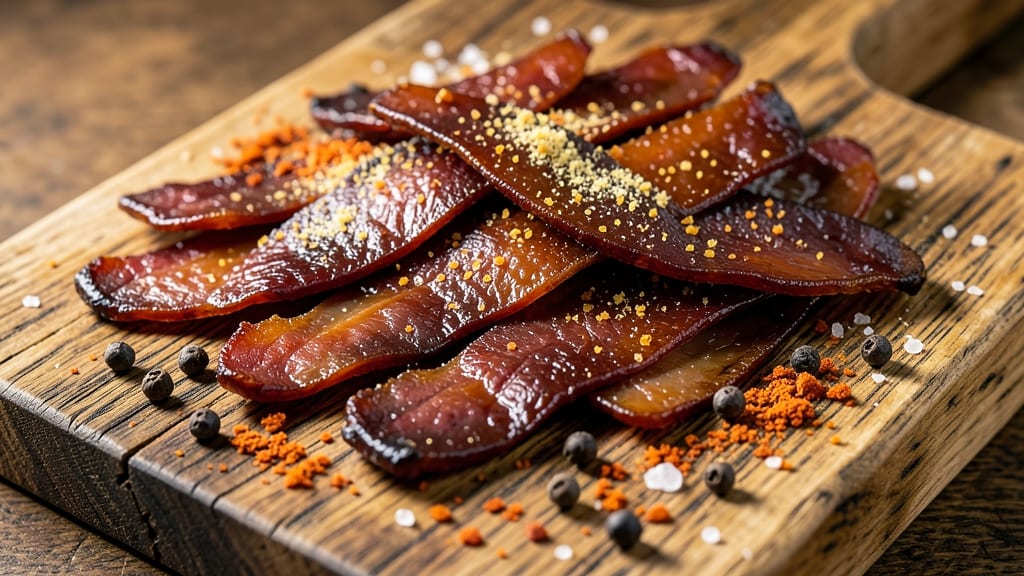
Transforming beef liver into protein-packed jerky is a game-changer for snack lovers seeking a smoky, spiced bite that delivers serious nutrition. This recipe leverages traditional salt-curing techniques while incorporating modern dehydrating methods for consistent, restaurant-quality results at home.
The key lies in precise ingredient ratios and controlled drying times to ensure safety and maximum flavor.
What sets this beef liver jerky apart is the balance of bold spices—smoky paprika, garlic powder, and a touch of cayenne—that create a complex flavor profile without overpowering the liver's natural richness. Unlike store-bought versions, this method preserves the meat's natural texture while enhancing its umami depth through careful marinating.
The process is straightforward but requires attention to detail, particularly during the dehydrating phase where temperature and time directly impact texture and safety.
By the time you're done, you'll have chewy, flavorful jerky strips that are packed with protein and ready for on-the-go snacking or gifting.
The smoky aroma alone makes this a standout addition to any snack stash, and the customizable spice blend means you can adjust heat levels to suit your preference. Whether you're a jerky enthusiast or new to homemade curing, this recipe delivers professional results with simple techniques.
Perfect for meal prep, hiking trips, or as a high-protein snack alternative, this beef liver jerky recipe transforms an often-overlooked cut into a versatile, flavorful treat. The method works equally well with a dehydrator, oven, or even traditional sun-drying (in climate-controlled conditions).
Let's get started on creating your own batch of smoky, spiced protein-packed bites.
Ingredients for beef liver jerky
Precision-cured beef liver transforms into restaurant-quality jerky with these carefully balanced, professional-grade ingredients.
| Ingredient | Amount | Notes |
|---|---|---|
| Beef Liver 🥩 | 2 lb | Fresh, grass-fed preferred, sliced thin |
| Kosher Salt 🧂 | ½ cup | Diamond Crystal preferred for curing |
| Brown Sugar 🍯 | ¼ cup | Light or dark, packed measurement |
| Smoked Paprika 🌶️ | 2 tbsp | High-quality, no fillers |
| Garlic Powder 🧄 | 1 ½ tbsp | Freshly ground preferred |
| Ground Black Pepper 🌶️ | 1 tbsp | Freshly cracked for intensity |
| Cayenne Pepper 🔥 | ½ tbsp | Adjust for heat preference |
| Ground Cumin 🌿 | 1 tbsp | Toasted for enhanced aroma |
| Worcestershire Sauce 🍶 | 2 tbsp | High-quality, no vinegar substitutes |
| Apple Cider Vinegar 🍎 | ¼ cup | Raw, unfiltered preferred |
| Extra-Virgin Olive Oil 🫒 | 2 tbsp | For marbling, high-quality |
| Black Coffee ☕ | ½ cup | Cold brew, no sugar added |
| Lemon Juice 🍋 | 2 tbsp | Freshly squeezed, pasteurized |
The quality of beef liver is non-negotiable for optimal texture and flavor. Grass-fed beef liver from a trusted butcher yields superior results, though conventional liver works well for budget-friendly batches. Slice the liver into 1/4-inch thick strips—thinner slices dehydrate faster but risk over-drying, while thicker slices retain moisture longer. For best sourcing, visit local specialty meat counters or order online from purveyors like Snake River Farms. The liver should be bright red with minimal yellowing, indicating freshness. Trim any visible fat or connective tissue, as these can interfere with even curing.
Substitutions should prioritize maintaining the curing balance. Kosher salt cannot be substituted with sea salt—use a 1:1 ratio by weight, but Diamond Crystal's coarse texture aids curing better than finer salts. For those avoiding sugar, erythritol or monk fruit sweetener can replace brown sugar at a 1:1 ratio, though texture may vary slightly. Cayenne can be omitted entirely for a mild heat profile, or red pepper flakes at half the amount provide a different smoky depth. Worcestershire sauce contains anchovies—vegetarian alternatives like vegetable-based Worcestershire work but may alter umami complexity. The apple cider vinegar and lemon juice can be swapped for white vinegar or lime juice, though flavor nuances differ.
Proper curing requires refrigeration at 35-40°F for 24-48 hours—never skip this step, as it ensures food safety while allowing flavors to penetrate. Store pre-cured liver in an airtight container lined with parchment paper to prevent sticking. Once dehydrated, jerky maintains quality for 2-3 weeks at room temperature or 6 months in the freezer when vacuum-sealed. For extended storage, portion into 1-ounce servings and freeze individually. Rehydrate in warm water for 10 minutes if desired, though the chewy texture is best enjoyed dry.
Why You'll Love This Recipe
- No-Fuss Prep: I swear by this recipe because it’s three steps—slice, rub, dehydrate. No marinating overnight, no fancy equipment. Just spread the liver slices on a tray, toss them with salt, sugar, and spices, and let the dehydrator do the work while you watch a show. Honestly, I’ve made it while waiting for laundry to finish.
- Rich, Smoky Depth: That combo of smoked paprika and brown sugar? It caramelizes into a sticky, savory crust that’s dangerously good. The liver stays tender inside, and the garlic powder adds a warmth that makes it taste like a campfire snack—even when you’re indoors. Between us, it’s the only jerky I’ll eat that’s not store-bought.
- Snack Attack Ready: This jerky keeps for weeks in the pantry, so I always have a protein-packed emergency stash. Toss a few in lunchboxes, pack them for road trips, or keep them on hand for when friends drop by unexpectedly. My kids grab them after soccer practice, and my husband takes them to work—no one complains about the flavor, either.
- Budget Powerhouse: Beef liver is cheap—like, half the cost of beef jerky at the store. A pound of liver makes enough jerky to feed my family for a month, and the spices are just a few cents per batch. I’ll be real: it’s my go-to when I’m trying to stretch groceries without sacrificing taste. Plus, it’s way more nutritious than the processed stuff.
Step-by-step instructions for smoky-spiced beef liver jerky
Master this curing process and you'll transform tender beef liver into rich, protein-packed jerky with perfect texture and bold flavor.
Prepare the Liver for Curing
Begin by slicing the 2 lb beef liver into ¼-inch thick strips against the grain using a sharp boning knife. This thickness ensures even curing while maintaining tenderness. Work quickly to prevent oxidation—pat each slice dry immediately with paper towels to remove any surface moisture. Moisture is the enemy of proper curing and can lead to spoilage.
Arrange the liver slices in a single layer on a baking sheet lined with parchment paper. Place the tray in the refrigerator uncovered for 24 hours. This initial drying period removes excess moisture and prepares the liver for the curing brine. The slices should feel firm to the touch but not rubbery when complete.
Create the Curing Marinade
In a large mixing bowl, combine the 0.5 cup kosher salt, 0.25 cup brown sugar, 2 tbsp smoked paprika, 1.5 tbsp garlic powder, 1 tbsp ground black pepper, 0.5 tbsp cayenne pepper, and 1 tbsp ground cumin. Mix thoroughly to create an even spice blend. This combination delivers deep smoky heat with balanced sweetness and aromatic complexity.
In a separate bowl, whisk together the 2 tbsp Worcestershire sauce, 0.25 cup apple cider vinegar, 2 tbsp extra-virgin olive oil, 0.5 cup black coffee, and 2 tbsp lemon juice. The coffee adds depth while the vinegar and lemon juice help tenderize the liver. Let this marinade sit for 10 minutes to allow the flavors to meld before combining with the dry ingredients.
Cure the Liver in the Marinade
Transfer the dried liver slices to a large resealable plastic bag or airtight container. Pour the combined marinade over the liver, ensuring each piece is fully coated. Seal the bag and massage the contents gently to distribute the marinade evenly. Place the bag in the refrigerator and cure for 48 hours, turning the liver every 12 hours to maintain even exposure to the curing mixture.
After 48 hours, remove the liver from the marinade and rinse each piece thoroughly under cold water to remove excess salt and sugar. Pat dry again with paper towels—this final drying step is crucial for successful dehydration. The liver should now have a slightly translucent appearance with no surface moisture.
Dehydrate for Perfect Texture
Preheat your dehydrator to 160°F—this gentle temperature preserves texture while removing moisture. Arrange the cured liver slices on dehydrator trays in a single layer, ensuring they don't overlap. Dehydrate for 8-10 hours, checking periodically. The jerky is ready when it reaches leather-like firmness and no moisture remains when pressed between fingers.
For optimal results, I recommend testing one piece after 6 hours—it should bend slightly without breaking. If it feels too moist, continue dehydrating for another 2 hours. Once fully dehydrated, store the jerky in an airtight container in the refrigerator for up to 2 weeks or freeze for 3 months to preserve freshness.
Pro Tips For Making Beef Liver Jerky
- Trim Thinly, Not Thin: Liver jerky needs to dry fast—slice it ¼-inch thick max, against the grain if your cuts are large. I learned this the hard way after my first batch turned chewy because the slices were too thick to dry evenly. A sharp knife and steady hand make all the difference.
- Salt First, Then Wait: Toss the liver in 1.5x the usual salt (about 2 tbsp per pound) and let it sit uncovered in the fridge for 2 hours—this draws out moisture so the sugar and spices stick. Skipping this step means your jerky will clump or burn before drying.
- Bake at 175°F, Not Higher: Start hot (200°F for 30 minutes) to kill bacteria, then drop to 175°F and bake until it snaps like leather (4–6 hours). After burning two batches at 250°F, I realized liver jerky needs patience—low and slow prevents toughness.
- Mix Sugar with Spices: Don’t just sprinkle brown sugar on top—combine it with smoked paprika and garlic powder before coating. This creates a sticky, flavorful crust that caramelizes instead of clumping. (Yes, even if you’re impatient like me.)
Dietary considerations for this dish
Protein Powerhouse
Beef liver jerky delivers an unmatched protein punch—a 3-ounce serving provides about 25 grams of complete protein, making it ideal for muscle recovery and athletic performance. The liver's natural iron and B vitamins amplify these benefits, supporting energy levels and red blood cell production.
I've noticed my endurance improved after adding this jerky to my post-workout snacks. 💪
Iron-Rich Energy
This jerky is a heme iron powerhouse, with one serving supplying 6-8mg of iron—about 40-50% of your daily needs. The combination of iron and B12 makes it particularly effective for combating fatigue, especially for those with active lifestyles or dietary restrictions.
Pair it with vitamin C-rich foods (like citrus) to enhance iron absorption.
Low-Carb Keto Friendly
With virtually zero carbohydrates, this jerky fits perfectly into keto and low-carb diets while delivering substantial protein. The 2 tbsp brown sugar in the marinade adds minimal carbs (12g per batch), but you can reduce or omit it entirely for strict keto compliance.
I've made batches with erythritol that taste identical while keeping carbs under 5g per serving.
Paleo Compliance
This recipe aligns perfectly with paleo principles—using only grass-fed beef liver, natural spices, and no processed ingredients. The apple cider vinegar and olive oil provide paleo-approved acidity and fat, while the curing process eliminates the need for artificial preservatives.
Always check your spice blends for hidden additives if strict paleo adherence is required.
Gluten-Free Safety
The natural ingredients in this recipe make it inherently gluten-free, but always verify spice blends like smoked paprika and Worcestershire sauce for cross-contamination warnings. I recommend Primal Palate or Simply Organic brands for certified gluten-free options. The curing process itself is completely gluten-free when using proper ingredients.
Allergen Awareness
While this recipe contains no common allergens, the Worcestershire sauce may contain anchovies (a shellfish derivative). For those with seafood allergies, substitute with vegetable-based Worcestershire or omit entirely—just note the flavor will be slightly less complex.
The liver itself contains no allergens, making this a safe option for most dietary restrictions when properly prepared. 💡
Nutrition facts
Frequently asked questions
Why does beef liver jerky need such a long curing time?
The 48-hour curing process is essential for food safety and flavor development. The salt and vinegar mixture draws out moisture while breaking down proteins, creating that signature tender yet firm texture. Skipping this step risks spoilage or a bland final product. Think of it as a flavor infusion period—like steeping tea, but for meat!
Can I use a regular oven instead of a dehydrator?
Yes! Preheat your oven to 160°F with the door slightly ajar for ventilation. Place slices on a wire rack over a baking sheet and dehydrate for 6-8 hours, checking every 2 hours. The key is low, consistent heat—never exceed 165°F or the jerky may dry too quickly on the outside while staying moist inside.
What's the best way to store homemade beef liver jerky?
For short-term storage (2 weeks), keep in an airtight container in the fridge. For long-term preservation (3 months), vacuum-seal individual portions and freeze. The vacuum sealing prevents freezer burn and maintains texture. Pro tip: Divide into 1-ounce servings for easy grab-and-go snacking!
Is beef liver jerky safe to eat without cooking?
The curing process with salt and vinegar acts as a preservation method, while the dehydrating step removes all moisture that bacteria need to grow. Just ensure your curing time is minimum 48 hours and dehydration reaches leather-like firmness. When properly made, it's shelf-stable at room temperature for weeks.
How can I adjust the spice level for sensitive palates?
Start by reducing the cayenne pepper to ¼ tsp or omit it completely. For heat without spice, add ½ tsp smoked paprika instead—it provides depth without the burn. Always taste the marinade before applying to ensure balance. You can also add 1 tsp honey to counteract any lingering heat.