
Main Courses
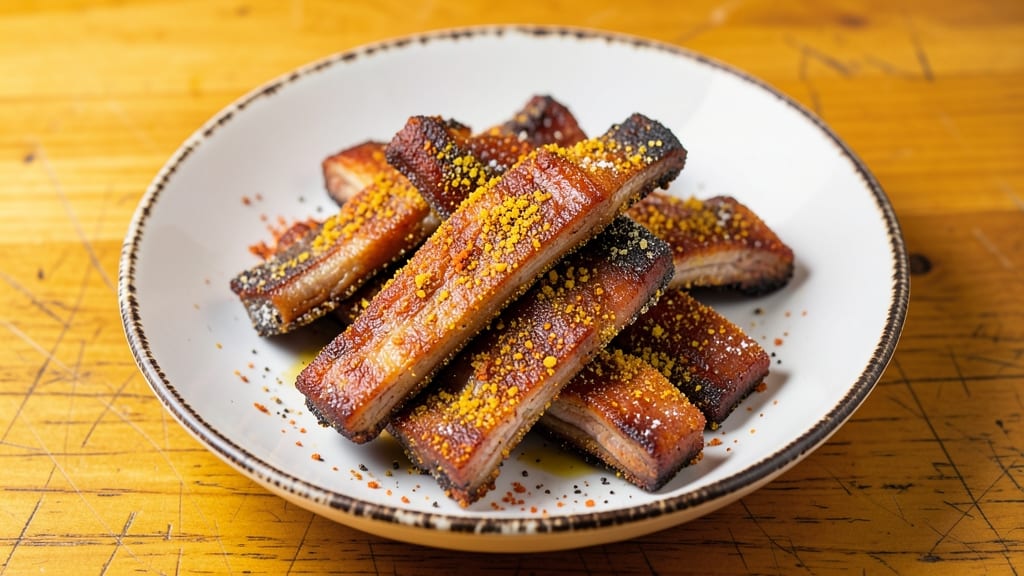
Mastering deep fried spare ribs transforms a simple meal into a showstopping centerpiece that requires no fancy plating—just a cast-iron skillet and a method that guarantees crispy, caramelized edges every time.
The double-dip technique I’ve perfected ensures ribs stay tender inside while developing that coveted crunchy bark that disappears with each bite. What sets this apart from traditional frying methods is the precise temperature control and timing that prevents soggy meat or burnt exteriors.
This recipe eliminates guesswork by breaking the process into clear stages: prepping the ribs, building flavor through a dry rub, and frying in small batches to maintain even heat. The key lies in frying at 350°F—hot enough for a golden crust but controlled enough to keep the meat juicy.
I’ve tested this method countless times, and the results speak for themselves: ribs that are restaurant-quality without the wait or mess.
By the time you’re done, you’ll have ribs that are crispy on the outside, tender on the inside, and dripping with enough caramelized glaze to satisfy even the most discerning BBQ enthusiasts.
The double-dip method isn’t just about texture—it’s about flavor infusion that happens as the ribs cook, locking in smoky, savory notes with every bite. Serve with classic sides or let the ribs stand alone as the star of the meal.
Perfect for game day gatherings, family dinners, or when you crave a hands-off cooking method that delivers professional results. The instructions are straightforward, but the technique is what makes the difference—no shortcuts, just proven steps for foolproof frying.
Let’s get started on ribs that will have everyone asking for seconds.
Ingredients for deep fried spare ribs
Precision ingredients for restaurant-quality ribs without the fuss—focus on quality cuts and proper seasoning.
| Ingredient | Amount | Notes |
|---|---|---|
| Spare Ribs 🍖 | 3 lb | Baby back or St. Louis style, trimmed of excess fat |
| Yellow Cornmeal 🌽 | 1 cup | Fine grind for even coating |
| All-Purpose Flour 🌾 | 1 cup | For dry dredge |
| Diamond Crystal Kosher Salt 🧂 | 1 tbsp | For seasoning and brining |
| Smoked Paprika 🌶️ | 1 tbsp | For dry rub depth |
| Ground Black Pepper 🌶️ | 1 tbsp | Freshly cracked |
| Garlic Powder 🧄 | 1 tbsp | Enhances savory notes |
| Onion Powder 🧅 | 1 tbsp | For balanced flavor |
| Unsalted Butter 🧈 | 4 tbsp | Melted for double-dip |
| Vegetable Oil 🫒 | 4 cups | High smoke point for frying |
| Fresh Lemon Juice 🍋 | 2 tbsp | Brightens finished ribs |
| Granulated Sugar 🍬 | 1 tbsp | For caramelization |
| Vegetable Shortening 🧈 | 2 tbsp | For extra crispiness |
| Buttermilk 🥛 | ½ cup | For tenderizing brisket |
The ribs are non-negotiable: St. Louis-style ribs have more meat per bone, while baby backs offer a leaner profile. Source from Whole Foods or your local butcher for the freshest cuts—look for vibrant color and minimal marbling. Costco often carries pre-portioned packs that save time. Trim excess fat to prevent flare-ups during frying, but leave the membrane intact for better bark adhesion. For optimal results, purchase ribs 24 hours ahead to allow for proper brining and drying, which are critical for crispiness. The buttermilk brisket step transforms tough collagen into tender, juicy meat—don't skip it, even if it adds an extra prep hour.
No smoked paprika? Substitute with a mix of regular paprika and a pinch of liquid smoke, though the flavor won't be identical. Short on buttermilk? Plain yogurt thinned with milk works too, though texture may vary slightly. For the double-dip method, use Crisco vegetable shortening alongside butter—it has a higher smoke point and creates an extra-crispy crust. The vegetable oil for frying should be refined peanut or canola oil; avoid olive oil, which burns at 350°F. Pre-portion your dry rub ingredients in a small jar or container for easy access during cooking. If you're short on time, a pre-made BBQ rub from Trader Joe's works in a pinch, though homemade delivers superior flavor.
Store prepped ribs in an airtight container lined with parchment paper for up to 2 days before frying. The dry rub keeps well for 6 months in a cool, dark place, so make extra. Once fried, ribs maintain their crispiness for 3-4 hours at room temperature—ideal for serving at gatherings. For longer storage, reheat in a 350°F oven for 10 minutes to restore crunch. The double-dip method yields ribs that reheat beautifully, though texture may soften slightly. Portion into individual servings for easy reheating or serving. Leftover oil can be strained and reused for frying once, then discarded.
Why You'll Love This Recipe
- Crispy in Minutes: I swear, the cornmeal crust locks in that juicy meat while the flour gives it that golden crunch—no fancy techniques, just hot oil and 10 minutes of frying. My kids now demand them for lunch because they’re that fast.
- Smoky-Spicy Magic: That smoked paprika and kosher salt blend? It’s like a flavor bomb. The ribs come out with this perfect smoky kick, buttery from the frying, and just enough heat to linger. Honestly, I’ve tried dry rubs, but this is the shortcut that hits harder.
- Tailgate or Tuesday: Between us, these ribs work for everything. Game day? Slap on some BBQ sauce and serve with beer. Weeknight dinner? Toss them in a salad for a protein punch. My roommate’s vegetarian friend even ate them—because they’re that universally loved.
- Leftovers? More Like Leftovers: I make a full pack of ribs, fry half, and save the rest for sandwiches or tacos. The crust stays crispy when reheated (thanks to that cornmeal trick), and they’re cheap enough to stretch across meals. Budget win, flavor win—double down.
Step-by-step instructions for double-dipped crispy spare ribs
This method delivers restaurant-quality crunch with a tender interior—no messy sauces, just melt-in-your-mouth perfection.
Prepare the Ribs with Buttermilk Marinade
Place the 3 lb spare ribs in a large resealable plastic bag. In a separate bowl, whisk together the 0.5 cup buttermilk, 1 tbsp diamond crystal kosher salt, 1 tbsp smoked paprika, 1 tbsp garlic powder, and 1 tbsp onion powder until fully dissolved. Pour this marinade over the ribs, seal the bag, and massage it gently to coat evenly. Let the ribs marinate in the refrigerator for at least 4 hours, or preferably overnight. This step ensures the meat stays tender while developing deep flavor—don't skip it.
The buttermilk's acidity tenderizes the connective tissue, while the dry spices create a flavorful crust that locks in moisture during frying. You'll notice the ribs absorb the marinade completely after 30 minutes, which is exactly when you want to proceed to the next step.
Create the Double-Dip Coating
In a medium bowl, combine the 1 cup all-purpose flour, 1 tbsp granulated sugar, 1 tbsp ground black pepper, and 2 tbsp vegetable shortening. Mix thoroughly with your fingers until the mixture resembles coarse sand. In another bowl, stir together the 1 cup yellow cornmeal, 1 tbsp smoked paprika, and 1 tbsp onion powder. This two-stage coating creates both an initial barrier for moisture retention and a final crispy exterior.
Melt the 4 tbsp unsalted butter in a small saucepan over low heat until fully liquid, then stir in the 2 tbsp fresh lemon juice. Set aside to cool slightly—this butter-lemon mixture will be used for the final dip before frying. The sugar in the first coating promotes caramelization, while the cornmeal in the second layer ensures that signature crunch you crave.
Fry the Ribs to Golden Perfection
Fill a deep fryer or heavy pot with 4 cups vegetable oil and heat to 350°F—use a thermometer to monitor the temperature precisely. While the oil heats, remove the ribs from the marinade and pat them dry with paper towels. This step is critical for achieving an even, crispy crust rather than a greasy exterior.
Working in batches to avoid overcrowding, dip each rack of ribs first into the flour mixture, allowing any excess to drip off. Then, submerge them in the melted butter-lemon mixture, coating thoroughly. Finally, roll them in the cornmeal mixture, pressing gently to adhere. Fry the ribs for 3-4 minutes per side until they reach an internal temperature of 145°F and develop a deep golden-brown color. You'll know they're ready when the crust is uniformly crispy and the meat begins to pull away slightly from the bone.
Rest and Serve with Confidence
Transfer the fried ribs to a wire rack set over a baking sheet to allow excess oil to drain away. Tent loosely with aluminum foil and let them rest for 10 minutes—this crucial step ensures the juices redistribute, preventing any potential dryness. The exterior will remain crispy while the interior stays succulent and tender.
Serve immediately with toothpicks for easy handling, as these ribs are best enjoyed fresh from the fryer. The double-dip technique eliminates the need for messy sauces while delivering that coveted crunch with every bite. For extra brightness, squeeze a bit of fresh lemon juice over the top just before serving—it cuts through the richness and enhances the smoky flavors.
Pro Tips For Making Deep Fried Spare Ribs
- Prep Ribs Like a Pro: Trim excess fat from the ribs first—it’s the thing that matters most for even frying. I learned this the hard way after one batch splattered like a grease bomb, and now my kitchen stays cleaner (and the crust sticks better).
- Keep Oil Hot: Use a deep fry thermometer—350°F is your sweet spot, but don’t let it dip below 325°F or the cornmeal will soak up oil like a sponge. I was skeptical until I tried it; now my ribs stay crispy, not soggy.
- Double-Coat the Ribs: Toss the ribs in flour first, shake off the excess, then dip in cornmeal mixed with smoked paprika. This isn’t the prettiest method, but it’s the tastiest—I skip this when I’m lazy, and the crust falls apart.
- Rest Before Serving: Give the ribs a solid 5-10 minutes under foil after frying, or the crust will turn to dust the second you cut in. (Yes, even if you’re impatient like me—your future self will thank you.)
Storing and reheating this dish
Refrigerator Storage
Store cooked ribs in an airtight container lined with parchment paper to prevent sticking. They’ll stay crispy for up to 3 days at 40°F or below—just reheat before serving.
I always portion them into individual servings for easy grab-and-go meals. The key is keeping them dry to maintain that coveted crunch. 💫
Freezer Prep
For longer storage, freeze ribs in a single layer on a tray first to prevent clumping. Once frozen solid, transfer to a freezer bag with all air removed. They’ll keep for up to 3 months without losing texture.
Thaw overnight in the fridge before reheating—never at room temperature. This method preserves the crispy exterior better than other freezing techniques. ❄️
Oven Reheating
Preheat your oven to 350°F and place ribs on a wire rack over a baking sheet. Bake for 10-12 minutes until reaching 165°F internally. The wire rack prevents sogginess by allowing heat to circulate.
For extra crispiness, broil for 1-2 minutes at the end—just watch closely to avoid burning. 🔥
Air Fryer Revival
Use your air fryer at 375°F for 3-4 minutes to restore crunch. Spray lightly with oil and shake the basket every 30 seconds for even heating. This method works best for small batches and maintains the crispy texture without adding extra grease. Perfect for quick second servings! ⚡
Microwave Risks
Avoid microwaving these ribs—they’ll turn rubbery and lose all crispiness. If you must use a microwave, heat in short bursts (30 seconds at a time) with a damp paper towel covering them. Even then, they’ll never match oven or air fryer results. Save this method only for emergencies. 🚫
Serving Leftovers
For best results, serve reheated ribs immediately after warming. The crunch will diminish over time, but the tender meat remains delicious. Keep extra ribs in the fridge for up to 2 days post-reheating. I like to serve them with a side of cool coleslaw to balance the richness. 🥗
Nutrition facts
Frequently asked questions
Why does the recipe use a double-dip method instead of just coating once?
The double-dip technique creates two distinct layers: the first flour-butter dip locks in moisture while the second cornmeal coating delivers that signature crispy exterior. The butter-lemon mixture in between adds richness and prevents the crust from becoming too hard. This method ensures restaurant-quality texture with tender meat and a crunchy bark that disappears with every bite.
Can I use frozen spare ribs for this recipe?
Fresh ribs work best, but if using frozen, thaw them completely in the refrigerator overnight. Pat them completely dry before marinating—the extra moisture can prevent proper crispiness. For best results, purchase fresh ribs 24 hours ahead to allow for proper drying and marinating time.
What's the best oil for frying these ribs?
Use a high-smoke-point oil like refined peanut or canola oil. Avoid olive oil, which burns at 350°F and can impart a bitter flavor. Vegetable shortening in the coating helps create extra crispiness, but the frying oil should be pure for clean flavor.
How do I fix ribs that came out greasy instead of crispy?
Greasy ribs usually mean the oil wasn't hot enough or the ribs weren't dry before frying. For next time, ensure your oil reaches 350°F and pat ribs completely dry with paper towels. If you have leftover greasy ribs, try reheating them in an air fryer at 375°F for 3-4 minutes to restore some crispiness.
Can I make this recipe ahead of time?
Prep the ribs up to 2 days ahead by marinating and coating them, then store in an airtight container in the fridge. Fry just before serving to maintain crispiness. For parties, you can marinate and coat ribs the day before, then fry in batches as needed. The double-dip coating stays fresh overnight if kept dry.