
Snacks
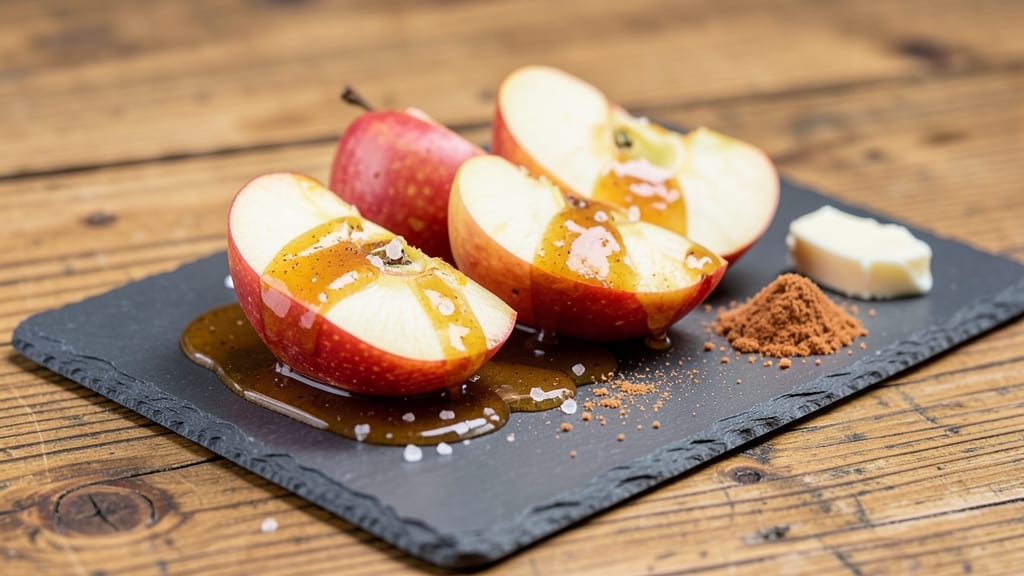
This dipped apples recipe turns ordinary fruit into a caramelized cinnamon sugar masterpiece in just 10 minutes—no fancy tools or skills needed. This recipe turns fresh fruit into a warm, spiced snack that tastes like autumn in every bite, perfect for satisfying cravings or adding a gourmet touch to gatherings.
The secret lies in the balance of heat and sweetness, where melted butter and sugar create a glossy, crackly coating that clings perfectly to each slice.
What makes this recipe stand out is its foolproof technique—no waiting for hours, no complicated steps. You'll start with crisp apples like Honeycrisp or Fuji, which hold their shape beautifully when coated.
The cinnamon-sugar mixture transforms ordinary fruit into something that looks and tastes like it belongs in a bakery display, with just the right amount of crunch and warmth. Every element comes together quickly, making it ideal for busy afternoons or last-minute treats.
By the end, you'll have golden-brown apples with a caramelized crust that's irresistibly crisp yet tender underneath. The aroma alone—warm cinnamon, buttery richness, and the natural sweetness of the fruit—will have everyone reaching for seconds.
This is the kind of snack that feels indulgent without requiring effort, proving that sometimes the simplest ingredients create the most impressive results.
Serve them warm as a dessert, pack them for lunch, or use them as a topping for yogurt and ice cream. The possibilities are endless, and the process is so satisfying that you'll want to make them regularly. Let's get started with this quick, delicious, and professional-quality treat.
Ingredients for dipped apples
Eight essential ingredients transform crisp apples into bakery-style caramelized treats in minutes.
| Ingredient | Amount | Notes |
|---|---|---|
| Honeycrisp Apples 🍎 | 4 medium | Firm, unpeeled, sliced into wedges |
| Unsalted Butter 🧈 | ½ cup | Cold, cubed for even melting |
| Granulated Sugar 🍚 | 1 cup | White or light brown preferred |
| Ground Cinnamon 🌿 | 2 tbsp | Freshly ground for optimal flavor |
| Sea Salt 🧂 | ½ tsp | Fine grain preferred |
| Pure Vanilla Extract 💧 | ½ tsp | High-quality, pure vanilla |
| Cornstarch 🌾 | 1 tbsp | For crisp coating texture |
| Lemon Juice 🍋 | 1 tbsp | Freshly squeezed, prevents browning |
| Coconut Oil 🥥 | 1 tbsp | For dipping, optional for extra shine |
The apple variety matters—Honeycrisp or Fuji hold their shape perfectly when coated. Whole Foods or local orchards often carry the freshest options, but any crisp apple works. For optimal results, select apples with minimal bruising and store them in the refrigerator until ready to use. The cinnamon should be freshly ground—pre-ground often loses potency. If unavailable, Ceylon cinnamon from specialty stores adds subtle warmth without overpowering. For the butter, European-style unsalted (like Plugrá) melts more smoothly than American varieties, though standard brands work fine.
No vanilla extract? Almond extract at half the amount provides a similar aromatic depth. Substituting brown sugar for granulated alters the texture slightly but works in a pinch. For extra crunch, add crushed graham crackers to the sugar mixture. If coconut oil isn't available, extra-virgin olive oil can replace it for dipping, though it has a distinct flavor. The lemon juice is critical—it prevents the apples from browning while adding subtle brightness. If you're making this ahead, store the coated apples in an airtight container with a paper towel to maintain crispness.
Prep the apples just before coating to prevent browning. The mixture keeps at room temperature for up to 2 hours if stored in a sealed container. For longer storage, refrigerate the coated apples for up to 3 days, though they're best enjoyed fresh. Freezing isn't recommended as it alters the texture. To reheat, warm in a 200°F oven for 5-10 minutes to restore crispness. This treat reheats beautifully, making it perfect for meal prep or last-minute gatherings.
Why You'll Love This Recipe
- Five-Ingredient Magic: The pantry already has what you need—no fancy shopping list. Butter, sugar, cinnamon, salt, and a Honeycrisp? That’s it. I swear, I’ve made this with ingredients I grabbed while still in my pajamas.
- Crunchy-Creamy Bliss: The butter and sugar caramelize into a glossy dip while the apples stay crisp—that perfect contrast. Honestly, the first bite makes me pause mid-chew just to savor it.
- Picnic to Potluck: Pack these in a container for a lunchbox or bring them to a gathering—no reheating required. My kids devour them cold, and my colleagues always ask for the recipe at office parties.
- Zero-Waste Leftovers: The apples stay fresh for days, and the leftover dip? Spread it on toast or stir it into yogurt. I’ll be real, I’ve even used it to glaze pancakes when I’m lazy. Versatile like that.
Step-by-step instructions for caramelized cinnamon sugar coating
This method delivers perfectly balanced sweetness and texture in under ten minutes.
Prepare the Apples for Even Cooking
Core the 4 medium Honeycrisp apples and slice them into even wedges, about ½-inch thick. I use a sharp chef's knife for clean cuts and maintain consistent thickness throughout. Arrange the wedges on a parchment-lined baking sheet, leaving ½-inch space between each piece to prevent steaming.
In a small bowl, whisk together the 1 tablespoon lemon juice and 1 tablespoon cornstarch. This mixture creates a natural barrier that prevents browning while adding subtle texture to the final coating. Toss the apple wedges gently in this preparation, ensuring each piece is evenly coated. Let them sit for 5 minutes while you prepare the caramel mixture.
Create the Caramel Base
In a medium saucepan, combine the 0.5 cup unsalted butter and 1 cup granulated sugar over medium heat. Stir continuously with a silicone spatula until the butter melts completely and the mixture becomes smooth and bubbly. This should take about 3-4 minutes—watch carefully to prevent burning.
Once fully melted, remove the pan from heat and stir in the 2 tablespoons ground cinnamon, 0.5 teaspoon sea salt, and 0.5 teaspoon pure vanilla extract. The salt enhances the cinnamon flavor while balancing the sweetness, and the vanilla adds depth. Return the pan to low heat and maintain the mixture at a gentle simmer for 2 minutes, stirring constantly to ensure even distribution of spices.
Dip and Coat the Apples
Working in batches to avoid overcrowding, dip each apple wedge into the caramel mixture using tongs. Hold each piece for 3-4 seconds to allow the coating to adhere fully, then transfer to a wire rack set over a baking sheet. The rack allows excess caramel to drip off, creating a crisp exterior while keeping the interior tender.
For an extra-shiny finish, melt the 1 tablespoon coconut oil in a small bowl using a double boiler or microwave. Once melted, brush a thin layer over each apple wedge. This step is optional but adds a professional-looking sheen that enhances presentation. Allow the apples to cool for 5 minutes before serving to let the coating set.
Serve Immediately for Optimal Texture
Transfer the coated apples to a serving platter and arrange them with the caramel-side up. The coating should be glossy with visible cinnamon specks and a slight crackle when touched. Serve warm for the best texture—the caramel will be slightly soft and gooey, clinging perfectly to each apple wedge.
These apples maintain their natural sweetness while delivering a complex cinnamon-sugar crust that balances heat and sweetness. The lemon juice prevents browning, keeping the apples vibrant and fresh-tasting beneath the caramelized coating. Store any leftovers in an airtight container for up to 2 days, though they're best enjoyed fresh.
Pro Tips For Making Dipped Apples
- Peel the Apples: Skip the knife and use a potato peeler—it’s faster and leaves cleaner strips. For Honeycrisp, go halfway down the sides only; the skin’s texture holds up better than you’d think, and it adds subtle bite.
- Brown the Butter First: Melt the butter until it’s nutty and golden, then whisk in sugar and cinnamon. Cold butter clumps with sugar; warm butter makes a smoother, richer dip that clings to the apples without graininess.
- Salt the Apples Mid-Dip: Sprinkle a pinch of sea salt over the warm apples after dipping, not before. The heat opens their pores, so salt sticks better—it cuts through the sweetness like a bright contrast instead of getting lost.
- Use a Mixing Bowl, Not a Pan: Toss the apple slices in the butter-sugar mix right in a deep bowl (no need to preheat). The residual heat from the apples keeps the butter liquid longer, so you avoid that sticky, lumpy mess when it cools too fast.
Make-ahead tips for this dipped apples
Prep Ahead for Crispy Coating
Prepare the cinnamon-sugar mixture 24 hours ahead and store it in an airtight container at room temperature. This gives the spices time to meld, intensifying the flavor.
I like to mix the 1 cup sugar, 2 tbsp cinnamon, ½ tsp salt, and ½ tsp vanilla in advance—just add the melted butter when ready to cook. This step saves 10 minutes of active prep time on the day you serve. 💫
Apple Prep Shortcut
Slice the apples and toss them with the lemon juice and cornstarch mixture up to 4 hours ahead. Store them in a single layer on a parchment-lined tray in the fridge to prevent browning.
When ready to cook, simply dip them into the warm caramel mixture—no extra prep needed. This works especially well for meal prep or when hosting guests. 🍎
Caramel Mixture Make-Ahead
For a truly stress-free experience, make the caramel base 1 day ahead and store it in a sealed container. Reheat it gently in a saucepan over low heat until smooth, stirring constantly to avoid graininess.
I add 1 tsp coconut oil when reheating to restore its glossy texture. This method is perfect for busy mornings or when you're short on time. ✨
Storage for Leftovers
Store any remaining coated apples in a single layer on a parchment-lined tray, covered with a clean kitchen towel. This prevents them from sticking together while preserving their crispness. They'll keep at room temperature for 2 days or in the fridge for up to 5 days.
For reheating, place them on a baking sheet and warm in a 200°F oven for 5-7 minutes to restore that bakery-fresh crunch. 🔥
Batch Cooking for Parties
Double the recipe and prepare everything 1 day ahead for gatherings. The apples can be coated and stored in airtight containers with parchment paper between layers. Reheat in batches in a 350°F oven for 8-10 minutes before serving. This ensures you can focus on hosting rather than cooking last-minute. 💡
Freezing for Later Use
While not ideal for texture, you can freeze the coated apples for up to 1 month if needed. Place them in a single layer on a tray, freeze solid, then transfer to a freezer bag.
Thaw overnight in the fridge and reheat in a 350°F oven for 10-12 minutes to revive the coating. The texture won't be as crisp, but it's a great backup plan for unexpected cravings. ❄️
Nutrition facts
Frequently asked questions
Can I use any type of apple for this recipe?
For the best results, choose crisp varieties like Honeycrisp, Fuji, or Granny Smith. These hold their shape well when coated and provide the perfect balance of sweetness and tartness. Avoid softer apples like Red Delicious, as they won't hold the caramelized coating as effectively.
How do I prevent the apples from turning brown before coating?
Toss the sliced apples with a mixture of 1 tablespoon lemon juice and 1 tablespoon cornstarch right after slicing. This creates a protective barrier that keeps them vibrant. Work quickly and store them in a single layer on a tray in the fridge until ready to coat.
Can I make this recipe without butter?
Yes! Substitute the ½ cup butter with ½ cup coconut oil or vegetable shortening for a dairy-free version. The texture will be slightly different but still delicious. For extra richness, use ½ cup olive oil, though it has a distinct flavor that pairs well with cinnamon.
Why is my caramel mixture grainy or separating?
Graininess usually happens if the sugar isn't fully dissolved or if the mixture cools too quickly. Stir constantly over medium heat until smooth, then remove from heat before adding spices. If it separates, gently reheat the mixture and whisk vigorously to restore its consistency.
How can I make these apples extra crispy?
For maximum crunch, toss the coated apples with an extra 1 tablespoon of cornstarch before letting them cool. You can also bake them at 350°F for 5 minutes after coating to set the caramel and enhance crispiness. Serve them immediately for the best texture!