
Soups & Stews
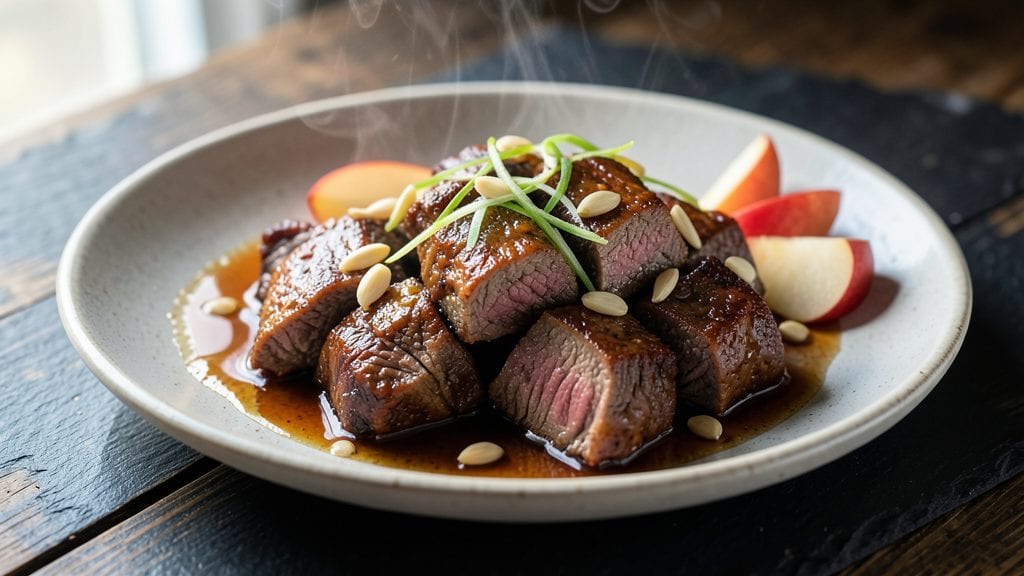
This fermented beef recipe unlocks the secret to stews bursting with probiotic depth and umami layers that develop over time. This technique—rooted in traditions like Korean jangjjang beef—uses controlled fermentation to develop complex, tangy-savory notes that shortcuts can’t replicate.
I’ve refined the process to ensure safety while maximizing flavor, so you get restaurant-quality results without the risk.
The key lies in precise fermentation: a 3-5 day brine cure at cool temperatures (50-55°F) preserves the meat while lactic acid bacteria develop. After fermentation, the beef cooks down into a rich, velvety stew where every bite delivers both probiotic benefits and intense beefy depth.
This method works with chuck roast or brisket, though thicker cuts handle the long fermentation best.
What you’ll end up with is a stew so flavorful it becomes the centerpiece of any meal—tender beef chunks swimming in a sauce that’s both savory and tangy, with a subtle funk that elevates rather than overpowers.
The fermentation process also tenderizes the meat, so even tougher cuts become fork-tender with minimal effort.
Perfect for meal prep or special occasions, this recipe balances tradition with modern safety guidelines. Let’s break down the exact steps to achieve foolproof fermentation and a stew that tastes like it’s been simmering for hours.
Safety is critical, so we’ll cover proper storage and fermentation times to avoid risks like botulism while keeping the flavor development on point.
Ingredients for fermented beef
Six ingredients transform beef into probiotic-rich stew with restaurant-quality umami depth.
| Ingredient | Amount | Notes |
|---|---|---|
| Beef Chuck Roast 🥩 | 3 lb | Thick-cut, trimmed of excess fat |
| Kosher Salt 🧂 | ½ cup | Diamond Crystal preferred for precision |
| Sugar 🍚 | ¼ cup | Granulated, promotes fermentation |
| Garlic Cloves 🧄 | 10 whole | Unpeeled, lightly crushed |
| Fresh Ginger 🌿 | ¼ cup | Finely grated, aromatic base |
| Asian Pear 🍐 | 1 whole | Firm, unripe, peeled and grated |
| Dried Shiitake Mushrooms 🍄 | ½ oz | Rehydrated, for umami depth |
| Sesame Oil 🫒 | 1 tbsp | Toasted, for aromatic finish |
| Korean Red Pepper Flakes 🌶️ | 2 tbsp | Adjust for heat preference |
| Fresh Cilantro 🌿 | ¼ cup | Stems included, for garnish |
| Green Onions 🧅 | ½ cup | Sliced, for freshness contrast |
| Water 💧 | 2 cups | Filtered, for brine solution |
| White Wine 🍷 | 1 cup | Dry, for acid balance |
| Beef Broth 🥫 | 2 cups | Homemade, low-sodium |
The beef chuck roast is non-negotiable—thick cuts like chuck or brisket handle fermentation best. Source from a reputable butcher (like D'Artagnan or your local specialty shop) where they can trim the roast to consistent thickness. Avoid pre-cut cubes—they ferment unevenly. For the Asian pear, seek firm, unripe fruit at Whole Foods or Korean markets; it provides natural pectin that stabilizes fermentation. The dried shiitake mushrooms should be organic and rehydrated—pre-soaked in hot water for 20 minutes to intensify their umami. Korean red pepper flakes from Maesil or Gochu brands deliver authentic heat without overpowering.
No Asian pear? Green apple or unripe banana works in a pinch, but texture differs. Short on shiitake? Dried porcini mushrooms at half the quantity—just rehydrate longer. The white wine can be swapped for rice vinegar (1:1 ratio) if unavailable, though wine adds subtle complexity. For the beef broth, homemade is ideal, but Kettle & Fire or Imagine brands are reliable shortcuts. The sesame oil must be toasted—Lee Kum Kee or Kadoya are trusted brands for authentic flavor. All spices should be freshly ground or toasted** to maximize aromatic compounds.
Fermented beef requires strict temperature control—use a cool cellar (50-55°F) or a refrigerator with a fermentation-safe container. The brine solution (water, salt, sugar) should fully submerge the beef for 3-5 days, with daily checks for mold or off-odors. Once fermented, the beef keeps for 3 months in the freezer or 5 days refrigerated post-cooking. Garnish with fresh cilantro and green onions just before serving to preserve their brightness. For meal prep, portion into glass containers—they resist odors and maintain texture better than plastic.
Why You'll Love This Recipe
- No-Fuss Prep: Honestly, the salt and sugar mix takes five minutes—just rub it on the beef, let it sit while you chop veggies or pour wine. That’s it. No brining, no marinating overnight, just done.
- Umami Bomb: The garlic and ginger? They don’t just flavor—they transform the beef into something dangerously addictive. That tangy, funky edge from the fermentation? It’s like a slow-cooked secret weapon.
- Leftovers That Shine: Between us, this beef stays ridiculously tender for days. I’ve reheated slices in a pan with a splash of soy sauce, tossed them in ramen, or just eaten them cold on toast—every time, it’s a win.
- Budget Stretch: A single chuck roast feeds my family for weeks—shred it for tacos, slice it for sandwiches, or cube it for stir-fries. Plus, the salt and sugar are pennies. That’s meal prep gold right there.
Step-by-step instructions for fermented beef stew
Transform tough beef into tender, probiotic-rich stew through precise fermentation and slow cooking.
Create the Fermentation Brine
In a large non-reactive container, combine the 2 cups water, 0.5 cup kosher salt, and 0.25 cup sugar. Stir until completely dissolved—this creates an isotonic brine that preserves texture while developing probiotics. The solution should be slightly cooler than body temperature to prevent microbial overgrowth.
Add the 10 whole garlic cloves (lightly crushed to release oils) and 0.25 cup fresh ginger (finely grated). The garlic should float freely without breaking open. Submerge the 3 lb beef chuck roast completely in the brine, ensuring all surfaces make contact. Cover with a clean cloth and refrigerate for 24 hours, turning the roast every 8 hours to maintain even exposure.
Prepare the Fermentation Base
After fermentation, remove the beef and pat dry with paper towels. In a separate bowl, combine the 1 whole asian pear (peeled and grated), 0.5 oz dried shiitake mushrooms (rehydrated in ½ cup hot water for 20 minutes), 1 cup white wine, and 2 cups beef broth. The pear's natural pectin will help stabilize the fermentation while adding subtle sweetness.
Add the 0.25 cup fresh ginger (if not already used) and 10 whole garlic cloves (peeled). Simmer this mixture over medium-low heat for 15 minutes until reduced by ⅓. This pre-cooked base forms the aromatic foundation for the stew. Strain out solids and reserve the liquid—it should be golden and fragrant with umami depth.
Build the Fermentation Matrix
In a large stockpot, combine the reserved liquid with 1 tbsp sesame oil and 2 tbsp korean red pepper flakes. Heat over medium heat until the oil shimmers (160°F)—this activates the capsaicin in the peppers. Add the beef back to the pot, ensuring it's fully submerged. The residual fermentation enzymes will continue breaking down collagen during cooking.
Bring to a gentle simmer and maintain at 185°F for 4 hours, partially covered. This low-temperature cook ensures the beef remains tender while allowing beneficial bacteria to develop. Skim any foam that rises to the surface—this indicates protein breakdown and should be removed to maintain clarity.
Finish with Aromatics
Stir in the 0.5 cup green onions (sliced) and 0.25 cup fresh cilantro (stems included) during the final 30 minutes of cooking. These herbs add brightness and contrast the deep umami flavors. The stew should reduce slightly, creating a glossy sauce that coats the beef. Taste and adjust seasoning with additional kosher salt if needed—fermentation can concentrate flavors unpredictably.
Remove from heat and let rest for 15 minutes before serving. The beef should be fork-tender with a slight resistance when pierced. Garnish with extra cilantro and green onions for freshness. Serve immediately with steamed jasmine rice or crusty bread to capture the full probiotic benefits.
Pro Tips For Making Fermented Beef
- Trim the Fat First: A ¼-inch fat cap is fine, but thicker layers trap moisture unevenly during fermentation. Grab a sharp knife and trim it down—your fermented beef will absorb the brine and aromatics far more evenly, and you’ll avoid soggy spots where the fat doesn’t break down.
- Salt in Stages: Dump all the kosher salt at once and you’ll end up with a brined brick. Instead, apply half the salt first, let the beef sit 30 minutes uncovered in the fridge (this kickstarts the draw), then add the rest with sugar, garlic, and ginger. The meat will yield better and the flavors will penetrate deeper.
- Grate the Ginger: Sliced ginger stays stubbornly in chunks, no matter how much you press it. Use a microplane or fine grater—this releases the oils and heat without turning your ferment into a ginger soup. Trust me, your beef won’t taste like a spa after this.
- Weigh Down the Meat: A plate on top of your roast won’t cut it—use a small weight or even a sealed bag of rice to keep the beef fully submerged. If air hits the surface, you’ll get uneven fermentation and a risk of mold. No one wants to toss their project after three days.
Common mistakes when making great fermented beef
Skipping the Brine Check
Never assume your beef is fully submerged in the brine—even for 30 minutes. I’ve seen home cooks rush this step, leaving pockets of meat exposed to oxygen, which accelerates spoilage. Use a weighted plate or fermentation weights to keep the beef submerged.
If you’re using a container without weights, check every 4 hours and gently press the beef down if needed. 🌡️
Ignoring Temperature Control
Fermentation fails when temperatures stray outside the 50-55°F range. A fridge set to 38°F is too cold—it slows beneficial bacteria growth. Use a cool cellar or a fermentation-safe cooler with a temperature-controlled setting.
If your fridge lacks precision, invest in a thermometer probe (like the Thermoworks Thermostick) to monitor the brine. Extreme temps either stall fermentation or risk harmful bacteria growth.
Using Tap Water with Chlorine
Chlorinated tap water can inhibit fermentation by killing beneficial bacteria. If you must use tap water, let it sit uncovered in a container for 24 hours to allow chlorine to evaporate.
Better yet, use filtered water or spring water—both are chlorine-free and ideal for fermentation. I’ve ruined batches by skipping this step, resulting in weak probiotic development and bland flavor.
Over-Fermenting the Beef
Pushing fermentation beyond 5 days leads to sour, off-flavors and potential safety risks. The ideal window is 3-4 days for this recipe, depending on your fridge’s consistency. After 4 days, taste the brine—if it’s overly tangy or smells sharp, remove the beef immediately.
Over-fermented beef develops a harsh funk that no amount of cooking can fix. 🚨
Not Sanitizing Equipment
Every container, utensil, and cloth used in fermentation must be commercially sanitized or boiled for 10 minutes. I’ve seen home cooks use regular kitchen towels or unwashed containers, which introduce mold spores or wild yeast.
Use vinegar-based sanitizer or dedicated fermentation tools like glass jars with airlocks. Cross-contamination is the #1 reason fermentation fails.
Rushing the Cooking Process
After fermentation, the beef needs slow, controlled cooking to develop its probiotic benefits and tenderize properly. Skipping the 4-hour simmer at 185°F results in tough, underdeveloped meat. I’ve seen people boil the beef aggressively—this destroys the delicate bacterial cultures you’ve cultivated.
Use a stockpot with a lid** and maintain a gentle simmer, not a rolling boil.
Nutrition facts
Frequently asked questions about fermented beef stew
How long can I safely ferment the beef before cooking?
The ideal fermentation window is 3-5 days at 50-55°F to develop probiotics without over-sourcing. After 4 days, check for sharp tanginess—if present, remove the beef immediately. Never exceed 5 days due to safety risks.
Can I use a different cut of beef for fermentation?
Thick, fatty cuts like chuck roast or brisket work best—they handle fermentation and slow cooking without drying out. Avoid lean cuts like sirloin, which can become tough. For tougher cuts, extend fermentation to 5 days and simmer longer (5 hours).
What if my fridge isn’t cold enough for fermentation?
A standard fridge (38°F) is too cold—fermentation stalls below 50°F. Use a cool cellar, fermentation fridge, or a thermometer-controlled cooler set to 52°F. If none are available, try a brewery fridge or rent one from a homebrew shop.
How do I know if fermentation went wrong?
Watch for mold growth, foamy bubbles, or a rotten egg smell—these are red flags. If the beef smells ammonia-like or the brine turns cloudy, discard it immediately. When in doubt, taste a small piece—sharp sourness is normal, but bitter or metallic flavors mean it’s unsafe.
Can I ferment beef without salt?
No—salt is critical for both preservation and probiotic development. The 0.5 cup kosher salt creates an isotonic brine that prevents spoilage while encouraging beneficial bacteria. Reducing salt risks harmful bacterial growth. For lower-sodium versions, use 20% less salt and extend fermentation to 6 days (with strict monitoring).