
Desserts
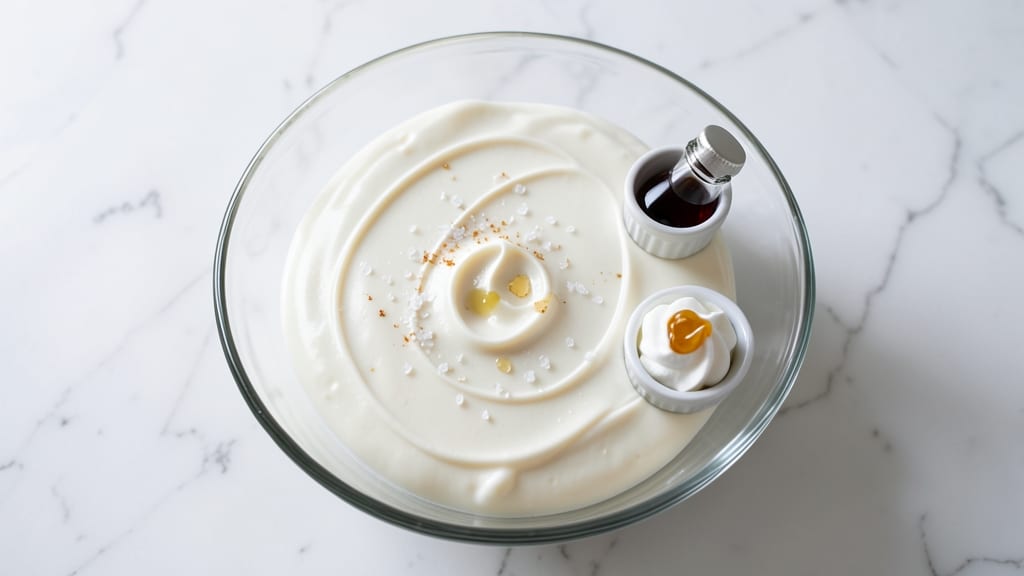
Creating old-fashioned cake icing that stays smooth and never weeps is an art I've perfected over years of baking—this buttery vanilla version delivers that classic, velvety texture without the dreaded sugar syrup drips.
The secret lies in precise ratios and gentle mixing techniques that create a stable, spreadable frosting every time. Whether you're filling layers or decorating tiers, this recipe ensures professional results with simple ingredients you likely already have.
This recipe relies on just five core ingredients—powdered sugar, unsalted butter, heavy cream, pure vanilla extract, and a pinch of salt—to build an icing that's rich yet light, with a perfect balance of sweetness and tang.
The butter contributes that signature old-fashioned richness, while the cream ensures smoothness without making the icing too thin or prone to weeping. For extra depth, I often add a touch of almond extract or lemon zest, but the classic vanilla version remains foolproof for beginners.
What makes this icing truly special is its versatility—it works beautifully for layering between cake tiers, filling cupcakes, or creating elegant swirls on sheet cakes. The texture remains stable even in warm kitchens, and it holds its shape when piped, making it ideal for both rustic and formal desserts.
The key to success is patience during mixing and proper temperature control, which I'll walk you through in the instructions.
Once you master this technique, you'll never buy store-bought icing again. The flavor develops as it sits, becoming even more aromatic over time, and it keeps beautifully in the refrigerator for up to a week.
Let's get started on creating that perfect, weep-free frosting that brings old-fashioned charm to every dessert.
Ingredients for old fashioned cake icing
Five core ingredients transform into velvety, weep-free frosting that tastes homemade.
| Ingredient | Amount | Notes |
|---|---|---|
| Powdered Sugar 🍚 | 3 cups | Sifted for smooth texture |
| Unsalted Butter 🧈 | 1 cup | Cold, cubed for easy mixing |
| Heavy Whipping Cream 🥛 | ½ cup | Cold for stable texture |
| Pure Vanilla Extract 🌿 | 1 tbsp | High-quality for rich flavor |
| Fine Sea Salt 🧂 | ¼ tsp | Balances sweetness perfectly |
| Almond Extract (optional) 🌰 | ½ tsp | For subtle depth of flavor |
| Lemon Zest (optional) 🍋 | 1 tsp | Brightens the icing beautifully |
The powdered sugar is non-negotiable—Domino or C&H brands work best since they're finely sifted. I always grab the butter from the refrigerated section (not the tub) because it's less waterlogged. The heavy cream? Trader Joe's organic is my go-to—it whips up fluffier than store brands. For vanilla, McCormick Pure or Nielsen-Massey are my top picks. The salt might seem negligible, but it's what keeps the sweetness from feeling overpowering. Pro tip: if your powdered sugar looks clumpy, sift it right before measuring—it makes all the difference in that silky texture.
No almond extract? Skip it or use extra vanilla—it's purely for depth. Running out of heavy cream? Half-and-half works in a pinch, but the icing will be slightly less stable. The lemon zest can be swapped for orange zest if you prefer citrus notes. Want to make it dairy-free? Coconut cream mimics the texture (though it adds a slight coconut flavor), and use vegan butter. For a tangier kick, add 1/2 tsp lemon juice alongside the zest. The optional ingredients are just that—optional—this icing still shines without them.
This icing keeps beautifully in the fridge for up to 1 week, though I find it tastes even better the next day as the flavors meld. For longer storage, freeze portions in airtight containers for 3 months. Before using, let it sit at room temperature for 10 minutes—it'll be more spreadable. If it thickens too much, a quick zap in the microwave (10-second bursts) brings it back to perfection. And if you're prepping ahead? Make it 2 days before your event—it develops richer flavor over time.
Why You'll Love This Recipe
- Three-Ingredient Magic: I swear by this combo—just butter, cream, and vanilla. No fancy gadgets or tempering stress; the butter softens in minutes, and the cream whips to clouds while I’m still measuring sugar.
- Salted Sweetness: That pinch of sea salt? It’s the secret weapon. The vanilla sings, but the salt cuts through the sweetness like a whisper—rich, balanced, and impossible to overdo.
- Birthday to Bake Sale: Slather it on sheet cake or pipe it into cupcakes. Too much frosting? Spread it on toast with fruit or dollop it into coffee. Honestly, I’ve used it for all three in one weekend.
- Make-Ahead Gold: Mix it the night before, cover it, and forget it. The flavors deepen overnight, and it’s ready to go when guests arrive. My go-to for last-minute desserts—no stress, all reward.
Step-by-step instructions for buttery vanilla cake icing
Here's how to whip up that classic, creamy icing that stays smooth and never weeps.
Sift the Powdered Sugar for Silky Texture
Start by sifting the 3 cups powdered sugar through a fine-mesh sieve into a large mixing bowl. This removes any lumps and ensures your icing will be smooth and velvety. I like to do this over a separate bowl first to catch any stray bits, then transfer just the sifted sugar to your mixing bowl.
If you notice any graininess in your powdered sugar, sift it again—this is the secret to that professional, flawless finish. The extra effort now prevents gritty texture later. Keep the bowl ready for the next step.
Whip Cold Butter Until Light and Fluffy
Add the 1 cup cold, cubed unsalted butter to the sifted sugar. Using a stand mixer fitted with the paddle attachment, beat on medium speed for 3-4 minutes until the butter becomes pale and fluffy. You'll know it's ready when it nearly doubles in volume and looks light and airy.
This step is crucial for creating that perfect, stable base. Cold butter incorporates air better than softened butter, which gives your icing that classic old-fashioned richness. If your kitchen gets warm, chill the butter for 15 minutes before starting.
Gradually Add Cream and Flavorings
With the mixer running on low speed, slowly pour in the 0.5 cup cold heavy whipping cream. Add it gradually—about 1 tablespoon at a time—to prevent the mixture from curdling. Once fully incorporated, add the 1 tablespoon pure vanilla extract, 0.25 teaspoon fine sea salt, and any optional flavorings like 0.5 teaspoon almond extract or 1 teaspoon lemon zest. Mix until completely combined.
The salt might seem odd, but it actually enhances the flavors and balances the sweetness. If using lemon zest, make sure it's finely grated—large pieces can make the icing grainy. Mix just until everything is evenly distributed, about 1 minute total.
Beat Until Smooth and Stiff
Increase the mixer speed to high and beat the icing for 3-5 minutes until it becomes thick, smooth, and holds its shape when you lift the paddle. You're looking for a consistency similar to toothpaste—thick enough to pipe but still spreadable. The icing should coat the back of a spoon and leave a clean trail.
This final beating step develops the structure that prevents weeping. If the icing feels too soft, chill it in the refrigerator for 15-20 minutes before using. For extra stability, you can even pipe it onto the cake and let it set in the fridge for 30 minutes before decorating.
Pipe or Spread for Perfect Decoration
Transfer the icing to a piping bag fitted with a star tip or use a spatula to spread it over your cooled cake. For classic old-fashioned swirls, pipe ropes of icing onto the cake and drag a knife through them while the icing is still soft. For a smooth finish, spread the icing evenly and use a comb to create decorative ridges.
The key to beautiful decoration is working quickly—icing sets faster in warm conditions. If you're piping intricate designs, keep the icing slightly cooler by chilling the bowl between uses. This icing will keep at room temperature for 2-3 hours or refrigerated for up to 3 days without losing its texture.
Pro Tips For Making Old Fashioned Cake Icing
- Whip Cream Cold: Grab that heavy whipping cream straight from the fridge—room temperature is the enemy here. I learned this the hard way when my icing turned into buttercream soup because the cream was too warm. Chill your bowl and beaters too if your kitchen’s toasty.
- Salt the Butter First: Toss that pinch of fine sea salt into the softened butter before mixing it with powdered sugar. It dissolves better and distributes evenly—no clumpy salt crystals lurking in your first bite. (Yes, even if you’re impatient like me.)
- Sift the Sugar Twice: Powdered sugar is sneaky—lumps hide in plain sight. Sift it once through a fine-mesh sieve, then sift the catch bowl too. This isn’t the prettiest method, but it’s the tastiest. Trust me, your cake will thank you.
- Scrape the Bowl Often: Don’t let stubborn bits of icing cling to your mixer bowl like a stubborn ex. Scrape it down every 30 seconds—it keeps the texture silky and prevents you from overworking the cream. (Your arm will too, but that’s a separate issue.)
Essential equipment for this recipe
Stand Mixer Essentials
Your stand mixer is the workhorse of this recipe—I use a KitchenAid Artisan Series with the paddle attachment for best results. The paddle’s flat surface incorporates air into the butter perfectly, creating that light, fluffy texture.
If you don’t have a stand mixer, a hand mixer works in a pinch, but you’ll need to mix in 30-second bursts to avoid overheating the butter. Never use a whisk attachment—it won’t develop the proper structure for weep-free icing. 💡
Precision Measuring Tools
Accurate measurements are the secret to stable icing. Invest in a digital kitchen scale for powdered sugar and butter—1 cup powdered sugar should weigh 120 grams (never scoop directly from the bag). For liquids, use a liquid measuring cup with clear markings.
I keep a small offset spatula nearby to scrape every last bit from containers, ensuring no wasted ingredients. Even ½ teaspoon of extra cream can throw off the consistency.
Fine-Mesh Sieve
A stainless steel fine-mesh sieve (like the OXO Good Grips) is non-negotiable for sifting powdered sugar. Cheap plastic sieves often leave behind gritty particles that ruin the silky texture. I sift directly into the mixing bowl to avoid transfer mess.
For extra smoothness, pulse the sifted sugar in a food processor for 10 seconds before mixing—this eliminates any remaining micro-lumps that can cause graininess in the final icing.
Piping Bags & Tips
For professional-looking decorations, use disposable piping bags (like Ateco) with a Wilton 1M tip for classic swirls or a star tip for rosettes. If piping bags aren’t available, a ziplock bag with the corner snipped off works in a bind.
For spreading, keep a flexible silicone spatula handy—it glides smoothly over cake layers without tearing. I always chill my piping bags for 10 minutes before use to prevent the icing from oozing out too quickly.
Temperature Control Tools
Cold ingredients are your best friend here. A small glass mixing bowl (like Pyrex) chills faster than metal when placed in the fridge for 15 minutes before mixing. For warm kitchens, I keep a thermometer nearby to ensure butter stays between 60-65°F—warmer butter creates a greasy icing.
A cooling rack helps cakes set properly before icing, preventing soggy layers. Pro tip: Place your mixing bowl on ice for 5 minutes if the icing gets too soft during beating.
Storage Containers
For leftovers, transfer icing to an airtight container with a parchment-lined lid to prevent sticking. I use glass jars (like Ball Mason) for easy reheating—just microwave in 10-second bursts until smooth. For long-term storage, freeze portions in silicone molds (like Wilton) for portion control.
Label containers with the date—the icing keeps best for 1 week refrigerated or 3 months frozen, but flavor peaks after 24 hours of resting at room temperature. 💫
Nutrition facts
Frequently asked questions
Why does this icing stay smooth and never weep?
The secret lies in the butter-to-sugar ratio and cold ingredients. Cold butter creates air pockets when whipped, while the heavy cream adds stability without thinning the mixture too much. The salt balances sweetness and helps bind the ingredients, preventing that dreaded sugar syrup separation. Chilling the cake layers first also keeps the icing from melting into them.
Can I make this icing without a stand mixer?
Yes! Use a hand mixer with the paddle attachment. Mix in 30-second bursts on medium-high speed to avoid overheating the butter. For extra insurance, chill your mixing bowl in the freezer for 10 minutes before starting. The key is patience—let the butter come to room temperature gradually rather than forcing it.
What's the best way to store leftover icing?
Transfer to an airtight container with parchment paper between layers to prevent sticking. It keeps in the fridge for 1 week or freezes for 3 months. For best flavor, let it sit at room temperature for 30 minutes before using—it develops richer notes over time. Reheat gently in 10-second microwave bursts if too thick.
How do I fix icing that's too thick or too thin?
If too thick, add ½ teaspoon cream at a time while mixing. For runny icing, chill the bowl for 15 minutes or add 1 tablespoon powdered sugar at a time. The goal is toothpaste consistency—thick enough to hold shape but still spreadable. Never microwave thick icing directly as it can separate.
Can I use this icing for cupcakes or just layer cakes?
This versatile icing works beautifully for both! For cupcakes, pipe directly onto cooled cakes or use a spatula to spread. The stiff consistency holds well when filled, and it creates elegant swirls. For layer cakes, it's perfect for filling between tiers or creating decorative borders. The key is working with slightly softer icing for filling to prevent cracking.