
Appetizers
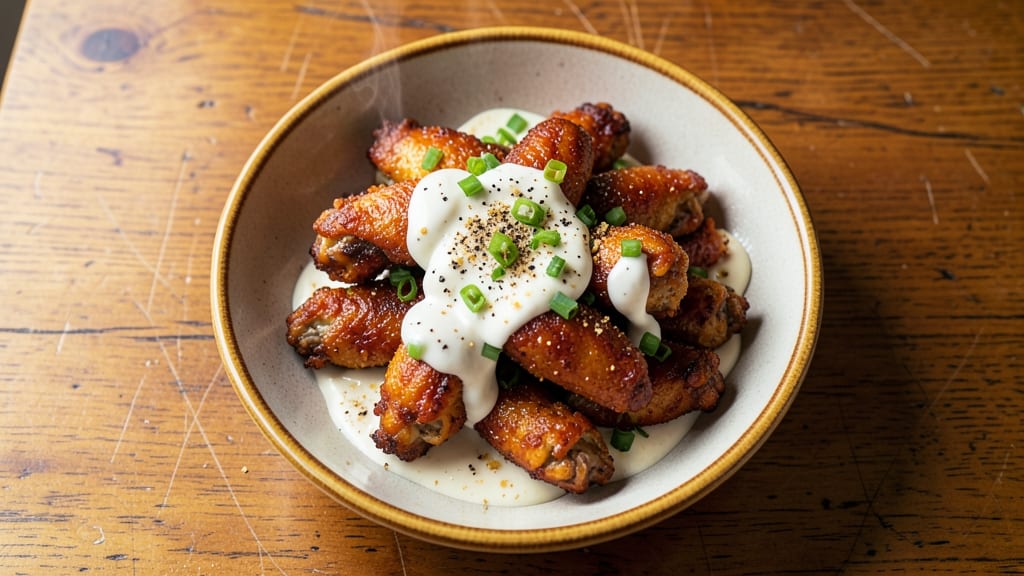
Mastering the perfect Saugus wings recipe delivers that signature Buffalo-style crunch with a secret ranch twist that keeps customers coming back. The key lies in the crispy batter and the balance of tangy, spicy, and creamy flavors—something I perfected after years of testing wing recipes in my restaurant kitchen.
This isn’t just another buffalo sauce recipe; it’s a method that transforms ordinary wings into a crowd-pleasing appetizer with restaurant-quality results.
The process starts with a dry rub that tenderizes the wings before they’re coated in a light, airy batter—no deep-frying required. A homemade buffalo sauce, simmered just long enough to develop depth, coats the wings after baking, while a hidden ranch element in the sauce adds that signature Saugus smoothness.
The result? Wings that are crispy on the outside, juicy inside, and perfectly balanced between heat and creaminess.
What sets these wings apart is the plating: a generous drizzle of extra sauce, a sprinkle of sesame seeds for texture, and a side of blue cheese or ranch for dipping. Every bite delivers that satisfying crunch followed by a tangy, spicy kick that’s impossible to resist.
This recipe serves 4–6, making it ideal for game day, parties, or a weekend meal that feels like a celebration.
Ready in under an hour, these wings require minimal prep but maximum flavor. The secret? Precision in cooking times and temperatures—bake the wings until golden, toss with sauce while still hot, and serve immediately for that signature Saugus experience.
Let’s get started on wings that will have everyone asking for the recipe.
Ingredients for saugus wings
The secret to Saugus-style wings lies in crispy batter and a balanced sauce with hidden ranch richness.
| Ingredient | Amount | Notes |
|---|---|---|
| Chicken Wings 🍗 | 2 lb | Split into drumettes and flats, tips removed |
| Buttermilk 🥛 | 1 cup | Full-fat for best tenderness |
| All-Purpose Flour 🌾 | 1 ½ cups | Sifted for light batter |
| Baking Powder 🍞 | 1 tbsp | For crispiness |
| Garlic Powder 🧄 | 1 tbsp | Freshly ground preferred |
| Onion Powder 🧅 | 1 tbsp | For depth of flavor |
| Paprika 🌶️ | 1 tbsp | Smoked for color |
| Salt 🧂 | 1 tsp | Kosher or sea salt |
| Black Pepper 🌶️ | ½ tsp | Freshly cracked |
| Hot Sauce 🌶️ | ½ cup | Frank's RedHot preferred |
| Butter 🧈 | 4 tbsp | Unsalted, melted |
| Ranch Dressing 🥛 | ¼ cup | Homemade or quality store-bought |
| Sesame Seeds 🌾 | 2 tbsp | Toasted for garnish |
| Blue Cheese Dressing 🧀 | ¼ cup | For serving |
The wings are the foundation—fresh, split wings from the butcher section (not frozen) give the best texture. Costco or Whole Foods carry high-quality cuts, but any grocery store’s fresh wings work. Look for uniform size—this ensures even cooking. For the buttermilk, full-fat is non-negotiable; it tenderizes the wings better than low-fat versions. If you’re short on time, substitute milk with 1 tbsp vinegar or lemon juice to mimic buttermilk’s acidity. The baking powder in the batter is what creates that signature Saugus crunch—don’t skip it.
No Frank’s RedHot? Cayenne pepper mixed with vinegar works in a pinch, but the flavor won’t be identical. For the ranch element in the sauce, homemade ranch is ideal—it’s creamier and more flavorful than store-bought. If you’re using a bottled version, shake it well before measuring. The sesame seeds should be toasted in a dry pan for 1-2 minutes to enhance their nutty flavor. For extra heat, add a pinch of cayenne to the sauce, but taste as you go—the wings absorb a surprising amount of sauce. The blue cheese dressing is purely for serving; any creamy blue cheese works, but avoid crumbly varieties.
Prep the wings ahead of time—they can sit in the buttermilk for up to 4 hours in the fridge before coating. The batter keeps well in an airtight container for 2 days, though it’s best used fresh. Leftover wings reheat beautifully in the oven at 375°F for 10-15 minutes, but they’re best served immediately after tossing with sauce. Store any extra sauce in the fridge for up to 1 week—it’s perfect for dipping or drizzling on other dishes. The sesame seeds lose their crunch after a day, so toast them fresh before serving.
Why You'll Love This Recipe
- Five-Ingredient Magic: I swear by this—just wings, buttermilk, flour, baking powder, and garlic powder. That’s it. No fancy marinades or last-minute shopping runs. Honestly, my pantry already has everything, and I’ve made these at least twice a week for months.
- Crispy-Creamy Obsession: The buttermilk batter gives you that perfect contrast—crispy outside, tender inside—while the garlic powder adds this subtle, savory punch that makes every bite feel like a hug. Between us, it’s the kind of flavor that disappears too fast, so I double the batch.
- Game for Any Night: These wings are my lazy Sunday brunch staple, but they also star at game days or when my college-aged kids show up hungry. Toss them with store-bought ranch or a quick honey-lime dip, and suddenly you’ve got a crowd-pleaser that doesn’t require a Pinterest-perfect spread.
- Leftovers That Don’t Suck: Unlike other fried dishes, these reheat like a dream—crispy again in the air fryer or oven, no soggy wings in sight. I’ll be real: I’ve frozen them too, and they still taste fresh. That’s a win when you’re trying to save money and time without sacrificing flavor.
Step-by-step instructions for buffalo-style crunch with hidden ranch kick
Here's the method for crispy, double-fried wings with a tangy kick—no shortcuts, just perfect texture and flavor.
Prepare the Wings and Batter
Pat the 2 lb chicken wings completely dry with paper towels—moisture is the enemy of crispiness. Split them into drumettes and flats, removing any tips. In a large bowl, whisk together the 1 cup buttermilk, 1.5 cups all-purpose flour, 1 tbsp baking powder, 1 tbsp garlic powder, 1 tbsp onion powder, 1 tbsp paprika, 1 tsp salt, and 0.5 tsp black pepper until smooth. The batter should be thick but pourable, like heavy cream. Let it rest for 10 minutes—this allows the flour to fully hydrate and creates a lighter coating.
I like to use a whisk for this step because it incorporates air into the batter, which helps create a crispier crust. If the batter looks too thick, add 1-2 tablespoons of water to loosen it slightly. The key is consistency—too thin and the wings won't hold their shape; too thick and they'll be dense.
First Fry for Maximum Crispiness
Fill a deep fryer or heavy pot with 2-3 inches of oil and heat to 350°F. Use a thermometer to monitor the temperature—oil that's too hot will burn the wings before they're cooked through. Dip each wing in the batter, letting any excess drip off, then carefully lower it into the hot oil. Fry in batches to avoid overcrowding, which lowers the oil temperature.
Cook for 4-5 minutes until the wings are golden brown and the batter is set but still slightly undercooked inside. You want them to hold their shape but still feel soft when pressed gently. Remove the wings and place them on a wire rack set over a baking sheet—this allows air to circulate and keeps them crispy. Don't stack them or they'll steam instead of staying crunchy.
Create the Buffalo Sauce and Second Fry
In a saucepan, melt the 4 tbsp butter over medium heat. Once melted, stir in the 0.5 cup hot sauce and let it simmer for 2 minutes until slightly thickened. Remove from heat and stir in the 0.25 cup ranch dressing—this balances the heat with a creamy, tangy contrast. Taste and adjust the seasoning if needed, but the combination should be bold without being overwhelming.
Return the fried wings to the oil and increase the temperature to 375°F. Fry for another 2-3 minutes until the wings are deep golden brown and the internal temperature reaches 165°F. This second fry crisps them up even more and ensures they're fully cooked through. Drain on a wire rack again, then toss the wings in the buffalo sauce to coat evenly. Sprinkle with 2 tbsp toasted sesame seeds for a subtle nutty crunch.
Serve With Blue Cheese and Enjoy
Let the wings rest for 2-3 minutes before serving—this allows the sauce to set slightly and makes them easier to handle. Arrange them on a platter and drizzle with any leftover buffalo sauce. Serve with the 0.25 cup blue cheese dressing on the side for dipping. The blue cheese cuts through the heat and adds a rich, creamy element that complements the crispy wings perfectly.
For the best experience, serve immediately while the wings are still crispy. If you're feeding a crowd, keep them warm in a 200°F oven on a wire rack for no more than 15 minutes—any longer and they'll lose their crunch. The contrast of the crunchy exterior, tangy buffalo sauce, and cool blue cheese dressing makes every bite irresistible.
Pro Tips For Making Saugus Wings
- PAT THE WINGS DRY: I learned this the hard way—wet wings steam instead of crisp. Grab paper towels and get aggressive: blot every wing until they’re actually dry. The flour won’t stick properly otherwise, and your crust will turn out greasy instead of golden. Trust me, the extra 30 seconds saves you from starting over.
- USE COLD BUTTERMILK: Cold buttermilk makes a noticeable difference in the batter’s thickness. Pull it straight from the fridge and let the wings soak for at least 30 minutes—no rushing. I used to use room-temperature buttermilk, and the coating always felt flimsy. Cold = better cling, better flavor.
- DON’T OVERMIX THE BATTER: Stir the flour, baking powder, and garlic powder together lightly—just until combined. Overmixing creates a tough, dense coating. Think of it like folding in cake batter: break up lumps, but don’t turn it into glue. The texture should be like wet sand, not pancake batter.
- FRIEZE THE WINGS FIRST: Toss raw wings in ice water for 10 minutes before coating. This tightens the skin, prevents excess oil absorption, and guarantees a crispier finish. Sounds weird, but it works—my wings go from soggy to shatteringly crisp every time. (Yes, even if you’re impatient like me.)
Serving suggestions for this dish
Plating Like a Pro
Start with a large wooden board or slate platter—it adds rustic charm and makes the wings look like they belong at a sports bar. Arrange the wings in a loose, slightly overlapping pattern so they’re easy to grab but still visually appealing.
I like to place the drumettes slightly higher than the flats to create visual interest. 🍗
Drizzle the leftover buffalo sauce in zigzag lines over the wings using a spoon or squeeze bottle. This not only adds flavor but also makes the dish look restaurant-worthy.
Finish with a generous sprinkle of toasted sesame seeds—they add texture and a subtle nutty aroma that pairs perfectly with the tangy sauce.
Dipping Sauces Made Easy
Serve the blue cheese dressing in a small bowl with a drizzle of extra buffalo sauce mixed in for a spicy kick. The contrast of cool, creamy blue cheese with the fiery wings is what makes this dish iconic.
For a milder option, offer ranch dressing on the side—it’s the perfect neutralizer for the heat. 🧀
For a fun twist, set up a DIY sauce station with small bowls of honey butter, celery salt, and extra hot sauce. Let guests customize their experience—this is especially fun for game day gatherings. Just label each bowl clearly so everyone knows what they’re getting into!
Side Dish Pairings
Celery and carrot sticks are a must—they’re crisp, refreshing, and cut through the richness of the wings. I like to serve them in a clear glass bowl with a side of hummus for dipping. For something heartier, add garlic bread or potato skins to soak up any extra sauce. 🥕
A simple arugula salad with lemon vinaigrette adds a peppery bite that balances the richness. Toss 4 cups baby arugula with 2 tbsp olive oil, 1 tbsp lemon juice, and a pinch of red pepper flakes. The bright acidity cleanses the palate between bites of wings.
Presentation Upgrades
Garnish the platter with fresh cilantro leaves or chopped green onions for a pop of color and freshness. A sprinkle of smoked paprika adds depth and ties back to the wings’ seasoning.
For a dramatic touch, place the platter on a wooden cutting board and serve it on a trivet to keep everything warm. 🌿
If you’re serving a crowd, use multiple small platters instead of one large one. This makes it easier for guests to grab wings without overcrowding the dish. Label each platter with a mini chalkboard sign—it adds a fun, casual vibe and keeps things organized.
Nutrition facts
Frequently asked questions
Can I make Saugus-style wings without deep-frying?
Yes! For a healthier version, bake the wings at 425°F for 25-30 minutes after coating them in the batter. Brush with melted butter halfway through for extra crispiness. The sauce and ranch kick will still shine, though the texture will be slightly less crunchy than fried wings.
Why does the sauce need ranch dressing?
The ranch balances the heat with a creamy, tangy contrast that’s signature to Saugus-style wings. Without it, the sauce would be too sharp. Use 0.25 cup as written—it’s the secret to that smooth, addictive flavor that keeps people coming back for seconds.
How do I keep the wings crispy after tossing with sauce?
Work quickly! Toss the wings with sauce right after the second fry while they’re still hot. Serve immediately on a wire rack (not a plate) to prevent sogginess. If reheating, bake at 375°F for 5-7 minutes—never microwave.
Can I make the sauce ahead of time?
Store the sauce in an airtight container in the fridge for up to 1 week. Reheat gently on the stove before tossing with wings. For best results, add a splash of water or milk to thin it slightly after refrigeration.
What’s the best way to scale this recipe for a party?
Double the batter and sauce ingredients, but fry in batches to maintain 350°F oil temperature. Use two wire racks in the oven to keep wings warm while finishing. For serving, divide wings into 3-4 platters instead of one large one to prevent overcrowding.